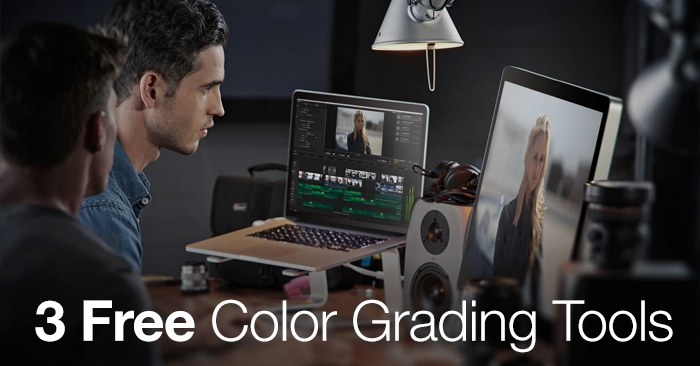
3 Free Color Grading Tools

Professional color grading tools are within reach – either as free downloads or built into the video editing app you already use!

Image from Blackmagic Design
Color Grading: In the Beginning
There was a time, not long ago, that getting a complex, subtle look for your video meant spending thousands of dollars a day in a DI suite. This final “finishing” step in post-production was a luxury that many producers simply could not afford. Most producers instead relied on their editors to do a basic “color correction” to the clips sitting in the NLE timeline using the small, limited set of filters at their disposal. The idea of a proper “color grade” was really just a pipe dream.
Then Apple, Inc bought Final Touch, renamed it Color and gave it away for free with every copy of the Final Cut Suite. The joke at the time was that you got a “free DaVinci” in every box of Final Cut.
Suddenly, editors everywhere were given the power of a complex, robust color grading application in all its arcane and indecipherable beauty. It turns out that what was going on in those expensive DI suites was more than just tweaking colors, there was a real color science happening. Many editors opened up Color, took one look around and then went straight back to the timeline. However, for the dedicated, the free copy of Color allowed for a shot at developing professional color grading skills.
Simultaneously, NLE based color correction plug-ins (like Red Giant Colorista and Magic Bullet Looks) were getting more powerful, allowing sophisticated color correction and grading right in the timeline. There was no need to move out of the NLE to a dedicated grading application, it was possible to finish right there inside of Final Cut.
In 2010, worlds collided when Blackmagic Design acquired DaVinci (the industry leader in high-end color grading) and released the latest version of Resolve (their flagship application) for the shockingly low price of US $995. This was a color grading environment you couldn’t touch for less than a hundred thousand dollars the year before. To drive the point home, Blackmagic released a free version called Resolve Lite. So now the “free DaVinci” was actually a free version of DaVinci Resolve. And you could run it on your laptop.
Color Grading: The Split
The work of color grading exists in two very different realms now. There are still the high-end Resolve artists, working on expensive hardware with multiple GPUs, colorimetric accurate displays, nice sofas and espresso machines. There is science in their work, a deep understanding of cinematography and a workflow centered around the job of color grading. They live in DaVinci Resolve and they are awesome, and very expensive.
On the other side are what you can call “editorial specialists”. They come into the edit suite after picture lock, work directly inside the timeline, create a color balanced images, post-relighting and make everything look qualitatively better. Sometimes there is a colorimetric accurate monitor, often not, and the editorial specialist uses color bars and adjustments to get a display close to something that approximates a true representation. This practitioner comes equipped with a suite of plug-ins, but many small post house and editorial boutiques stay up to date with the latest so this is becoming less of an issue.
What is interesting, to me, is that the proliferation of low (and no) cost color correction tools has created a new class of post-production workers. For two decades, we’ve all watched as digital technology collapsed and obsoleted many different post roles (and good paying jobs). In color grading and finishing, it’s done the opposite: it’s made the high-end more accessible while rates have stayed relatively high, and it’s created a new position in small post houses using NLE’s and plug-ins. Producers are aware that for another five-hundred dollars they can add a layer of polish on a low-budget spot without ever leaving the post-house.
‘All the Free DaVincis’
With this new landscape in mind, I present to you, three amazing applications you can download for free to do sophisticated color grading and finishing. Although these applications are packed with tons of professional color grading features, I urge you to study up on the foundations of color correcting theory and technique if you aim to have a comprehensive and systematic approach to working with color.
DaVinci Resolve Lite
“DaVinci Resolve Lite includes all the same high quality processing of the full DaVinci Resolve. However it limits projects to UHD resolutions or less, a single processing GPU and a single RED Rocket card.” from Blackmagic
OK, it is the free DaVinci so there are some limits:
1) You can only work in 4K or lower resolution
2) Only process on a single GPU and a single Red Rocket Card
3) No Stereo 3D support
4) No noise reduction, power mastering, remote grading and sharing

If you really need the extra, then you’ll have to pony up the $995 dollars. But c’mon, it’s a free DaVinci! Also, Resolve 11 is a fully-baked NLE so you can cut in it if you want.
To me, the bigger choice here is whether you want to invest the time in learning how to work in the Resolve world. It means migrating projects from your current NLE, managing data, learning a node-based workflow and generally spending hours and hours climbing the learning curve. Do you have the time to do this?
Red Giant Colorista Free
I am partial to all things Red Giant. They have supported me as a filmmaker for years, I have beta tested many of their products. They are my friends and they are filmmakers who make software for filmmakers. Colorista is an amazing product from the prolific mad genius of rebel filmmaker, Stu Maschwitz. When it was released it was, quite simply, the three-way color corrector that Adobe forgot to build in After Effects. It had primary and secondary color grading tools, skin tools, masking tools and it lived right there in the plug-in window.
The app has matured into an amazingly powerful color finishing tool that lives in most NLEs and After Effects as a plug-in, it’s called Colorista II and it’s US$199.
Red Giant released a free version of the app called “Colorista Free” that has just the three way color correction tool and numeric inputs. But when you combine this with the built-in tracking masks in Adobe Premiere CC 2014, you get a really stable, powerful primary and secondary color correction tool for free.

While you can use the built-in Premiere CC three way color corrector for the same effect, I personally find Colorista gets me the desired look a lot faster.
Adobe Premiere CC 2014
Which brings me to the last “free Da Vinci” in the box: the NLE you may already be using, Adobe Premiere CC 2014. Every plug-in now has optional automated tracking masks, this is a big deal.

It means that for every filter you apply, you can choose to apply it to a selected portion of the image, and then have Premiere “follow” that portion over time, dynamically key-framing as it goes. In Resolve-land, this is called “power windowing”, and it was the secret-sauce of the high-end color suite for decades. When you start stacking on these power windows and filters, you can do amazing things like relighting a shot in post, or soften wrinkles on an actors face. You can achieve the subtle effects that evoke emotion and enhance an image. And you can do it all without ever leaving Premiere. It’s kind of awesome.
You’ve got options.