

A Quick Guide to Steadicams

Once mastered, Steadicam is a handy way to get professional stabilized footage. In this post, pick up a few tips for Steadicam success.
The world of Steadicams and stabilized footage has drastically changed over the last decade. At one point, the costly tool was reserved only for professional broadcasts, TV, and cinema. Yet, with new filmmakers born of the DSLR revolution yearning for something similar, we also saw the birth of inexpensive stabilization tools that followed the principle of Steadicams, but the results weren’t as successful. Further into the decade, we then saw the birth of the consumer-priced gimbal, and now everyone can obtain smooth footage.

Steadicams have seemingly reverted to professional productions only, whereas low-budget and new filmmakers opt towards a gimbal like the DJI Ronin-S.
Let’s have a quick look at what Steadicams are and why they’re still vital in the world of film production.
What Is a Steadicam?
First, we should perhaps cover the fact that Steadicam is the brand name for the camera stabilization tool from Tiffen. Quite like Hoover for a household vacuum, and Velcro for the hook and loop fastener, Steadicam has become a generalized word that people give to camera stabilizers. Still, it’s just one of many professional brands on the market.
Additionally, we also need to acknowledge there’s a difference between a Steadicam and a gimbal. But, we’ll cover that in a separate segment further down.
Without further ado, a Steadicam is a camera rig that’s uniquely designed to stabilize camera shake. It mechanically isolates the camera from the operator’s movement, allowing for a smooth shot, even when moving over an asymmetrical surface. First created in the 1970s, the Steadicam quickly took Hollywood by storm as a better option for shooting smooth tracking shots. Haskell Wexler was the first to use the Steadicam in the 1976 film Bound for Glory, that year’s winner of the Academy Award for Best Cinematography.
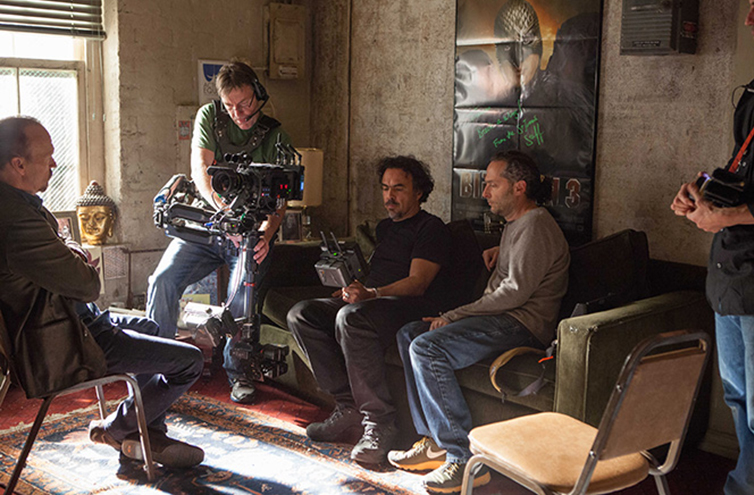
As the Steadicam allows filmmakers to walk with the camera without the visible and noticeable handheld shake, it opened up a world of cinematic possibilities. Takes involving movement could become longer—action scenes more dynamic. It also allowed the camera to move into areas that were otherwise impossible because of the dolly and track size. Perhaps one of the most recognized and celebrated Steadicam shots is that from Martin Scorsese‘s Goodfellas.
One thing to note about the use of a Steadicam is that it omits the need for camera setups and editing. If we take the scene from Goodfellas, for example, without a Steadicam, this could easily be a ten to fifteen shot scene, as we move from outside in the street to the table.
A Steadicam, unlike a gimbal, primarily achieves smooth footage from a series of counterbalance weights and operator skill. Unlike a gimbal, which uses a motor to help achieve stable footage, the Steadicam’s primary tool is gravity. As such, the use of a Steadicam comes with a steep learning curve, and it’s also why a Steadicam operator is a designated position on a production. It requires skill and expertise to master.
This is not to say anybody can use a gimbal, that too requires patience to perfect, but the act of using a Steadicam is a craft within itself.
To see why the gimbal is different from the Steadicam in detail, check out our writeup on the subject.
Why Would I Need a Steadicam?
If you’ve ever tried to keep an unstabilized camera steady, you know that no matter how steady you might feel, the footage is still going to end up a bit shaky. In fact, shaky footage might be one of the biggest contributors to giving video content an amateurish feel. Perhaps more so than the image quality itself. Using weight to counterbalance the camera, a Steadicam can eliminate unnecessary shake and obtain smoother footage.
However, as noted in the introduction, the motorized gimbal has filled a hole in the market of offering a stabilization tool for low-budget filmmakers with a small camera. So, why would one still opt towards a Steadicam?
First, the size of your camera will play a significant role. While motorized gimbals are perfect for DSLRs and mirrorless cameras, they often have a payload limit because the motors can’t handle the stress of heavy cameras. Additionally, because the camera is usually sat in a cradle, you often need to strip the camera down to its bare necessity to avoid it hitting the segments of the gimbal. Often, this can be a detriment if your camera needs external accessories, such as a cage to hold the SSD in place.
As the camera is placed on top of the Steadicam, it quashes these issues, both concerning camera size and having a camera rigged as needed. But, more predominantly, the Steadicam excels with the additional axis of stabilization. Some could argue that with a gimbal, you’re essentially smoothing handheld motion instead of creating fluid, stable movement.
A gimbal has 3-axes of stabilization—the roll, tilt, and pan—to help correct rotational movement. However, if you’ve ever used a gimbal, you’ll know that you need to perform a ninja-esque walk to keep the bob and sway at a minimum, as your arms are responsible for the movement of the camera from left to right, forward and backward.
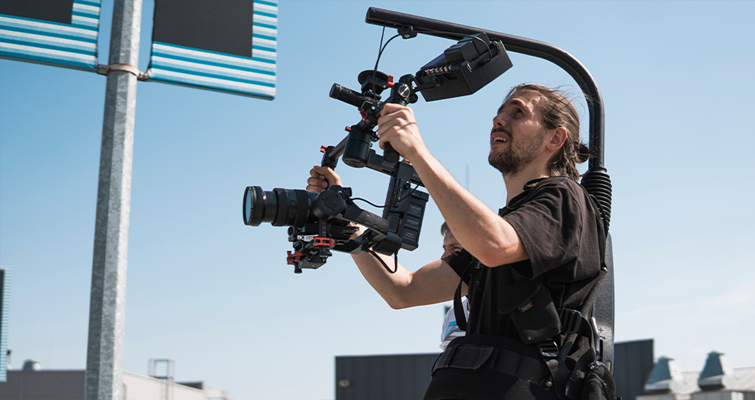
A Steadicam attached to a vest-based support unit allows for a full five degrees of stabilization in both the lateral and rotational axis. You may see some pictures of Steadicam operators with what looks like a Doctor Octopus-inspired arm reaching out from their body. This spring-loaded arm isolates the body moves away from the camera.
Coupled with the operator’s skillful movement, the bob and sway will be completely nullified, resulting in a completely steady movement. The camera will be so balanced that one could jump up and down, and the camera would remain still on the arm. Of course, with the gimbal, the camera would be moving with your jumps.
Of course, don’t let that arm extrude too far out or this will happen. Original video from Edward Kotovski.
Finally, the Steadicam also outguns the gimbal in the form of movement. While gimbals, like the Ronin-S, will allow the operator to face the camera in the direction the gimbal moves and, likewise, will have a joystick for faster panning and tilting, gimbals really require the use of an assistant operator to manage precise, controlled movement.
A Steadicam operator can quickly move the camera with pinpoint precision—from rotating the central column to tilting with ease—all while moving on an irregular surface without displaying any visual sway.
How Do I Set up a Steadicam?
There are a lot of factors to consider when setting up a Steadicam, including:
- Back weights
- Front weights
- Choosing the right peg
- Horizontal stabilization
- Vertical stabilization
- Lens weight
- Lens focal length
- Camera weight
And, no disrespect to the professional operators and owners of the Steadicam, but I think it would be fairly impossible to explain how to set up a Steadicam through a blog post. Not only is it an intricate process that requires experience, but it’s also individualistic, with each camera and lens combination requiring a different form of balancing.
However, Steadicam owner and operator SteadiRed has put together an in-depth, two-part, forty-minute YouTube series that documents how to set up a Steadicam.
So, if you’re looking to get the gist of it, Red provides a detailed breakdown in his video series. His channel, in general, is a treasure trove for those looking to possibly pick up one of the cheaper variations.
How Much Do Steadicams Cost?
In 2010, there were two distinct price brackets. You could pick up a lightweight model, such as the Merlin or Glidecam, from $400. Yet, top-of-the-line, heavy, Hollywood options would start from $10,000 and extend upward to $60,000.
In 2021, with the meteoric rise of 3-axis gimbals, the price range is vastly different. Glidecams and Merlins have seemingly gone extinct and, instead, you can find similar models, like the SUTEFOTO S40 for less than $50 on Amazon. However, with these inexpensive, lightweight models, it’s typically a case of “getting what you pay for.”
On the professional side, you’ll still find Steadicams breaching into the tens of thousands of dollars. However, there’s now also a middle-tier price bracket for indie filmmakers who likely own their own equipment, but are without the funding to invest in a sole piece of equipment.
You can purchase the Steadicam Zephyr for $9,995 or the more budget-friendly Steadicam Aero for $2,500 to $5,750, depending on the bundle you select. The cost really depends on your budget and needs.
The Less Expensive Alternative
I noted that tools like the Glidecam, which was the $500 budget alternative in 2011, had seemingly been made obsolete with the explosion of gimbals that cost the same price and do an extremely better job. However, while the gimbal has indeed taken their place, these inexpensive alternatives haven’t completely dropped off the map. Instead, you’ll find some third-party manufacturers have stepped up to fill the gap for those who still see $500 too much of an investment for a gimbal.
Amazon is littered with $50-$100 Steadicams and well—they’re okay. These variations require a lot of patience and practice to get a stabilized shot. And, while you’re going to smooth out slight shakes and jitters, it’s important to note that you’re not going to obtain shots as if it’s a professional Steadicam or a motorized gimbal.
Nigel Barros has a fantastic video comparing the $50 Steadicam and a gimbal in the video below.
More Info on Steadicams
Setting up your Steadicam is only half the challenge. It takes years of practice and experience to become a master Steadicam operator (which is why it’s a sought-after, well-paid position in film and television). Check out these links featuring more useful information on Steadicam operation:
- Tiffin (by the makers of Merlin and other professional Steadicams)
- The Steadicam Operators Association (a professional group for users)
- Steadicam Workshops
- The Steadicam Operator’s Handbook (by Focal Press)
- How Steadicam’s Work (via How Stuff Works)
- Wiki Steadicam (via Wikipedia)
For more film gear tips and advice, check out these additional articles:
- Filmmaking Gear Highlights of 2020 – Indie Edition
- The Best Mobile Filmmaking Gear for Making Videos on Your Phone
- How and Why to Cycle Through Video and Camera Gear
- The Best Lavalier Microphones for Video Production
Cover image via Anton Gvozdikov.


