Create Custom Effect Presets in Premiere Pro
Create custom effect presets in Premiere Pro with these simple steps. Your workflow will thank you.
Understanding how to use effects in Premiere Pro is a great skill set to have as a video editor. The real power comes with learning how to customize and save your own effect presets. Let’s take a look at how to customize an effect in the Effect Controls panel, go over how to save a preset in the Effects panel, and learn how to export our final custom effect presets to share with others.
Switch to the Effects Workspace
When creating custom effect presets, you’ll be working in several different panels — mainly Effects, Effect Controls, and the Timeline. To make your life much easier, make sure all of these panels are visible. Simply select Premiere’s default Effects Workspace.

Create Your Custom Effect
For this tutorial, I’ll be creating a custom video transition preset. But remember, you can create a custom effect preset for anything, including scale, rotation, color correction, audio effects, etc. Basically any effect property you can change, you can save out as a custom effect preset.
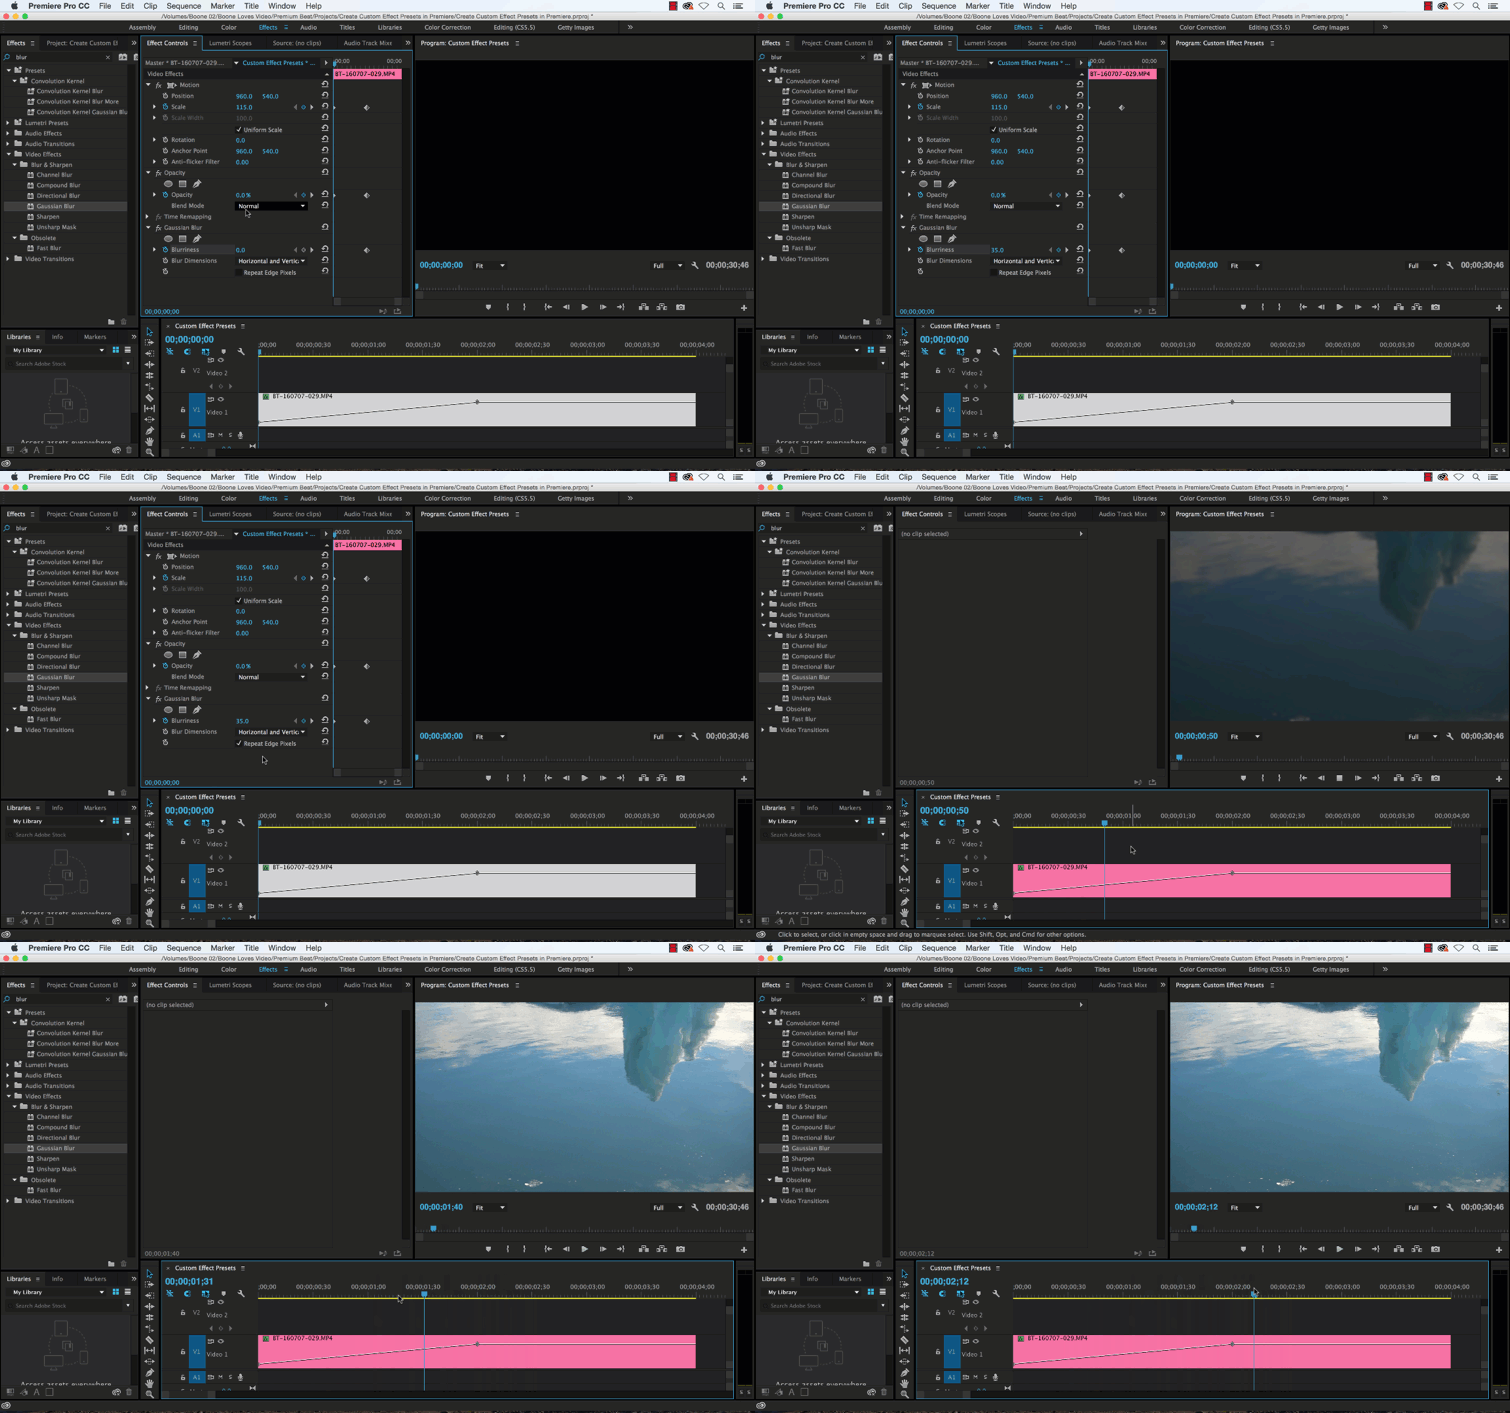
First I’ll create a simple two-second fade-in transition. The transition will include a small scaling effect, along with a blur. I’ll keyframe my Opacity, Scale, and a Gaussian Blur effect. The clip will scale down from 115 to 100. I want my clip to start off just a bit blurry and then come into focus, so I’ll keyframe the blur from 35 down to 0.

Save Preset
To save this transition as a preset, I need to select all three of the properties I changed in the effect controls panel. Once I have my properties selected, I can go up to the Effect Controls panel menu and select Save Preset. I’ll type in the name and description of my preset.

You’ll notice that you have three different Types to select from when saving out your preset — Scale, Anchor to In Point, and Anchor to Out Point. Here’s where things can get a little confusing.
Here’s the key thing to remember: When you apply an effect preset, it’s always going to take into consideration the length of the original clip on which you created the preset. In our case, we created our transition on a four-second clip.
Scale — This will scale your effect preset keyframes in proportion to the length of your target clip. For instance, I created this two-second transition preset on a four-second clip. If I were to add this effect on an eight-second clip, the transition would be twice as long. This action will also delete any pre-existing keyframes.
Anchor to In Point — As the name implies, this option will retain the original distance from the clip In Point to the first effect keyframe. Our effect is directly on the In Point of our source clip, so it will be applied on the first frame of a target clip.
Anchor to Out Point — As the name implies, this option will retain the original distance from the clip Out Point to the first effect keyframe. Our effect ends two seconds before our source clip Out Point, so the last keyframe will be located two seconds from the last frame of our target clip.
You can switch the Type of preset any time by double-clicking your preset in the Effects panel.

Organize Your Presets
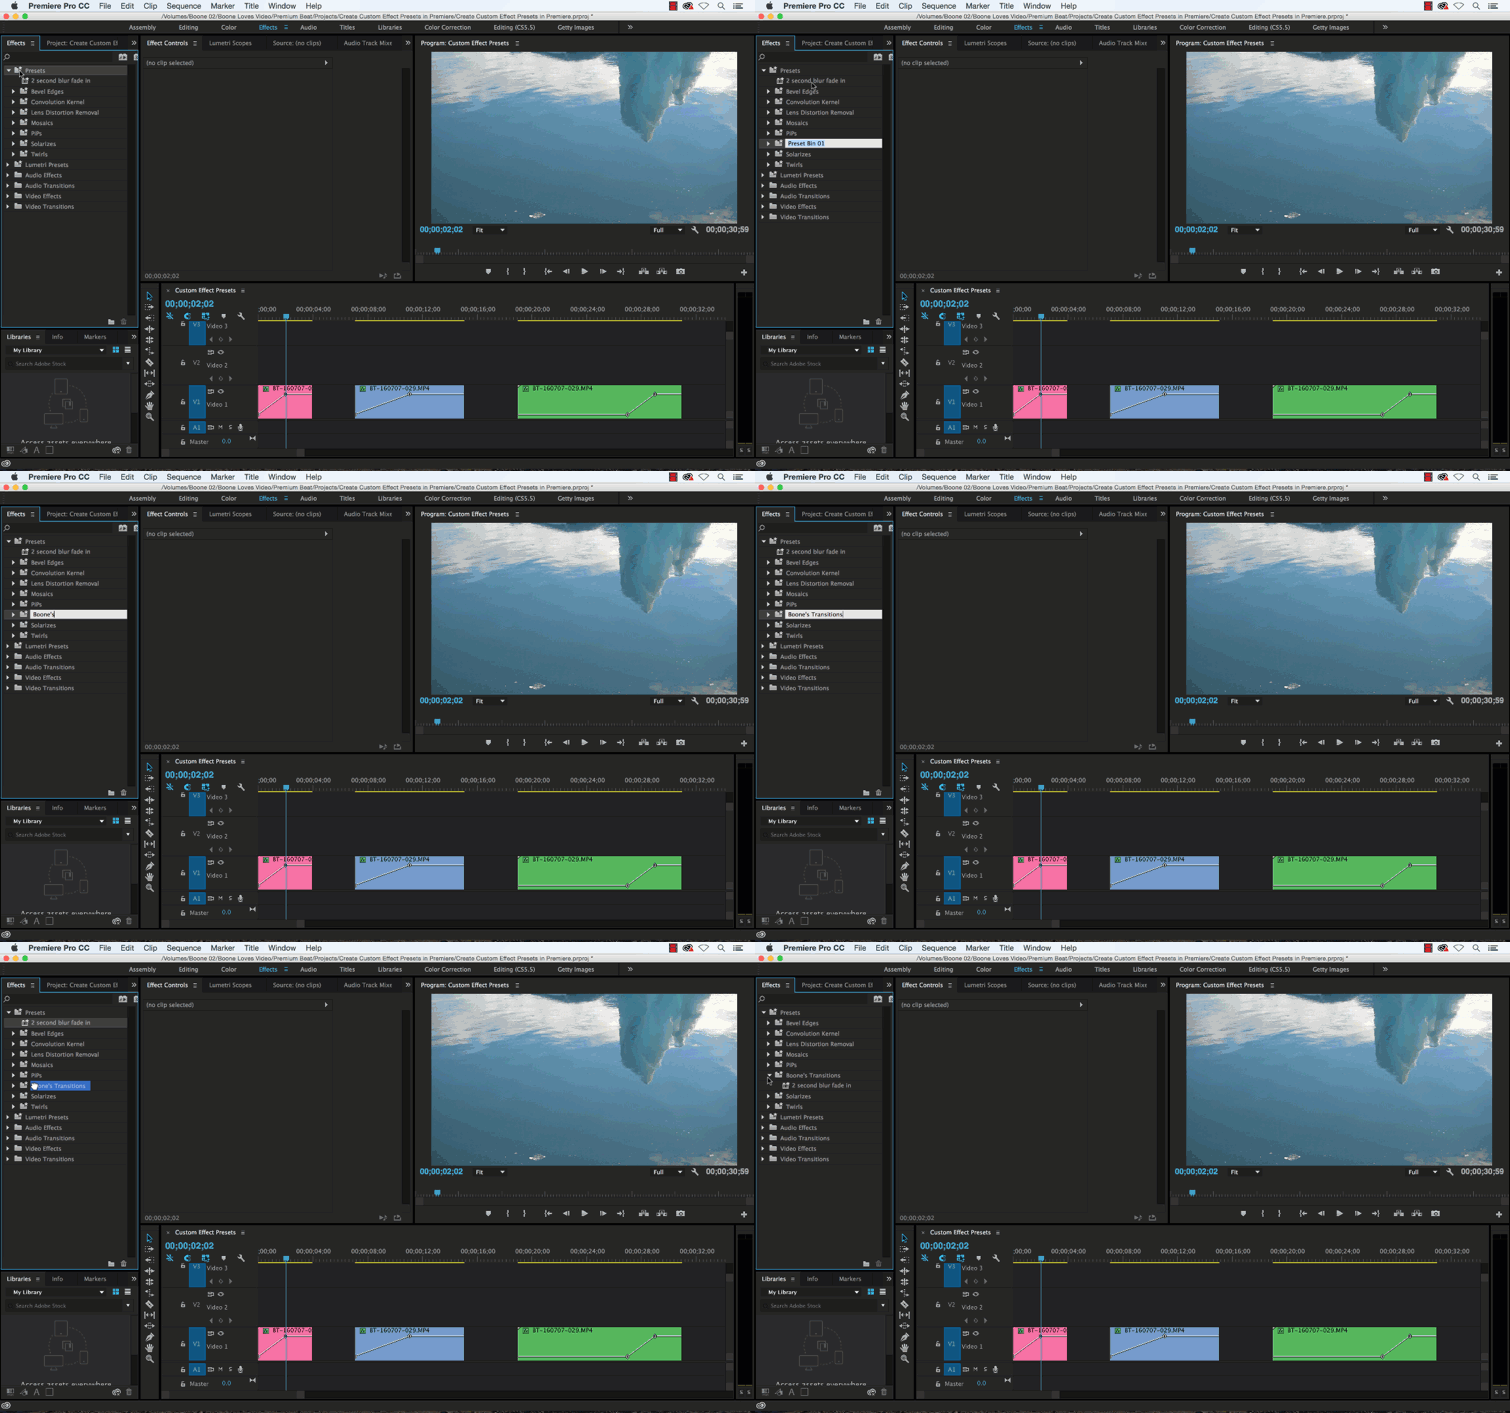
You can create both custom and Preset Bins. Preset bins remain in the root Presets Bin. You can add your presets to a custom bin, but it will only create a shortcut to the effect in the Presets Bin.

Export Presets
Once you have your effect presets all customized and organized, you can Export them out to share with other editors, sell online, or do whatever you want to do with them. And as you see in the Effects panel, importing presets is as simple as exporting.

There’s a lot you can accomplish with custom effect presets. Again, for this tutorial I created a custom video transition effect, but you can create custom presets for any property you like, including audio and color correction properties. I hope you enjoyed the tutorial, and be sure to check out PremiumBeat for high-quality royalty free music and sound effects for all of your media and video project.
Got any tips or techniques for working with custom effect presets in Premiere Pro? Share them in the comments below!


