Video Editing 101: How to Stabilize Footage in Premiere Pro

Shaky footage can totally throw off the momentum of your video. Here’s how you can stabilize it in post in Adobe Premiere Pro.
One of the most basic must-know video editing tricks is stabilizing shaky footage. You may have shaky footage because you were shooting handheld or you didn’t have access to a gimbal. Cleaning it up with the Warp Stabilizer is a more common occurrence than you might think. This task is very simple — you’re only seconds away from correcting an “unusable” shot.
Step 1: Activate Warp Stabilizer
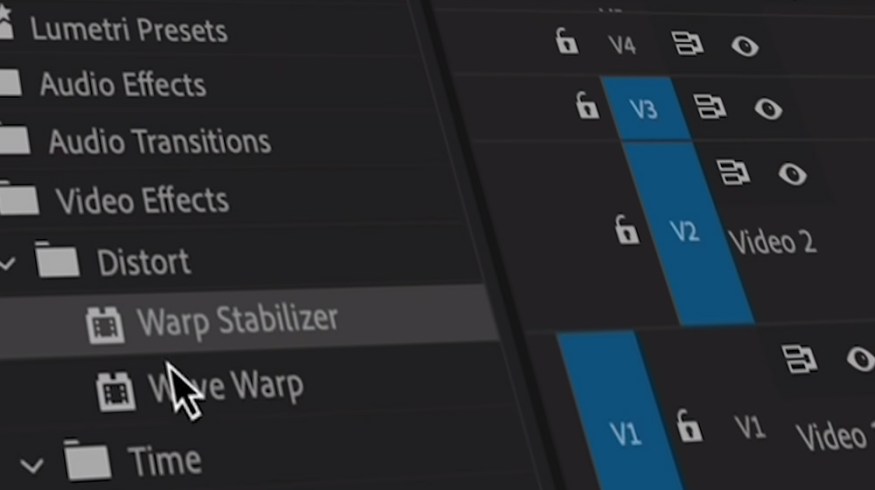
Get your shaky clip in front of you. Open up Effects, and choose Video Effects. Scroll down to Distort, and double-click Warp Stabilizer. You can also click and drag the Warp Stabilizer option over to your clip.

Step 2: Clip Analysis
After executing the first step, Premiere Pro will analyze the clip. This’ll take a minute, but you shouldn’t have to wait too long.
 - Stabilize Footage in Premiere Pro - Step Two")
Step 3: Examining the Stabilized Footage
Warp Stabilizer can be a finicky little tool. It’s not a once-size-fits-all kind of effect — you might throw the effect on there, and it becomes more shaky than before. So, what are the reasons why your clip might not work well with warp stabilizer?
- It’s TOO shaky. The Warp Stabilizer tool is effective, but it can’t perform magic. All it’s really doing is creating an artificial box-within-a-box to create the illusion of a smoothed-out shot. If your camera shakes too much, and there’s too much motion blur within your clip, the tool won’t have the information it needs to track and stabilize your footage.
- You have Time Remapped your clip. Premiere Pro won’t let you apply Warp Stabilizer to a clip you’ve either sped up or slowed down. There’s a quick fix to this — simply nest your clip, then place the effect over the nested sequence.
- The clip is too dark. If the effect can’t interpret the information in the clip, it won’t be able to justly stabilize it — just like if the clip was too shaky. Make sure your clip is brightened up or make sure you properly expose when you shoot.
 - Stabilize Footage in Premiere Pro - Step Three")
Shooting for Warp Stabilizer
A trick I’ve learned over the years is that you can actually plan your shots knowing you’re going to apply Warp Stabilizer in post. To get the best gimbal-like smoothness out of your clip, follow Shutterstock’s own Todd Blankenship’s tips for shooting for Warp Stabilizer:
- Shoot Wide. The wider you shoot, the more information that Warp Stabilizer has to clean up and smooth out the motion. It’ll also cut down on your motion blur that might come from a zoom lens.
- Shoot in a Deep Depth of Field. Warp Stabilizer is not a big fan of blurry parts of video. The shallower your depth of field, the harder it is for the effect to decipher information. Keep your aperture tight, and try your best to avoid a sharp depth of field. That’s where you’ll run into those weird jitter shakes that happen when Warp Stabilizer gets confused during analysis.
Diving Deeper into Warp Stabilizer
For even more control and precision when fixing your footage, open up Effects Controls for Warp Stabilizer, and you can watch each frame get analyzed. You can also change the Smoothness to work with your footage — if the stabilizer is too jarring, you can turn it down and play with the effect in any way you want. Make sure to check out Austin Crow‘s dive into the Warp Stabilizer effect above to really get to know the effect.
This post was originally published in September, 2016. It has been updated to reflect appropriate changes.
Looking for more post-production tips and tricks? Check out these articles.