Video Editing Quick Tip: How to End a Track With Reverb
Add epic drama to your next project by ending your clips with audio reverb.
Image via Shutterstock
In this thorough tutorial created by Derek Lieu, ending a music cue with reverb is made simple. With just a few easy-to-remember steps, you can give your video a dramatic boost. The effect is instantly recognizable and will up your production value in a manner of seconds.
The video covers the technique for Premiere Pro, Final Cut Pro 7, Final Cut Pro X, and Avid Media Composer. Derek also goes into further explanation over the process on his blog. The following GIFs are taken from the Premiere Pro section of the video.
1. Nest the Clip
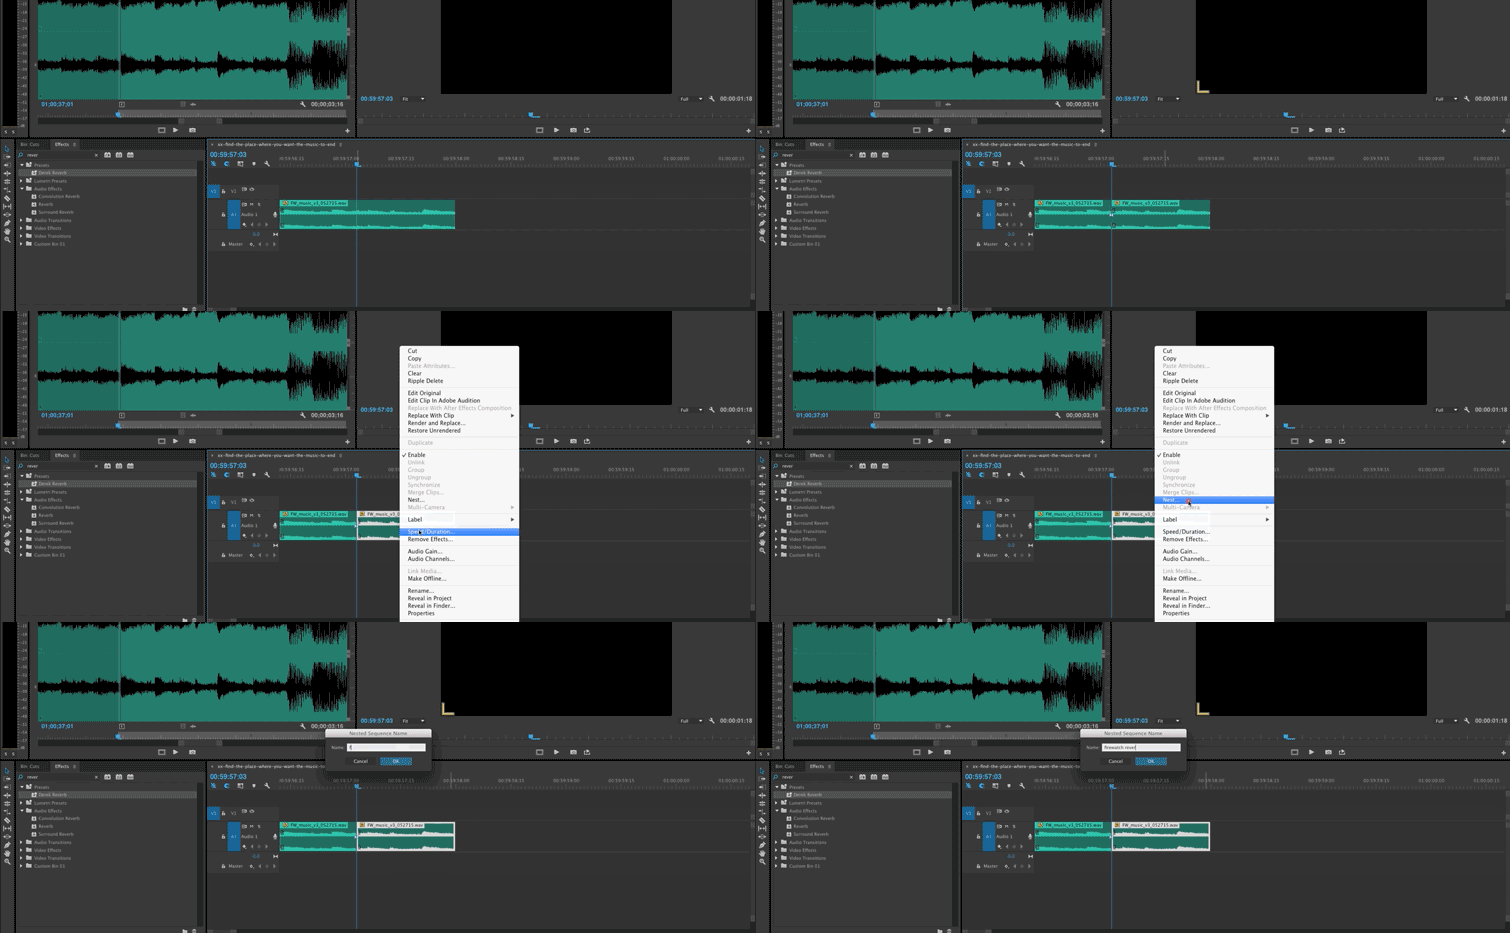
First, find the sound/beat you want to end the clip on. Cut the clip on the exact note you want the reverb to affect. Next, isolate the clip and then Nest it. Rename it and it will move it to a different sequence.
2. Add Black Video to Extend the Clip

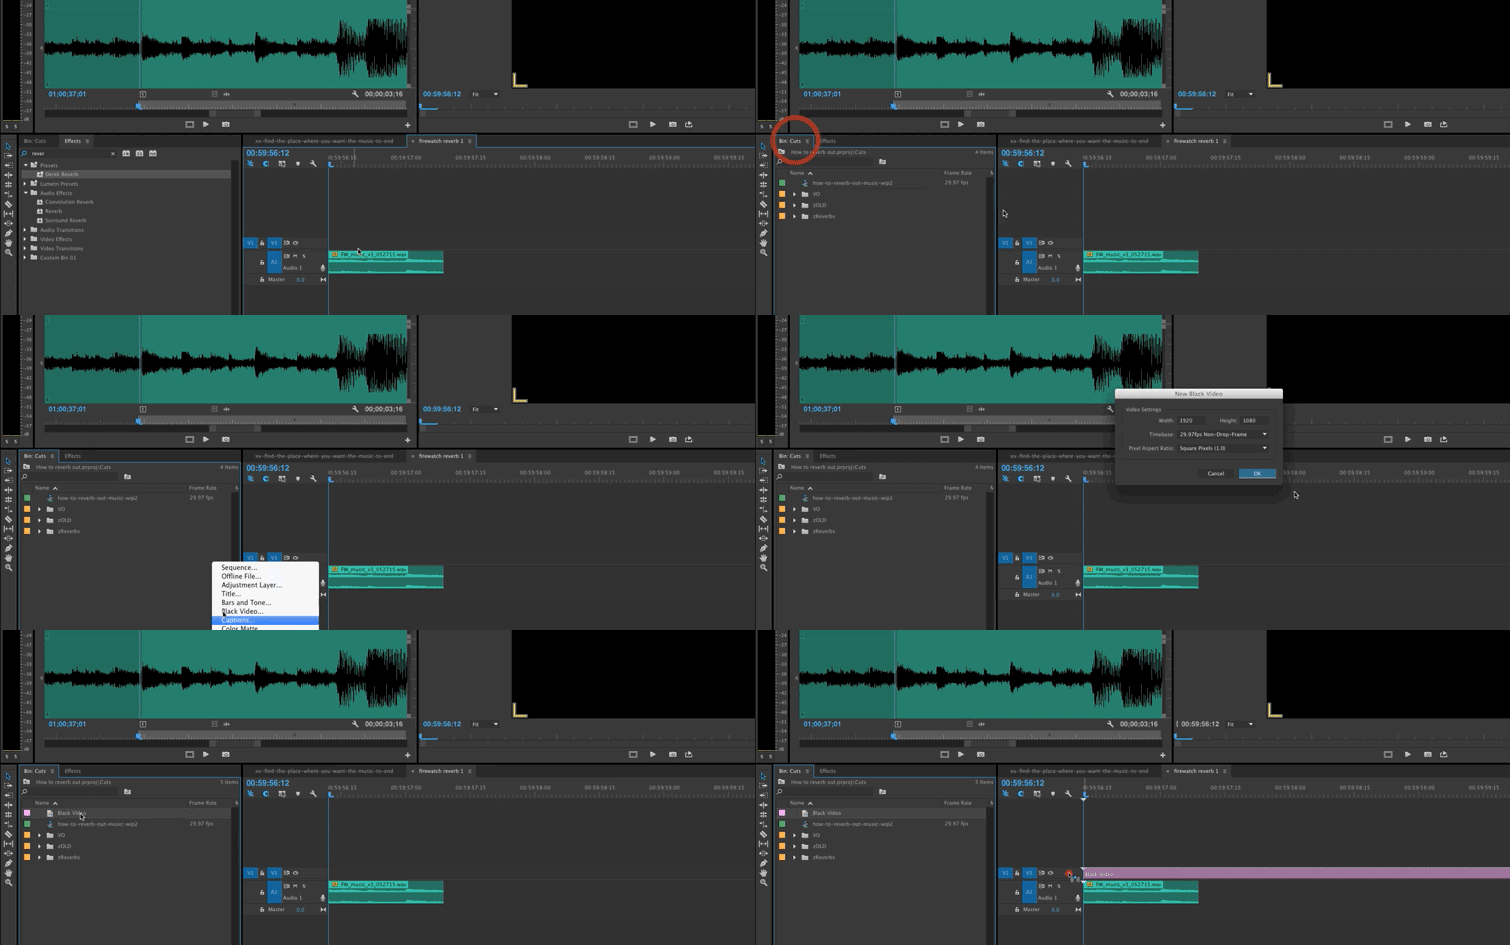
In order for the clip to be extended, add a clip of black video to the nested sequence. This will allow you to drag your intended clip out to however long you want the reverb to last.
3. Apply the Reverb

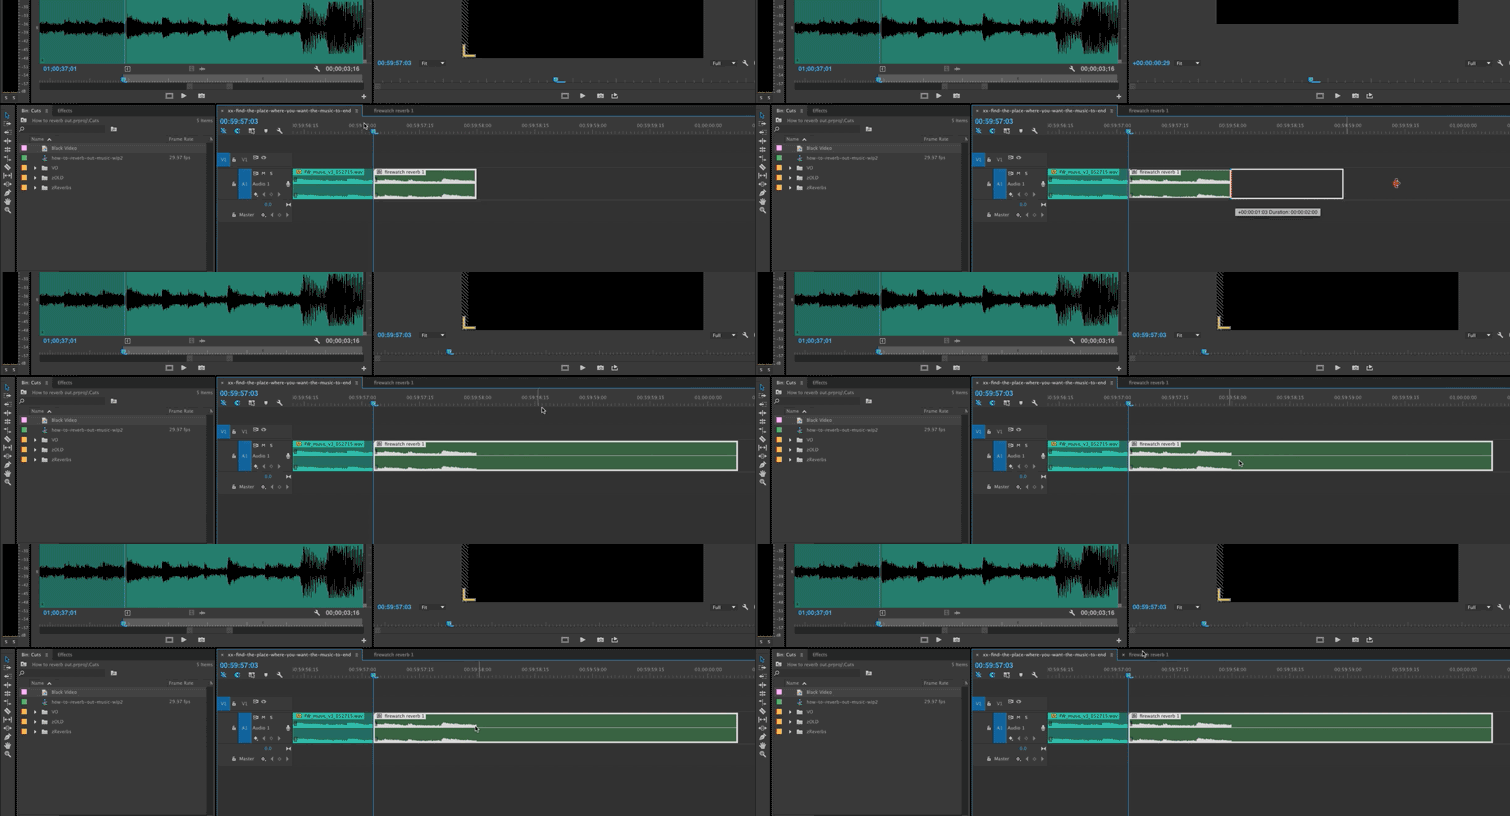
Once you drag the clip out, Apply a Fade if needed and then Apply the Reverb Effect. Bam. You did it!
Also, if you need a new song or sound effect for your video, check out PremiumBeats stacked library full of impressive tracks here.
How do you like to use reverb? Share your techniques in the comments below!


