Part 1: Making Metadata Work for you—Creating Custom Columns in Avid Media Composer

Customize your bin column information to create a superior clip retrieval system in Avid Media Composer!
Sometimes, the most important information about your clips is the user data that you define. In Part 1 of this two-part tutorial series, find out how to create custom columns and save your custom bin views in Avid Media Composer.
Organize Your Project!
Once you import and capture your material, naming your clips and putting them into well-labeled bins (and optionally, folders) is the first step in organizing the mounds of material in your project.
In many cases, the very next thing you should to do is to create practical and specific custom-columns in order to set up your bins as powerful databases that can serve as tools to further sift through your material (which we’ll explore in Part 2 of this tutorial series).
Creating Custom Columns
Using a combination of custom columns allows you to quickly sift through hours of material.
To create a custom column:
- Make sure that your bin is in Text View.
- Switch to the Custom view from the pop-up menu at the bottom of the bin.
- Click in the blank space to the right of the heading of the right-most column.
- Type in the name of your column heading.
- Once the column is created, type in your data in the rows below.
There are many types of custom columns that can be of use to you later when sorting and sifting through your shots. Here are just a few:
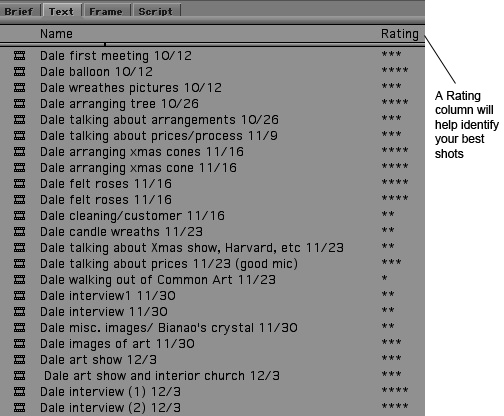
Rating columns
Making a Rating column can quickly give you access to your best material. By using a “star” system, ranging from one to four stars, you can provide an easy way to later reference, sort and sift the best shots.
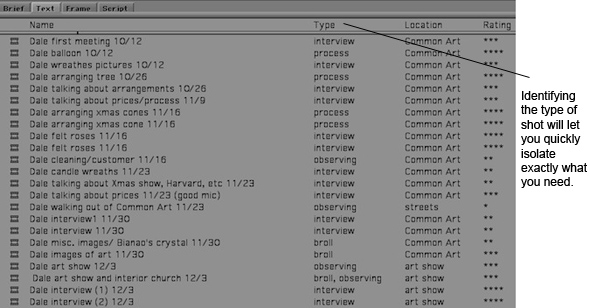
Shot Type
Organizing the footage by shot type is a great way to quickly be able to access all of one variety of shot within a subject-specified bin. Here are just a few options by which you may want to categorize your footage:
- Interview
- B-roll
- Archive
- Map
- Animation
Shot Composition
You can label the shot composition of each shot, so that you can immediately pull up a specific shot size in conjunction with a subject matter label.
Some shot composition types:
- CU (close-up)
- MCU (medium close-up)
- MS (medium shot)
- LS (long shot)
- CA (cutaway)
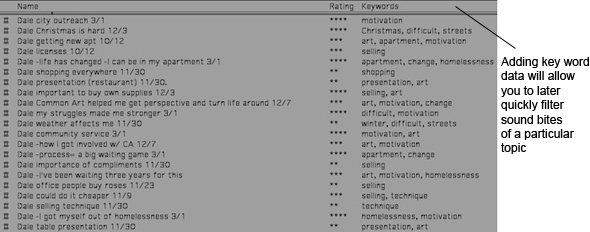
Key Words
One of the most helpful things you can do to properly organize and prioritize sound bites is to design a custom column that lists several key words relating to each particular bite. (Then, you can later sift for all of the interviews that mention a particular topic.)
Saving your Bin View
Once you’ve set up a bin view with valuable custom columns that you’d like to come back to, you can save it as a user setting.
To save a bin view:
- Click on the pop-up menu at the bottom of the bin.
- Select Save As.

- Name your bin view.
- Press OK.

Now What?
Now, you have one or more bin view(s) that will be accessible to you wherever you use your User setting. You can create as many bin views as you like, and switch back and forth between them, depending on what type of data you want to access.
Check out Part 2 of this tutorial series to find out how you can best sort and sift this user data!