Professional Video Editing Tips and Techniques
Want to take your video editing skills from beginner to pro? These tips and techniques can help you become a proper video editor.
Becoming a top-notch video editor isn’t easy. But with practice and patience, you’ll be editing like a pro in no time. Well, isn’t that easy for me to say while typing this from afar.
Look, editing is hard. The skills you learn are acquired, which means the best way to get better is to just put your head down and keep editing.
Here are a few of the most important tips and techniques you need to know that can help you improve your confidence as an editor, ensuring you get that next gig.
1. Choose the Right Software
Picking the right editing software is a lot like picking the right car. They’ll all get you from A to B, but depending on your tastes and preferences, you might prefer one above the rest.
The following is a quick breakdown of the most popular professional video editing programs in the world. Since the creation of this video, many of the programs have been updated with interfaces and features. Though the changes are significant, the layout of the programs is still relatively the same.
Premiere Pro
- Price: $52.99 a Month
- Pros: Consistent updates, multi-cam editing, tons of online support, customizable interface, dynamic link with other Adobe software
- Cons: Monthly payment, buggy exports, color grading workflow could be better
Premiere Pro has been around for a while. But, since the introduction of the Creative Cloud, Premiere has become the most popular NLE among professional video editors in the world—and rightfully so.
Premiere is a fantastic program for projects both large and small. Plus, it’s frequently updated—unlike some of the other programs on this list.
One of the things that makes Premiere so fantastic is its integration with its sister programs, After Effects, and Media Encoder. In addition to the video-focused apps, you also have Lightroom and Photoshop. These are just the benefits of staying within the Adobe Creative Cloud world.
Users can easily send Premiere timelines between these programs when the built-in tools in Premiere won’t do the trick.
The only negative (or positive, depending on how you look at it) is the fact that if you want an up-to-date copy of Premiere, you must subscribe to the Creative Cloud, which starts at $52.99 a month.
This is a good deal if you’re an editor or creative artist, as you likely use programs like Photoshop, Illustrator, After Effects, and Premiere often. If you don’t do a ton of editing, it might make sense to use other options, which we’ll discuss right now!
Final Cut Pro
- Price: $299
- Pros: fast workflow, compound clips, intuitive design, multicam support
- Cons: only for Mac, not intuitive design at all (see what I did there)
FCPX is a fully-functional NLE that’s much more powerful than one might think coming from Apple. FCPX has several features that editors will find helpful like background rendering and multi-cam editing.
In a lot of ways, FCPX is similar to both Premiere and Resolve. In fact, aside from a few minor differences, FCPX, Premiere Pro, and DaVinci Resolve are all similar in their function. At the end of the day, it’s a program that allows you to edit video.
DaVinci Resolve
- Price: $295/FREE
- Pros: Good for any size project, exceptional color grading tools, GPU-based rendering
- Cons: Relatively newer platform, not as intuitive as Premiere
Although Resolve started out as a color grading and color correction software, Blackmagic Design has overhauled it over the last couple of years to become a powerful NLE. As a result, Resolve is now one of the most popular editing programs out there.
With their one-two punch approach of products such as the BMPCC6K and URSA lineup (as well as their many broadcast production tools) Blackmagic Design has really established itself as a powerhouse of video production.
There are other kinds of professional video editing software out there, but the four mentioned in this list are currently the most popular. Other software like Lightworks, Autodesk Smoke, and Sony Vegas are all popular alternatives. So, if you’re looking for something different than what’s found on this list, I highly recommend checking them out.
While there’s a paid version of Resolve (titled Studio), the free version is more than sufficient to get started. In fact, I’d wager that unless you’re producing content to be exhibited on TV or the big screen, you don’t necessarily need the features found in the Studio version.
2. Picking the Right Computer
While having a solid computer won’t necessarily make you a noteworthy video editor, a faster computer will allow you to focus more of your time on the story you’re trying to tell, rather than your computer rendering.
Everyone has their own opinions about what computer is best for editing, but it all depends on your own preferences. Here are a few tips for optimizing and picking the right computer for video editing.
Get an SSD
A fast storage drive is one of the most important investments you can make for video editing. This is for multiple reasons. First of all, a faster hard drive will allow your computer to access your footage and software faster. This will lead to faster render, loading, and export times. In most cases, an SSD will be close to double the price of a traditional hard drive, but it’s definitely worth it.
Increase Memory (RAM)
Increased RAM will almost always lead to faster editing speeds. This is why most modern NLEs recommend that you have at least 4GB of RAM—but if you’re serious about video editing, you’re going to need a lot more. You’d be hard-pressed to find a professional editor with less than 8GB of RAM. The more RAM the better.
Picking Your GPU
If you’re going to be doing graphics-intensive work, or color correction and grading, the GPU will power these effects. For a while, an expensive GPU wasn’t necessary for video editing. But recently, many NLEs (like Premiere) have begun offloading some of the workloads onto the GPU instead of mainlining it through the CPU. You’ll actually see a little box next to the effect in Premiere if the effect uses the GPU for processing.
When shopping for a GPU for video editing, keep an eye out for the amount of memory in GB, and the number of CUDA cores inside. The more memory available inside the GPU, the more graphics-intensive workload you can handle.
Picking Your CPU
The CPU, or “central processing unit,” is the brains of the operation. It performs the calculations and tasks necessary to run the OS and software. Previously, most mainstream NLEs like Adobe Premiere and Final Cut use the CPU way more than they did with the GPU. So, your biggest investment should have been the CPU, but recently Premiere came out with an update that lends more responsibility on the GPU.
A faster processor will result in faster render times, but it’s all a balancing act. If you have an amazing processor but end up skimping on the storage drive, RAM, or video card, your computer is going to run slow.
You can’t go wrong with an i7, but just like video cards, there’s a good chance your favorite NLE will recommend a certain processor. Check their site before you buy.
Mac or PC?
The Mac or PC argument is really quite silly when it comes to video editing. Both systems are worthy options, and feature-length films have been cut on both Macs and PCs. However, one of the biggest considerations that may make you choose a PC over a Mac is cost.
If you intend on building your PC, there are both cheap and expensive options. But the point is, you have control over the cost. That’s why I always recommend building your own, simply for the amount of control you have over the process
3. Keyboard Shortcuts Will Save Your Life
One of the fastest ways to tell the difference between a professional and novice video editor is to simply look at how much they use the keyboard. Editors who have been in the industry a while know that a few seconds saved here or there add up over time.
So, if you’re serious about saving hours (if not days) on projects, it’s best for you to learn how to use those keyboard shortcuts. Luckily for us, there are a lot of really good keyboard shortcut resources out there.
Cheat Sheets
One of the best ways to learn keyboard shortcuts as a beginner is to simply print out a cheat sheet that you can easily reference while you’re editing. If you’re performing basic actions like playback or cutting, odds are there’s a simple keyboard shortcut you can use instead. Just reference one of the following free keyboard shortcuts before you touch that mouse.
Premiere Pro
Final Cut Pro X
DaVinci Resolve
It should also be noted that you can change the keyboard shortcuts to your liking in all of these applications. So, if a given function uses a certain key combination that you don’t like, you can just change it!
Editing Keyboard Covers
Editing keyboards are fantastic for learning your keyboard shortcuts. But, if you already have a “standard” keyboard, you don’t have to buy an entirely new keyboard. There are keyboard covers that have printed icons on them that you can slip over your keyboard.
These are nice if you use your keyboard for more than one purpose. Plus, if you ever want to learn a new software in the future, it’s a lot cheaper to replace a keyboard cover than an entire keyboard. B&H has a good selection of video editing keyboards and covers. Just make sure the one you choose fits your keys!
4. Learn the Lingo
Video editing isn’t just a hobby or profession, it’s an industry. And, just like any industry, there’s a ton of lingo to learn.
Practically speaking, you don’t need to learn all of the terms on this list to become a better video editor, but a fundamental knowledge of the concepts may help you communicate better with other video editors or clients.
Here are a few basic concepts you’ll need to know:
Jump Cut
A jump cut is a cut that allows the editor to cut out portions of time. A jump cut can preserve visual interest without the audience having to watch boring fluff.
Think of a guy holding an egg over a building and then cutting to a clip of a splattered egg on a sidewalk. Even though you didn’t see the egg falling, it’s obvious what happened in-between.
J and L Cut
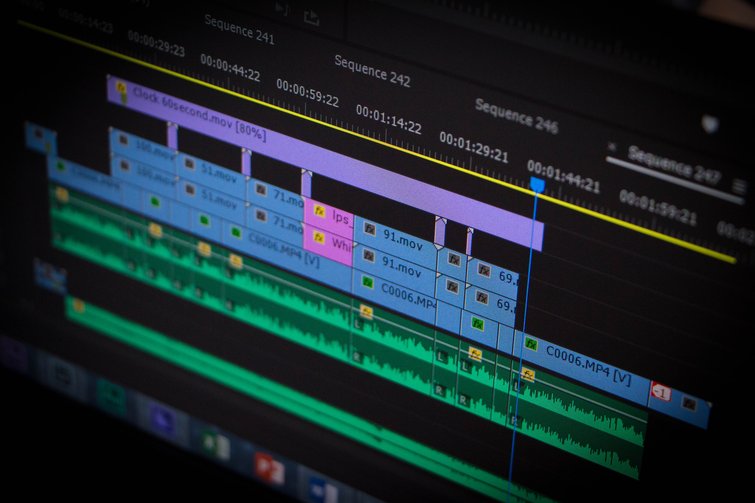
J and L cuts are an essential tool for tying two scenes together. In a nutshell, a J or L cut is an overlap of either audio or video onto the next scene. They’re named for the shape they make in your editing timeline.
A J-cut is where you hear the audio before you see the visual. For example, if you were to hear a train horn and then cut to video of a train, this would be considered a J-cut.
An L-cut, on the other hand, is where you see the video before you hear the audio. The best way to think about an L-cut is to envision a documentary where a guy is describing ice cream then cut to a video of someone scooping ice cream while he’s still talking.
You’re probably going to get the terms J and L cut mixed up a lot, but the thing to remember is simply the concepts. J and L cuts can add a lot of visual interest to your scene.
Montage
A montage is a sequence of shows that demonstrates the passage of time. While you may be familiar with the idea of a montage, it’s important to remember that a montage is a powerful tool that can progress your story.
The most notable example is the Rocky training sequence where Rocky trains for his big fight and ends up running up the stairs at the Philadelphia Museum of Art. You know this scene, it’s one of the most famous scenes of all time. Not only did that scene pass time, but it also developed Rocky’s character so that we could see his inner transformation.
Match Cut/Match Action
Match action (or match cut) is a technique where an editor will cut from one visually similar scene to another. Typically, match actions need to be planned out in advance—but, when done correctly, you can create a captivating sequence by simply cutting together two similar shots.
The most notable example of match action is the bone shot from 2001: A Space Odyssey where a bone is cut with a similarly shaped spaceship.
Cutting on Action
Cutting on action is a technique used to create a more interesting scene. The concept is simple . . . when you cut in the middle of an action, it’ll appear less jarring and more visually interesting. This goes for just about every scene. Cut when your subject is moving and not when they complete the action and your scene will seem much more fluid.
5. Good Music Changes Everything
Dear Reader, let me just hit you with a quote. David Lynch, one of the most innovative directors in the world, once said:
Films are 50% visual and 50% sound. Sometimes sound even overplays the visual.
– David Lynch, Director
Want to know the easiest way to tell the difference between an indie film and Hollywood blockbuster? Just close your eyes. As editors, it’s easy to focus way too heavily on the visuals and to keep the audio as an afterthought. This is, of course, a mistake.
Making sure your project has good sound is more important than the camera you’re using. Full stop. If you’re wondering what microphones to start with, check out this breakdown by Charles Yeager.
The best thing to do is license good music online from a royalty free music provider. I know what you’re thinking: Spend money on music? I can just get free music online.
While this is true, free music is free for a reason. In order to get the best audio possible, you’re going to need to spend a little money.
You may be hesitant to pay money for a track that you may not use, but that’s not how modern music licensing works. Most websites (including PremiumBeat) allow you to download free watermarked audio previews and place them into your timeline. This way you don’t waste money buying a track that’s not perfect.
Also, we’ve released entire free packs of sound effects and soundscapes, like this incredible set below:
How to Check Your Levels
It seems like every video editor has their own opinions about what your audio levels should be, so the following recommendations are by no means law. However, if you’re having some trouble getting your audio perfect, just follow these quick suggestions and begin adjusting your audio from there.
- Overall Mix Level: -10db to -14db
- Dialogue: -12db to -15db
- Music: -18db to -22db
- Sound Effects: -10db to -20db with occasional spikes up to -8db
At the end of the day, your ears need to be the judge. Your audio may follow these tips perfectly, but if it sounds bad . . . it’s bad.
6. Exporting for the Web
While it’s easy to get caught up on the big screen, in reality, most of your projects will be viewed on phones, iPads, computers, or TVs, so it’s important to know the proper way to export for the web. The goal when exporting a video for web is to create the highest quality possible without ending up with a huge file size.
There are four main factors that determine how large your finished video will be. Let’s break them down here:
- Codec: A codec is the type of file format that your video will be saved as. The more compressed the codec, the smaller your video’s size will be. However, smaller file sizes tend to be lower in quality.
- Resolution: Resolution is how many pixels your video has. For example, a 4K video has four times the resolution of HD video.
- Bit Rate: Bit rate is the amount of data dedicated to a second of video. A higher bit rate will result in higher-quality video and larger files. Some programs allow you to set a minimum and maximum bit rate.
- Frame Rate: Typically, you’ll want to export your video in the film standard (24fps) or the TV broadcast standard of 30fps (or 25fps in PAL). While there isn’t much wiggle room here, it should be noted that if you decide to export your video in 48fps or 60fps, your file size will likely double.
Over time, you’ll learn which export settings are best for you. But, if you’re just starting out, don’t worry—a lot of the online distributors have created recommended export settings so you can insure your videos are the highest quality possible.
All of these recommendations below are “minimum” recommendations. If you want your video to be the highest quality possible, you’ll probably want to make sure its specs exceed those listed below.
YouTube
YouTube has a strange relationship with video editors. It’s no secret that it’s the most popular video service in the world. If you want your video to be seen by the most people possible, YouTube is the place to put it. Right? Or is TikTok the new champion? It’s hard to say.
However, when you upload a video to YouTube, the video will be re-encoded to a smaller file format. This will result in a loss of quality. So, be sure to preview your video before you put it out in the world.
| Max Resolution | 8K |
| Recommended Codec | H.264 |
| Audio Codec | AAC-LC up to 96khz |
| Bit Rate Recommendations | 4K 45mbps at 24fps |
| Frame Rate Support | 24, 25, 30, 48, 50 & 60 |
Vimeo
Vimeo is the most beloved video streaming service among those in the industry. Or, at least it used to be. Do people still use Vimeo? Hmmm.
Well, Vimeo’s sleek design and ad-free model make it perfect for non-obstructed viewing. However, the same rules apply when exporting video on Vimeo. Your video is going to get re-encoded on Vimeo and lose quality. Keep this in mind before you set your video to “public.”
If quality is a major issue, you can tell your audience to download the original file by clicking the download button below your video. Here are Vimeo’s compression guidelines.
| Max Resolution | 8K UHD |
| Recommended Codec | H.264, ProRes 422, H.265 |
| Audio Codec | AAC-LC at 48khz |
| Bit Rate Recommendations | 30-60 |
| Frame Rate Support | 24, 25, 30, 60 |
Facebook and Instagram
Originally for this article, we had a graph listing the upload specs for Facebook video, but there are now more than ten different ways to upload a video to Facebook and Instagram. So, if you check out their page that has everything laid out quite thoroughly, you can find exactly what you need for the requirements.
It should be noted that most of the major NLEs have presets built-in for YouTube, Vimeo, and Facebook, so it’s unlikely that you’ll have to export your video “by hand.” Before you publish your video, be sure to watch it on a phone and computer so you can get a good idea of what the video will be like for your audience.
Remember, just because your video sounded awesome in your studio headphones doesn’t mean it sounds good coming from iPhone speakers. Also, certain monitors handle colors and contrast differently, so it’s best to check what the upload looks like on multiple screens, if you can.
7. Tips for Faster Editing
While becoming a faster editor won’t necessarily make you a better editor, it will allow you to try more things in a shorter amount of time, which can result in better films and videos. There are a lot of things you can do to become a faster video editor.
Here are a few of them . . .
Organization Is Everything!
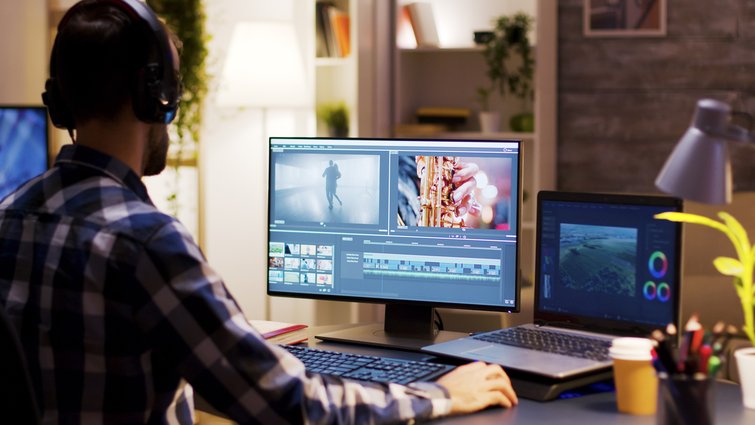
It takes time to organize your projects and files well, but a little time spent labeling and organizing your footage can save you hours of wasted time on a project. Not to mention the fact that videos without homes tend to get deleted. So, the trick is creating a simple organizational structure that you can use again and again for each project.
One of the most popular ways to organize footage is to use the following folder structure:
- Footage
- Project Files
- Titles/Animations
- Audio
- Images
Each section could have even more subsections, depending on the size of your projects. For example, under the Audio folder, you may have music, SFX, mic audio, and soundscapes.
At the end of the day, project organization is all about keeping your resources in one place. Just do what works best for you!
External Hard Drives

As we already mentioned, hard drive speed is paramount for getting fast render times, but there’s a few things you can do with your hard drives to speed up your editing speed.
The first is to simply purchase a fast external hard drive to store your footage. When talking about external hard drives, the adapter is key. You should be using either USB 3.0 or Thunderbolt to connect your hard drive to the computer.
I personally recommend using an external SSD that can be connected via USB 3.0. When picking a hard drive, you should also consider whether the external hard drive needs to be plugged into a wall or not to work. Typically, wall-plug-based hard drives are cheaper. But, if you ever plan on taking your hard drive somewhere besides your editing bay, they’re a huge pain to deal with.
Allocate Your RAM
Just because you have 32GB of RAM on your computer doesn’t mean you’re actually using all 32GB. Most NLEs will only default to using a few gigs of RAM at a time. In order to allocate more RAM for your video editing application, you’ll need to go to your preferences.
To perform these functions in your video editing application of choice, just follow these links:
Choosing the Right Mouse
Another popular option among professional video editors is using a gaming mouse with programmable buttons. The programmable buttons can be used to perform basic video editing tasks, like saving or undoing without having to use both of your hands.
While it may only save you a second here or there, those precious seconds will add up. I think it’s a known fact that the Apple mouse lineup isn’t the most video editing friendly options, so you might as well go with a gaming mouse or this Logitech mouse from the video above.
Close Out Other Programs
It may be common sense, but closing out all of your other applications will free up memory and reduce the strain on your CPU. I can’t tell you how many times I’ve been editing, not knowing why things are going so slow, then realizing that almost every single app is running. Especially if you’re using any of the Adobe apps while Premiere is running. Just be mindful of what your computer is currently trying to run.
8. Color Considerations
Color Correction
Color correction is the process of getting your footage to a color baseline. No matter how amazing your footage looks on set, you’ll almost always need to do some basic post-processing to get all of your footage consistent.
All of the major NLEs have basic color correction effects built-in that make it easier than ever to perform basic color correction. However, you might be somewhat limited on your ability to manipulate colors if you are given a highly-compressed codec. File formats like RAW and ProRes will be easier to manipulate than H.264 and AVC-HD.
Color Grading
Color grading is the process of actually stylizing the footage to match a given color “look.” While there’s certainly an infinite number of ways you could potentially color grade, the process can really be broken down into two different types of grading—grading with presets and grading by hand.
Color Grading with Presets
There are a lot of color grading presets out there, but most of them are simply drag-and-drop effects that can be easily applied to your footage in the NLE of your choice. We call these presets “LUTs,” which stands for “Look-Up-Tables.”
Essentially, these are specific looks created in a NLE program and exported as a .CUBE file that you can import to the program of your choice. Over the years, we’ve released many free LUT packs.
Check out some of them below:
Color grading presets are nice if you’re short on time. They can give you distinct and fun looks without spending a lot of time making them. However, it’s never a good idea to simply apply a preset look and click export. Color presets, especially free ones, tend to manipulate your colors in weird ways. You’ll need to scan through your footage to look for color problems.
Color Grading by Hand
If you have the time, the best option is to simply color grade your film by hand. As in, go in and change every little thing about your image. While this does take a good amount of skill, the results you get from a professionally graded film will almost always be superior to a film with a preset applied to it. Currently the most popular software to color grade is DaVinci Resolve.
9. Titles and Graphics
After you’ve edited your video, added music, and color graded, it’s time to add the graphics. While it’s easy to spot superb motion graphic work when you see it, good graphics are surprisingly difficult to create yourself. It’s really best to keep things simple.
Here are a few tips for getting the best graphics possible . . .
Simple Is Better
When it comes to creating titles and credits, simple is always better than complex. Working with pre-built titles and animated titles should be the first step. These look good and are free, like the example above.
Once you feel more comfortable using titles, then you can start branching out and trying new things. The best thing to do is simply build up your font collection, check the link below (wink wink).
Over time, you’ll come to use one font more than others and that’s okay. I currently use “Lato” more than any other font, but there have been times in the past where I’ve used Helvetica Nueue, Avenir, or Bebas Nueue for most of my projects.
Learn After Effects
If you only learn one program this year, go out and learn After Effects. Not only will After Effects allow you to create amazing motion graphics and VFX work, it’s also a lot of fun to learn.
There are quite a few places out there where you can learn After Effects. The key when learning how to create and work with motion graphics is to be methodical, taking it one step at a time.
The above video I included is an awesome resource for the beginning stages of using the program. What’s even better news? There’s a part two that you can watch here.
The reason we even include “Learn After Effects” on this list is if you’re serious about video editing, this is the next logical step for you to take. You’ll need to include motion graphics at some point. Face it, it’s best to not avoid the inevitable.
Further Video Editing Resources
While you may be able to learn how to cut together footage in an afternoon, the art of video editing is a process that will take years to master. Luckily for us, there are hundreds (if not thousands) of free resources online designed to help you become the best video editor you can be.
With more than fifteen original video editing and post-production articles a week, PremiumBeat’s blog, The Beat, is one of the largest video editing blogs in the world. Another stellar place to find video editing tips is the Shutterstock Blog.
Hopefully, you now feel inspired to go out and create your own video editing projects. Go forth, editor!
For more on video editing, check out this page on the PremiumBeat Blog where new articles are added every week!
A few more gear articles for you:


