3 Cinematography Tools for Capturing Perfect Exposure

Nailing perfect exposure is one of the cinematographer’s most essential roles. Learn to set the right exposure to streamline post-production.
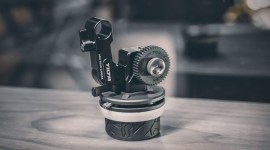
Cover image via Shutterstock.
Blown-out highlights or underexposed shadows can become a real pain during the post-production process. Luckily, there are many tools available for getting impeccable exposure that it is now more simple than ever. We’re going to take a look at three of the tools I like to use on set when trying to get the perfect exposure.
Histograms
At first, histograms can be intimidating. However, once you learn to properly use them, you begin to realize how powerful they can be. A histogram gives you a quick glimpse at the various exposure values of your shadows, midtones, and highlights across an image. In general, if your histogram is reading more to the left, that implies that your image is underexposed. If the histogram is resting more toward the right, your image is likely overexposed. Generally, having the histogram in the center of the chart is the ideal exposure. Check out this video to learn just a little more about histograms.
False Color
False Color has become one my favorite tools for nailing exposure every time. A lot of cameras and monitors don’t have false color built in. However, if you do have a monitor, like a SmallHD or a camera like a RED or ARRI, this built-in feature is a powerful tool.
False color uses different colors to represent exposure values across your screen. For example, let’s say that green represented a value of 55-65 IRE on your monitor. Those areas of the image that are within that exposure range would be highlighted green. Now if the color red was used to highlight overexposed areas of your image, all areas of over-exposure would be highlighted with red. To understand this a little more fully, check out this video from Shane Hurlbut, ASC on understanding false color.
Light Meters
Tried-and-true light meters are the established way to gather the exposure of your scene and expose your image properly. Not only do light meters help you generally expose a scene, they also assist you with creating the proper contrast ratios for your image.
There have been many innovations in the world of light meters in the last couple of years. Now you can turn your iPhone into a light meter with something like Lumu.
Light meters are powerful tools, especially during day exteriors when the sun’s position and cloud coverage are constantly changing. If you’re working on coverage of a dialogue scene over the course of an hour, the sun’s position (and, inherently, your lighting ratios) could drastically change. By using a light meter, you can ensure that the contrast ratios and exposure on your talent’s face stays consistent so there’s not a harsh jump in continuity.
Exposing your images correctly will save time in the post-production workflow. With access to tools we have today, nailing your exposure should be easier than it ever has been.
Looking for more information on lighting? Check out these articles: