

Premiere Pro CS Next – Changes to the Timeline Panel

Premiere Pro is getting updated! In this post we’re look at some of the improvements to the Timeline Panel in Premiere Pro CS Next, so you can get a running start when the updates roll out!

Every new version of Premiere Pro includes cool new tools and can often encourage us to try new ways of working. Among the updates to the next version of Premiere (dubbed “CS Next”) is an updated Timeline Panel. Here’s what you need to know about it!
Updated Timeline Panel
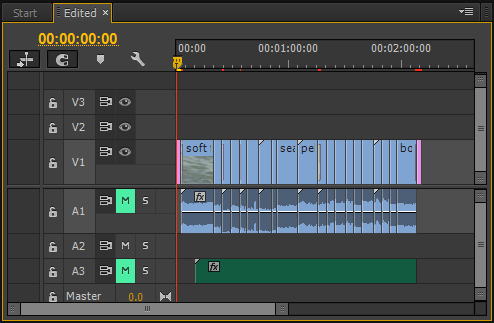
Perhaps the first thing you notice is that the track headers are different to previous versions of Premiere Pro. They have been simplified and are now editable! If you right-click on a video track header you get the normal options from previous versions to add and delete tracks, but you also get a new ‘customize’ option at the bottom. If you click on that option you get the new Button Editor:
New Customize Video Track Header ‘Button Editor’
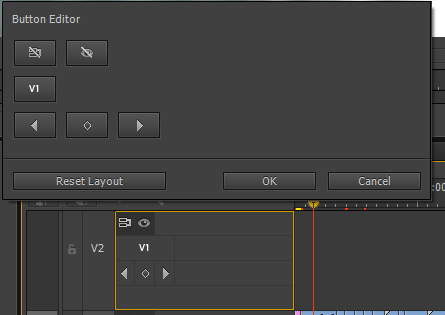
To remove a button from the track header, simply drag it out to the ‘Button Editor’ box. Similarly, to add a button back in drag it from the ‘Button Editor’ to the track header. You can even rearrange the order of the buttons while in this mode! Any changes you make to one header will affect all the headers of the same (video or audio) type.
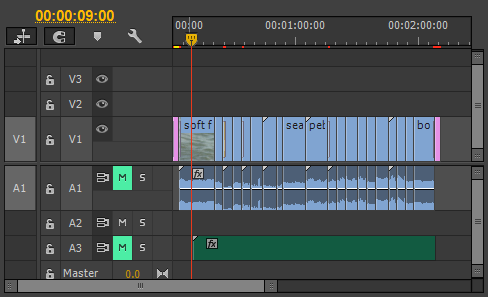
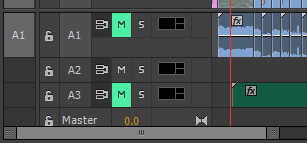
For example, here are the video track headers with ‘Sync Lock’ removed.
Sync Lock Removed From Track Header
Audio Track Header Button Editor with Audio Meter Being Added
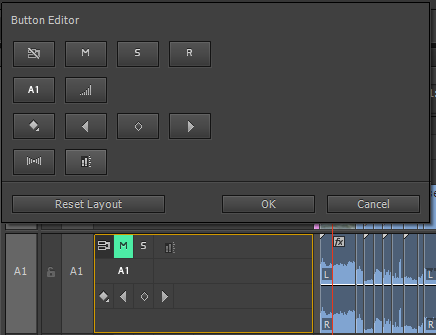
Audio Track Header After Audio Meter Added
Another really nice feature about the track header is that they can be expanded or closed by holding your mouse over the header you want to expand/close and scrolling your mouse wheel.
Scrolling Track Headers

However, some people don’t like using the mouse for this kind of thing and so a great new series of keyboard short-cuts have been added to open and close tracks.
Note: When I type ‘=’ and ‘–‘ these are to the right of the 0 key on the main keyboard and are sometimes called the plus and minus keys.
Open all tracks:
Shift and = (opens all tracks)
Close all tracks:
Shift and – (closes all tracks)
Expand all VIDEO tracks as you push and hold the = key:
CNTRL (PC) or CMD (Mac) and =
Close all VIDEO tracks as you push and hold the – key:
CNTRL (PC) or CMD (Mac) and –
Expand all AUDIO tracks as you push and hold the = key:
ALT and =
Close all AUDIO tracks as you push and hold the – key:
ALT and –
Other changes have been made to the Panel Menu for the timeline panel.
Panel Menu for the Timeline Panel
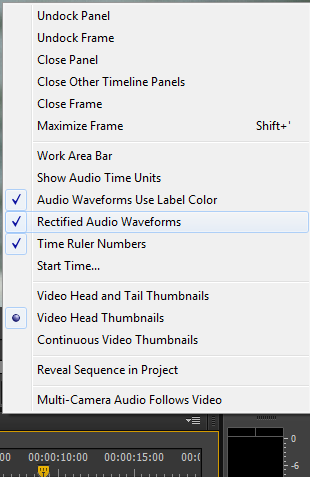
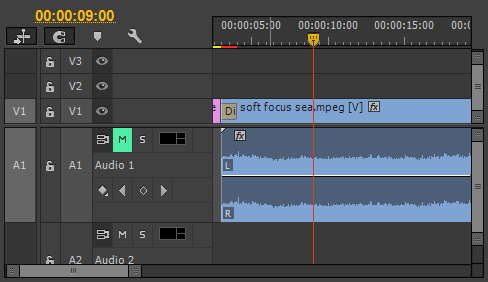
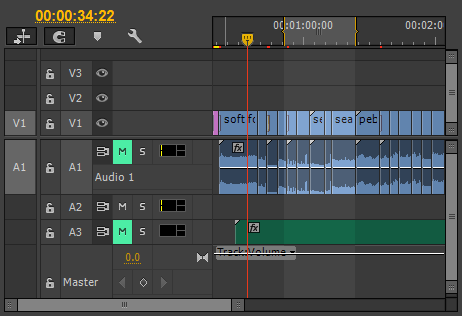
Notice that there is now something called ‘Rectified Audio Waveform’. This is another way of viewing the audio waveform. It is like cutting the waveform in half along its length and only looking at the top part. However, you can get back to the older view by turning this option off in the PANEL MENU if you want. Having worked with this view for a while now I actually find it easier to work with – but it does take a little getting use to.
Rectified Audio Waveform – Now Default
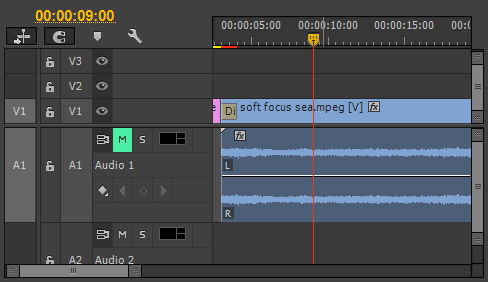
Standard Audio Waveform by Turning this Option Off
Notice also that the THUMBNAIL views for a track have been moved from the track header to the Panel Menu.
Other functions removed from the header are now found under a new ‘Spanner’ icon in the timeline which also gives us some other valuable new functions (you may notice the options that says ‘Show Duplicate Frame Markers’ and ‘Show Through Edits’).
Spanner Icon Menu
![]()
In addition to this, you can also change the START TIME for a sequence from the Panel Menu. By choosing this option you can, for example, choose for the timing of your sequence to start at 10 seconds rather than the default 0 seconds. This can be very useful for organizing your work-flow.
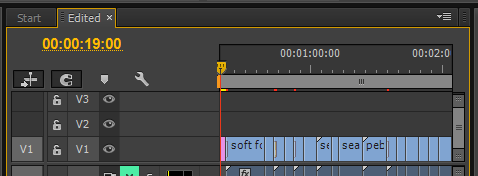
Another big change for those who are used to working with the Work Area Bar is that it is now OFF by default – although can be turned on again from the Panel Menu.
Work Area Bar OFF by Default
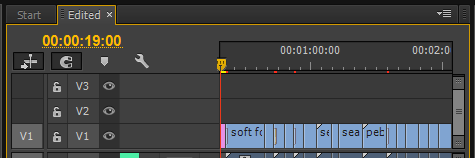
Work Area Bar Turned On Again
The idea of turning the work area bar off by default is to encourage us to use In points and Out points in the Premiere Pro timeline as a quicker workflow for selecting items.
In and Out Points in the Timeline
In and out points are created with the ‘I’ and ‘O’ keys with the timeline panel selected and are valuable for working with the lift and extract functions. These have options and are cleared with a right click option in the ruler area at the top of the panel.
The other new button to point out in the Timeline is the insert and overwrite sequences as nest:
Insert and Overwrite Sequences as Nest or Individual Clips
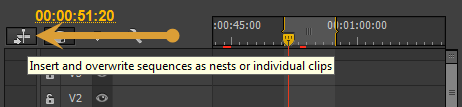
Basically, this button enables us to insert clips from nested sequences as the original clips ‘unnested’ – which is a feature a lot of people have been asking for for a long time!
Well, that should whet your appetite a little more for the next version of Première Pro and get you started extra fast when it arrives!


