

Creating Rolling Titles & Credits in Adobe Premiere Pro

Rolling titles are a must for any professional film production. There are a few things that you need to know in Adobe Premiere Pro to make the process of creating rolling titles an easier one.

Titles can be created in a number of ways in Adobe Premiere Pro.
You could, for example, use the keyboard shortcut: CONTROL + T (PC) or COMMAND + T (Mac). You could click the ‘new items’ button at the bottom of the project panel or access the title tool through the menu bar – File > New > Title.*
These options are great for a static title, but what about a rolling one? From the menu bar choose Title > New Title > Default Roll.

The advantage of doing it this way is that it will create a new title with the right options in place for setting up the roll.
*Note: if you want to convert a static title into a rolling one click the Roll/Crawl option box…

…and select the ‘Roll’ option in the dialogue box that appears:
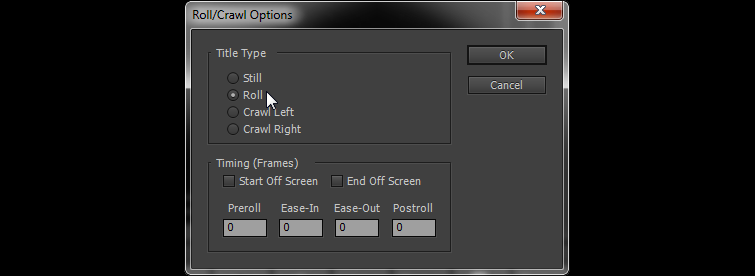
Don’t worry about the other options just yet, we’ll come to them later.
Creating a Text Area in Premiere
Next, we need to create a text area. Rather than just selecting the text tool and starting to type – which will create ‘point text’ (text that continues off the screen and will not wrap around) – you need to create ‘area text‘ and this can be done in one of two ways.
First, you could select the Area Type Tool…

…and then drag out an area from the top left of the inner box (called the title safe area) to the bottom right of the same inner box. Simply click inside this area to add text.
Another option is to drag the Standard Text Tool inside the box in the same way:

Then, when you have finished the text cursor should be flashing. If it isn’t, just click in the new area you have created with the standard ‘T’ text tool and you are ready to start creating your titles.
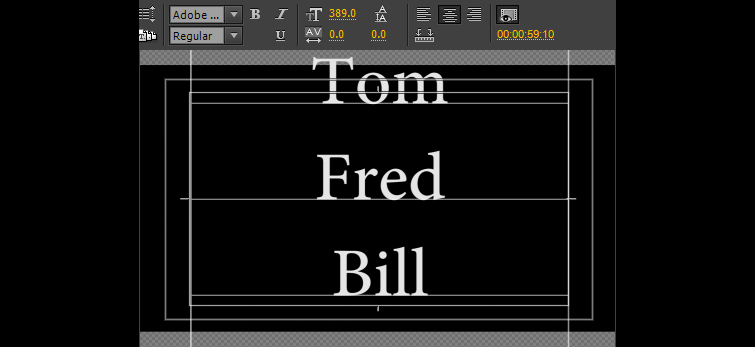
Font, size, etc are all up to you, but for this example I used a very large font and started to type out some names until they went off screen.
Once text has gone off screen you get the little ‘+’ sign, which is simply telling you that there is more text than shown. S o, how do you show that text to create the rolling title?
Rolling Titles in Premiere
First, MAKE SURE YOU HAVE THE TEXT TOOL SELECTED!
I have seen people really struggle to create a rolling title in the past because they have the wrong tool selected when they do this next step. It is very important that you have the text tool selected or else you will not be able to create a rolling title.
Secondly, hold the Control Key (on PC) or Command Key (on Mac), and drag the handle at the middle of the bottom of the screen until you can see the next text (as shown below)…
Handles

Above I have shown the handles that will appear all around the screen when you hit the CTL/CMD key. To create the rolling title choose the middle bottom ‘handle’.
Drag Arrow
![]()
When you hover over that handle you will get this up/down arrow. Click and hold your mouse button and drag down until you see all the text you have created so far. When you let go you will see something like the following.
After Dragging the Handle
Now it moves into a process of repeating the same thing over and over. Type the next names in until they go off screen and then hold the CTL/CMD key and drag down and let go when you can see all the text.
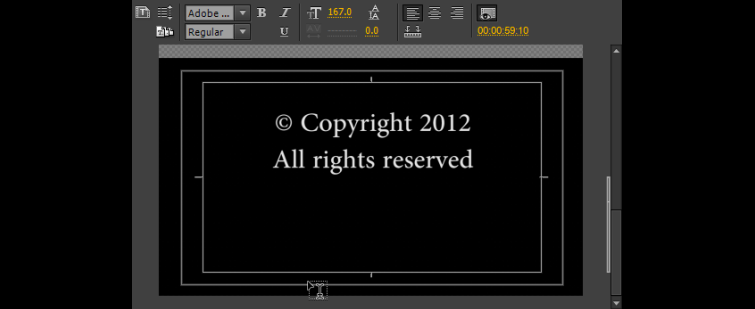
Lastly, when you’ve got all your list of credits into the title, hit return a few time then CTL/CMD drag down to a point where the names are off the top of the screen and you can type something like:
Copyright 2012
All rights reserved
Note, if you want the © symbol on a PC the shortcut is Alt + 0169 on the main keyboard. For a MAC the shortcut is Alt + G.
OK, now you’ve set up the title, use that scroll bar on the right-hand side to preview how your title will look. If something looks wrong, change it! If a name is still on screen at the top when you get to the end of the scroll – add in another line. If the copyright notice is too low, CTL/CMD + drag down just enough to get it in the right place – but be careful not to drag too much!
Roll/Crawl Options in Premiere
When you are happy with the way it scrolls, you are ready to move to the next stage – those roll/crawl options I previously mentioned.

Roll/Crawl Options

… and let’s have a look at each of these options in detail.
Preroll
How long after the title appears do you want the title to wait before it starts rolling up the screen?
For me, I usually choose the ‘Start Off Screen’ option and have the title background appear first and then have the text start to roll up from below the bottom.
However, if you want the text to start on the screen and then start to roll up choose a Preroll amount IN FRAMES – not seconds! So, if you are working with NTSC (US and Japan) that would be 30 frames per second. For PAL (UK, Europe and much of the rest of the world) that would be 25 frames per second. Thus, if you wanted the text to stay put for 2 seconds before it started to roll you would type 60 (NTSC) or 50 (PAL) into the Preroll box.
Ease-In
How slowly do you want to text to start moving?
For example, if you have 0 in this box the text will start to move at once with no ‘easing’ which can look very amateur!
What you want (if you start with the text on the screen) is the text to smoothly start to scroll up the screen starting very slowly and getting faster. So, if you wanted it to accelerate over say 1 second you would type 30 (NTSC) or 25 (PAL) in the Ease-In box.
End Off Screen means that the text will simply continue up off the screen without stopping at any point.
However, for me, I like the copyright notice and any logo that I may have added to stop at the end of the roll and wait for a while before the title ends. To do this, we need to use both the Ease-Out and the Postroll functions.
Ease-Out
Over what time would you like your title to slow down to a complete stop?
I usually choose 2 seconds for this which would mean adding 60 (NTSC) or 50 (PAL) into this box.
Postroll
How long do you want this title to stay still for at the end of your title roll?
If you have an important notice or a copyright notice or a logo at the end you probably want to have it stay on screen for at least 3 seconds if not more. So in the Postroll box I would type 90 (NTSC) or 75 (PAL).
So, a typical set up for the title starting off the bottom of the screen, then scrolling up and slowing down to a stop and waiting on screen for 3 seconds would look like this:

Once you’ve made your choices, click OK and then shut down the title creation window. The new rolling title is now sitting in your project panel waiting to be added to your timeline like any other asset.

Rolling Title Speed
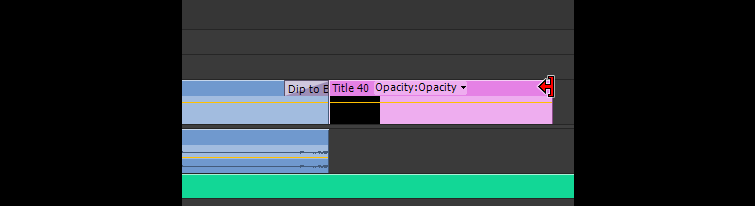
Now, the speed of your title – how fast it actually scrolls up the screen – is completely in your hands. You can trim the title in the normal way by adjusting the clip length.
Trimming the Title
However, you must bear something in mind…
You have already specified that the title needs 5 seconds to slow down and stop on screen because we chose 2 seconds for ease-out and 3 seconds for postroll.
This means that if the title is only 5 seconds long on your timeline that all the names will go through so fast you won’t even notice them before the titles slow down and stop! So, trim the length of your title out to the point whereby the names scroll up at the speed you want them to scroll up. You may need 20 – 50 seconds for even a small number of names – so try it out. Trim and have a look to make sure it’s what you want.
Lastly, a couple of quick tips for rolling titles in Premiere Pro:
-
When your titles come to an end, Premiere Pro will want to start from the beginning of your whole timeline which is a bit of a pain. So, trim your work area bar to just the length of your titles plus a little of the previous clip. This will allow you to see the transition for clip to title without having to go back to the start of the timeline.
-
Use a transition – perhaps the default Cross Dissolve – at the start and the end of your title. This will fade it in and fade it out for that professional look you’re after.
As you can see, there are a ton of options for working with rolling titles and credits in Premiere Pro. Experiment and have fun with it!


