

Smokin’ Hot Tips for Autodesk Smoke

Here are 3 hot Autodesk Smoke tips that will allow you to expand on the workflows to get the most out of the software.

Tip #1: Visual Rendering Inside ConnectFX
In previous versions of Smoke, when the tools were module based and separate you could render inside Action and see your composite update frame by frame. This allowed you to catch any keyframe errors or other user mistakes and fix them without having to wait for the entire render to finish. With ConnectFX, this rendering option isn’t available. Many users coming from older versions have requested it.
However, until it becomes an actual feature, I have a creative workaround. for rendering inside Smoke ConnectFX.
1. Create a CFX Clip by right clicking on your final node. You can use the CFX Result Node, but if you do, there is a small bug.
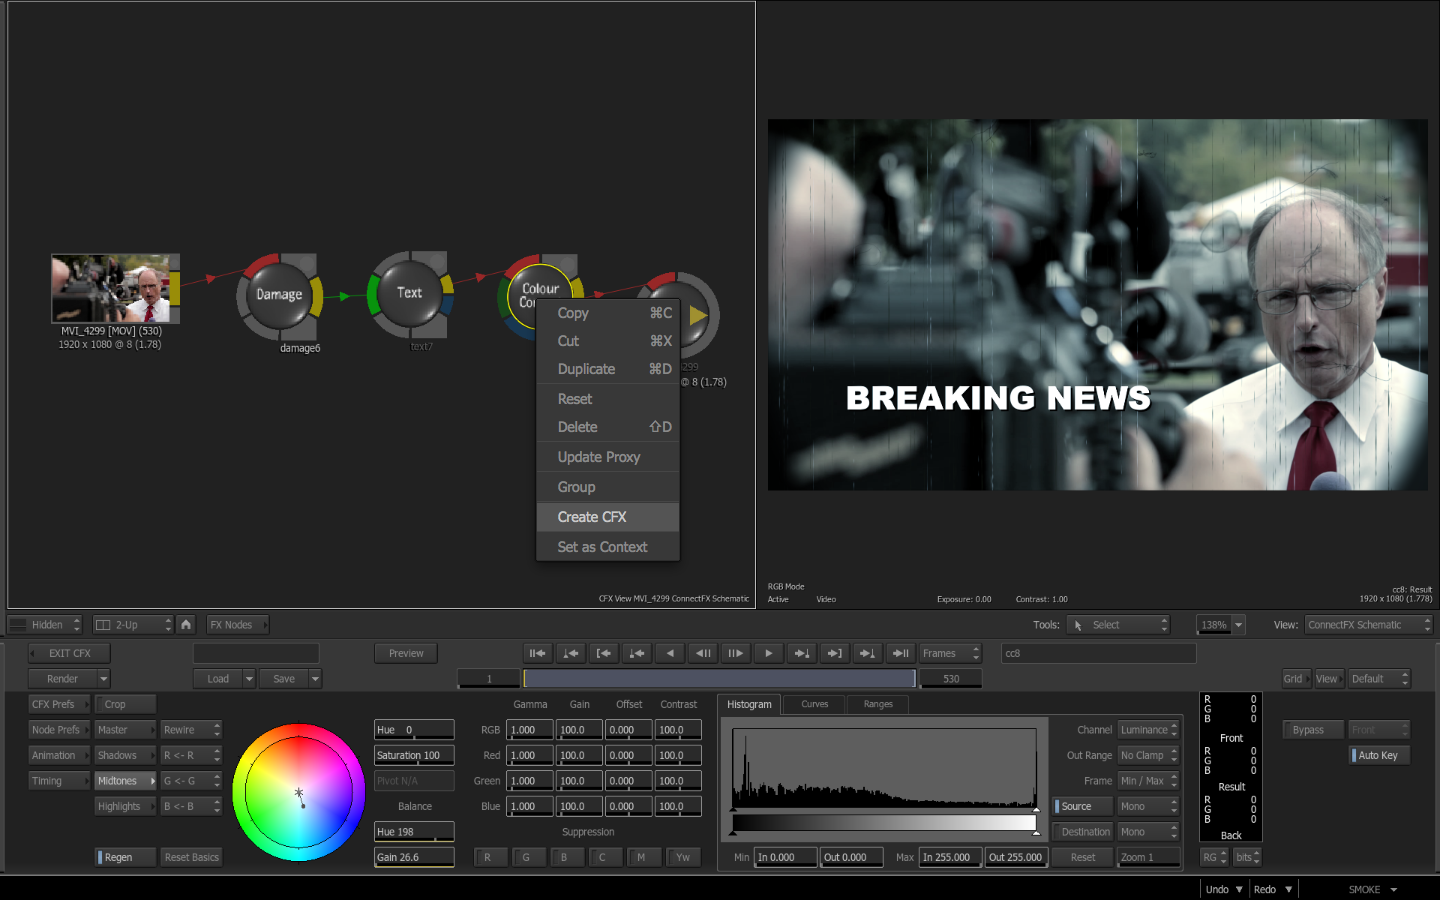
2. Once your CFX Clip is created, find it in the Timing display. If you did choose to use the CFX Result Clip, you will need to trim the end of the clip and extend the out point to match the number of frames you need for your timeline clip.

3. Go to the first frame. Select the clip. Press [F1] to view it. Then simply hit Play in the Viewer. Your clip will attempt to play. As it does, it will actually render each frame as it plays.
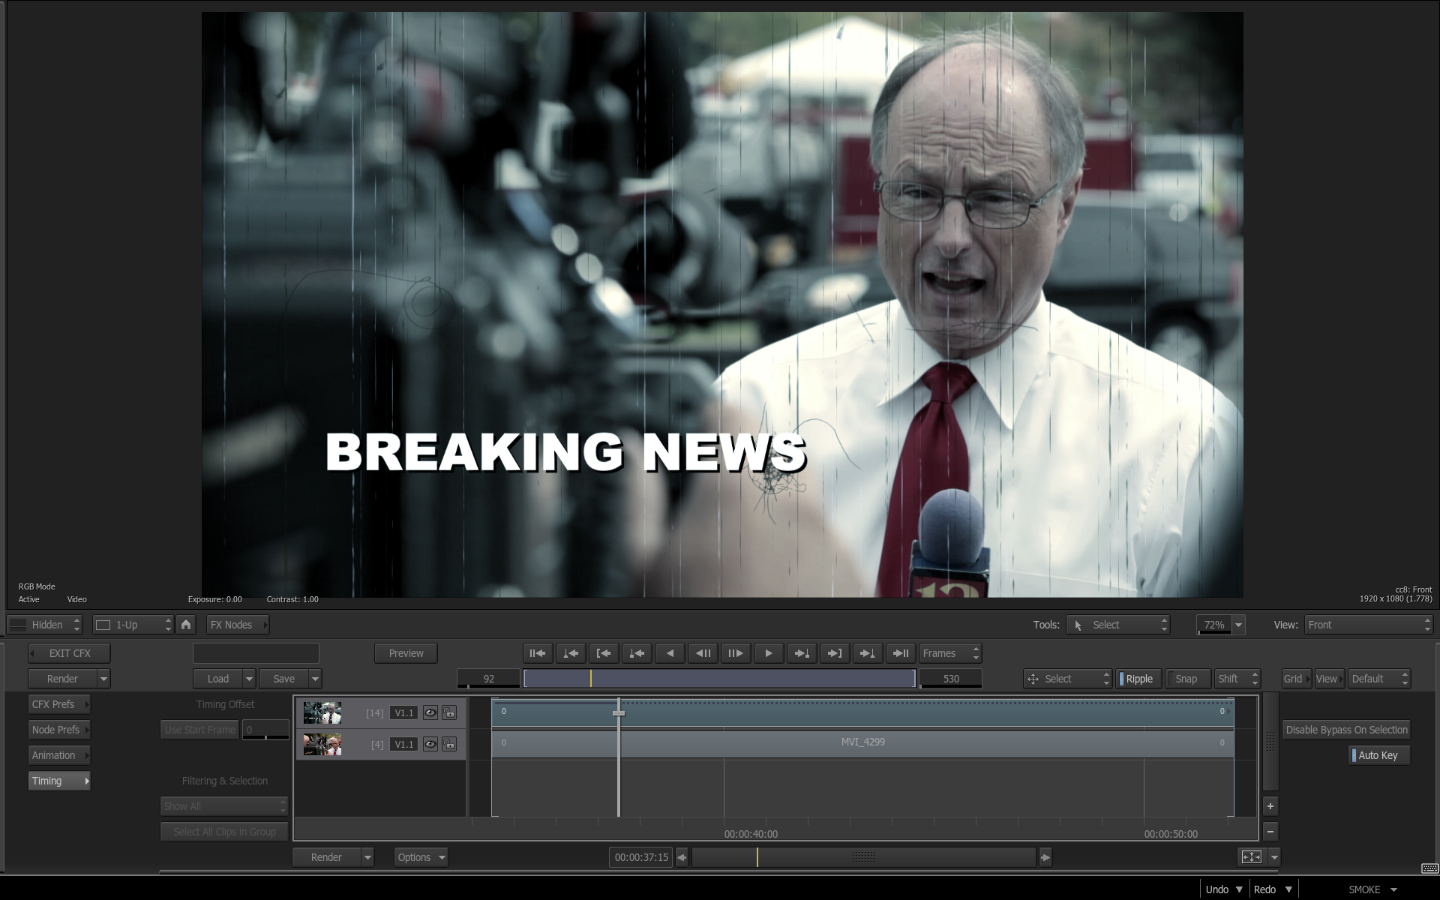
4. Once the clip is done and rendered you can play it in real-time. If you like the result, you can simply pipe the clip output in to the CFX Result Node and exit.
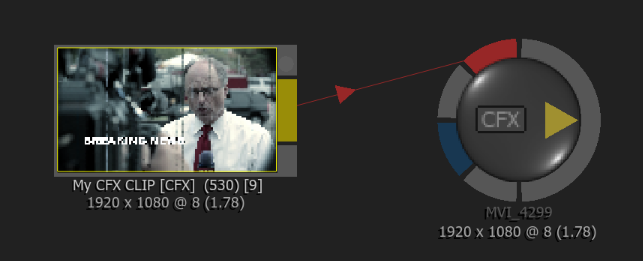
Here’s the catch. Even though this clip is rendered when you exit.. there’s still some rendering to be done. This honestly makes no sense and something I intend to point out to Autodesk.
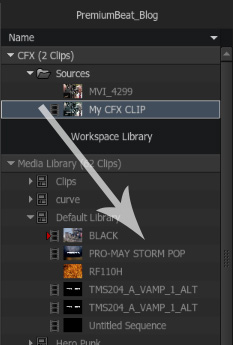
So there is a workaround for the workaround. Copy your rendered CFX Clip from the Sources folder to your library. Exit CFX, now just use the Replace hotkey [F11] to replace the original timeline CFX with your rendered CFX Clip. You can still go back and edit it as needed.
5. If you found an error, or wanted to change something, just make the adjustments in the nodes, delete the CFX Clip you made and create a new one.
Now you have an option to visually render your ConnectFX clips.
Tip #2: Copy Color Correct Effects
Often times you want to apply the same Color Correct effect across clips that all come from the same source. For example, if you are cutting a 2 camera interview, you make want to apply the same grade to all of the clips of your subject. Here is a quick way to copy color correction effects across clips in Smoke.
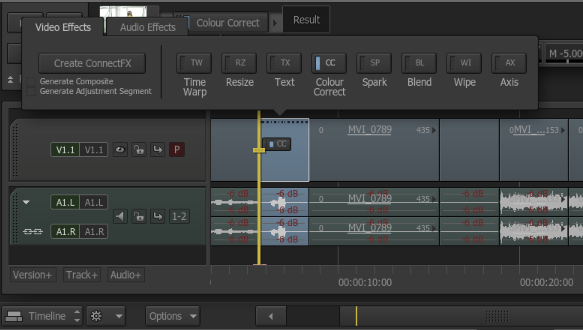
1. Add a CC or CW effect to your first clip.
 2. Now use the Timeline Search and Filter Tool to find all of the shots in your sequence that come from that same clip or “tape name”. The tool is accessed from the little Magnifying Icon in the lower right of the timeline.
The Search & Filter Tool is really a great way to highlight events in your edit. There are numerous selections you can make from, clip name, timecode, tape name, Cue Marks, and even use it to filter and highlight clips that have effects on them or transitions.

3. The easiest way to input the criteria you want is to press the “Get Information form Current Element” button which will populate the fields with the properties of the currently selected clip, or wherever the positioner is focused.
![]()
4. Choose Select on Current Track or All Tracks, whichever makes the most sense for you.
![]()
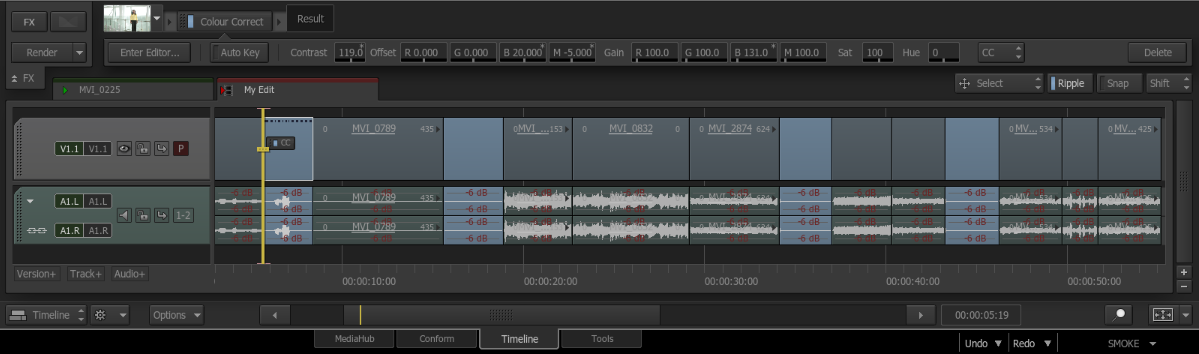
5. Your clips are now highlighted in your timeline.
You now have 2 options to copy your CC effect to all of the selected clips:
1. Copy your CC Effect into the Media Library before you make your Filter Selection. Then after your clips are highlighted, just drag the effect on to one of the highlighted clips and the effect will be applied to all of them or…

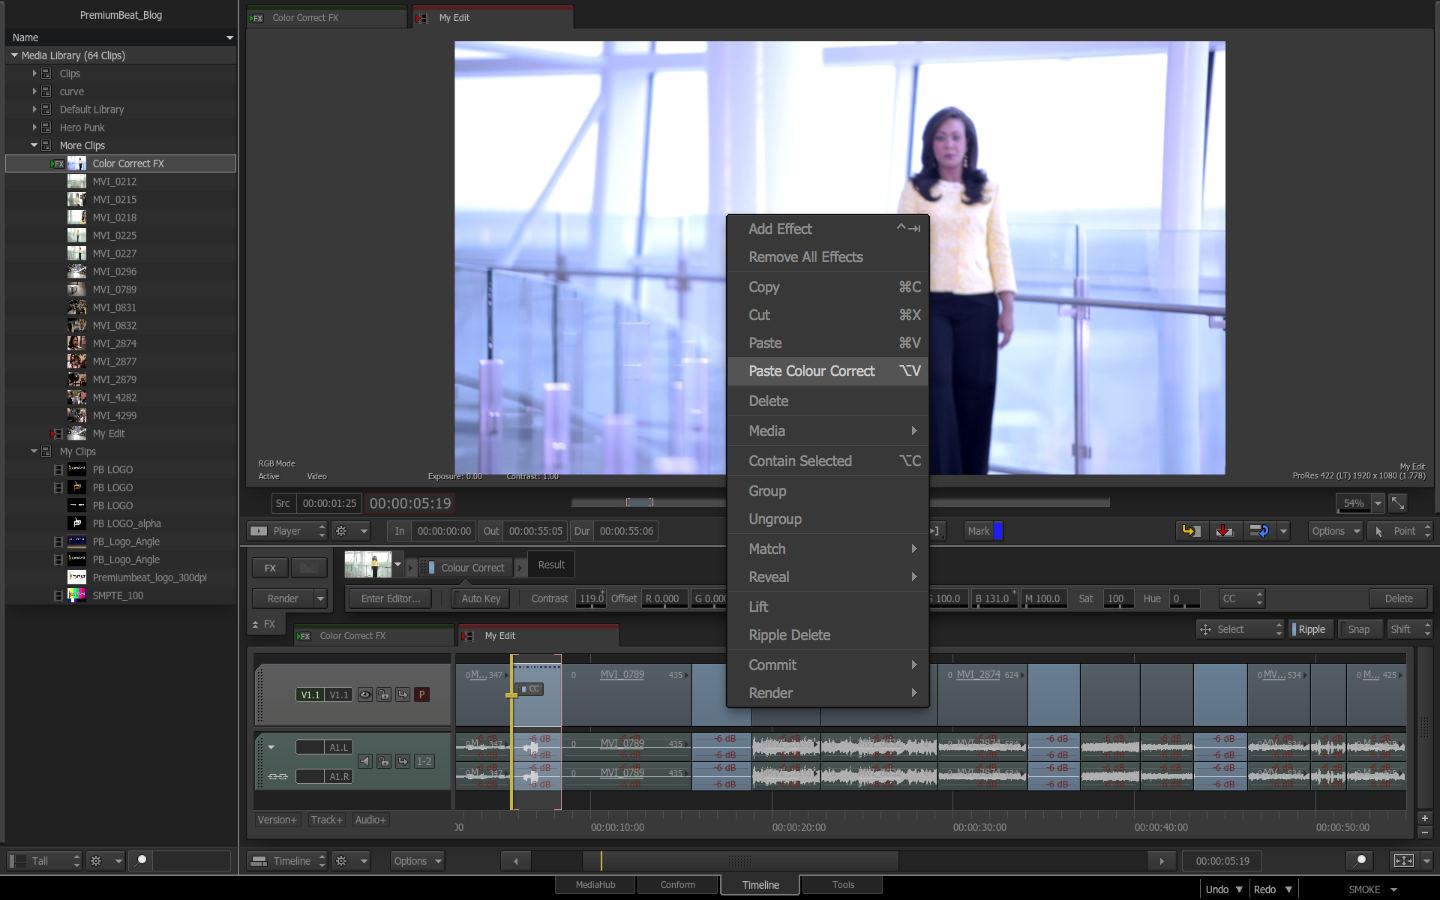
2. In the Effects Bar, right clip and Copy the CC Effect. Then right click on a highlighted clip in your timeline and choose Paste Color Correct.
If you try and drag and drop the effect from the effects bar, it will deselect your clips in your timeline. So use the saved effect from the Media Library or the copy/paste method. Now you can easily copy effects to multiple like clips in your timeline.
Tip #3: Change the Default Frame Rate
This tip will help you change the default frame rate for frame sequences that you import in Smoke. By default the frame rate of still sequences often come in at a frame rate that doesn’t match your project settings. The default frame rate is 23.98fps, so if you are in an NTSC or Pal Project, this can create some frustration for you. It is possible to change the frame rate via the UI in the Media Hub, but you often need to make this adjustment every time, and that’s annoying to the user.
Here is why this happens.
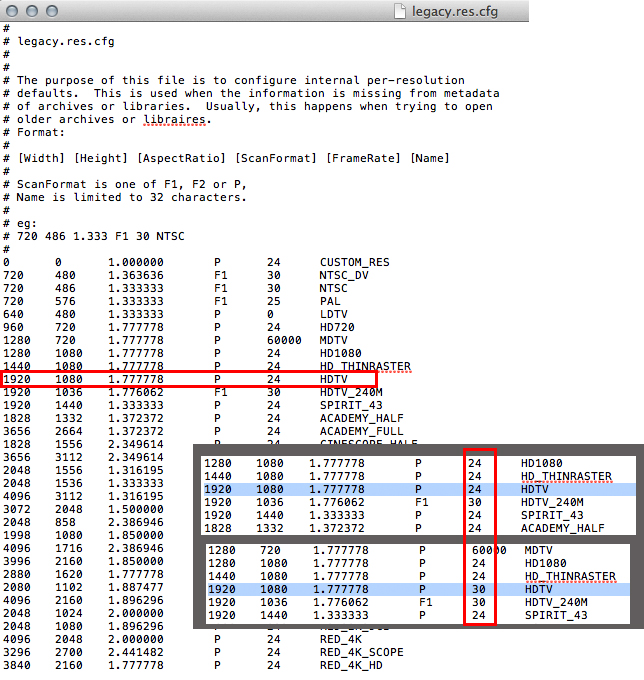
When a frame sequence is imported via the Media Hub, it will look at the header information for the file and read the frame rate. But some, if not many, frame sequences don’t contain header information. .Jpg, .Tiff, .Tga. for example don’t have the ability to specify frame rate. Sometimes DPX is detected wrong. So these frames get imported not at the project frame rate, like you would expect, but they default to a little known file in the Smoke configs. This file is the Legacy.res.cfg file in /usr/discreet/cfg. In the MediaHub Metadata Tab it will tell you if it’s getting the info from this file.

If the frame sequence resolution isn’t detected in the header, it will check it against this file. If it isn’t found in the file it will then default to the project setting.
If you work in consistent frame rates like I do. Then you can modify this file to force it to be the framerates your use most. Again this mainly applies to frame sequences imported without existing header information. Actual clips will still import normally with embeded frame rates.
1. Open Finder. Hit Shift+CMD+G. This will open the Go To Folder Option.
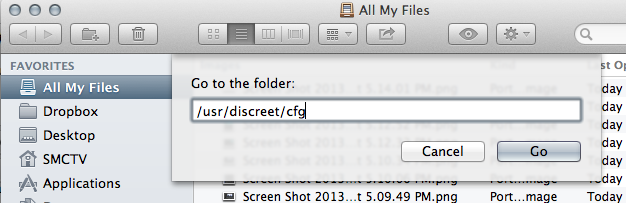
2. Type “/usr/discreet/cfg” (without quotes). Press Enter.
3. You may need to give yourself permissions to edit these files. I would give yourself permissions to the entire /cfg folder.
4. Open the Legacy.res.cfg file in a text editor.

5. Change the frame rate of the resolutions you import most often as frame sequences to the project frame rate you use most often (24,25, 30). Example: Change the 24 to 30 in the 1920 1080 line and that resolution will now default to 30 (29.97) fps for frame sequences.
NOTE: If you put 0 (zero) as the frame rate in the file it will default to the project frame rate automatically.
6. Save the file and restart Smoke to refresh the data.
In the Media Hub you can now import the sequence and it will be the new frame rate.

I hope that you find these tips helpful. If you have any questions, feel free to ask in the comments below. Keep checking back to Premiumbeat for more Autodesk Smoke information!


