How To Create A Stunning Custom Title Sequence + Free Ink Splashes
Whether it’s for a trailer or the opening sequence of a film, these assets can help you create attention-grabbing text slates or character introductions.
Any filmmaker or editor needs the proper skill-set and assets to create engaging graphics. You can use slate-style graphics for a number of different things, whether it’s to introduce a character, display some text on screen for a trailer-style edit, or reveal photos or elements of a story (like a documentary subject) in an interesting way.
One of the easiest ways to create motion graphics like this quickly (and, frankly, have a lot more fun doing it) is to use some practically and organically pre-shot elements to enhance the design. Rather than spending time painstakingly masking objects and adding textures to achieve a certain look, with a little bit of know-how, you can drag and drop some stock assets and make them work for you.
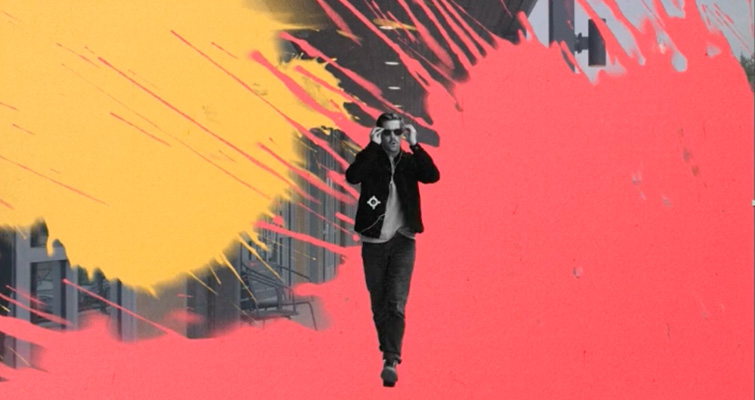
In this tutorial, we’ll show you how to use some elements from RocketStock’s new Hisan Ink Splash Elements pack to create some really cool and iconic motion graphics similar to ones you’ve seen in Guy Ritchie movies, movie trailers, and commercials.
Hisan — 50+ Ink Splash Transitions
The Hisan Ink Splash Transition pack is a great library of over 50 ink elements organically captured in 6k with a RED Epic (and finished out and released in 4k). There are a lot of different styles to choose from, including ink splats, ink spills, and some really stylish mirrored-style ink transitions. These elements will give your graphics and videos a visceral and unforgettable look.
If you want to give these elements a try and follow along with the tutorial, the download link below includes the necessary assets from the Hisan pack as well as a project file and the footage from the video.
Download the Free AE Project and Ink Splash Assets
Click the button below to download the free After Effects project file, footage, and ink splashes.
DOWNLOAD NOW
You can check out the whole pack in this video from RocketStock.
Setting Up Your After Effects Composition
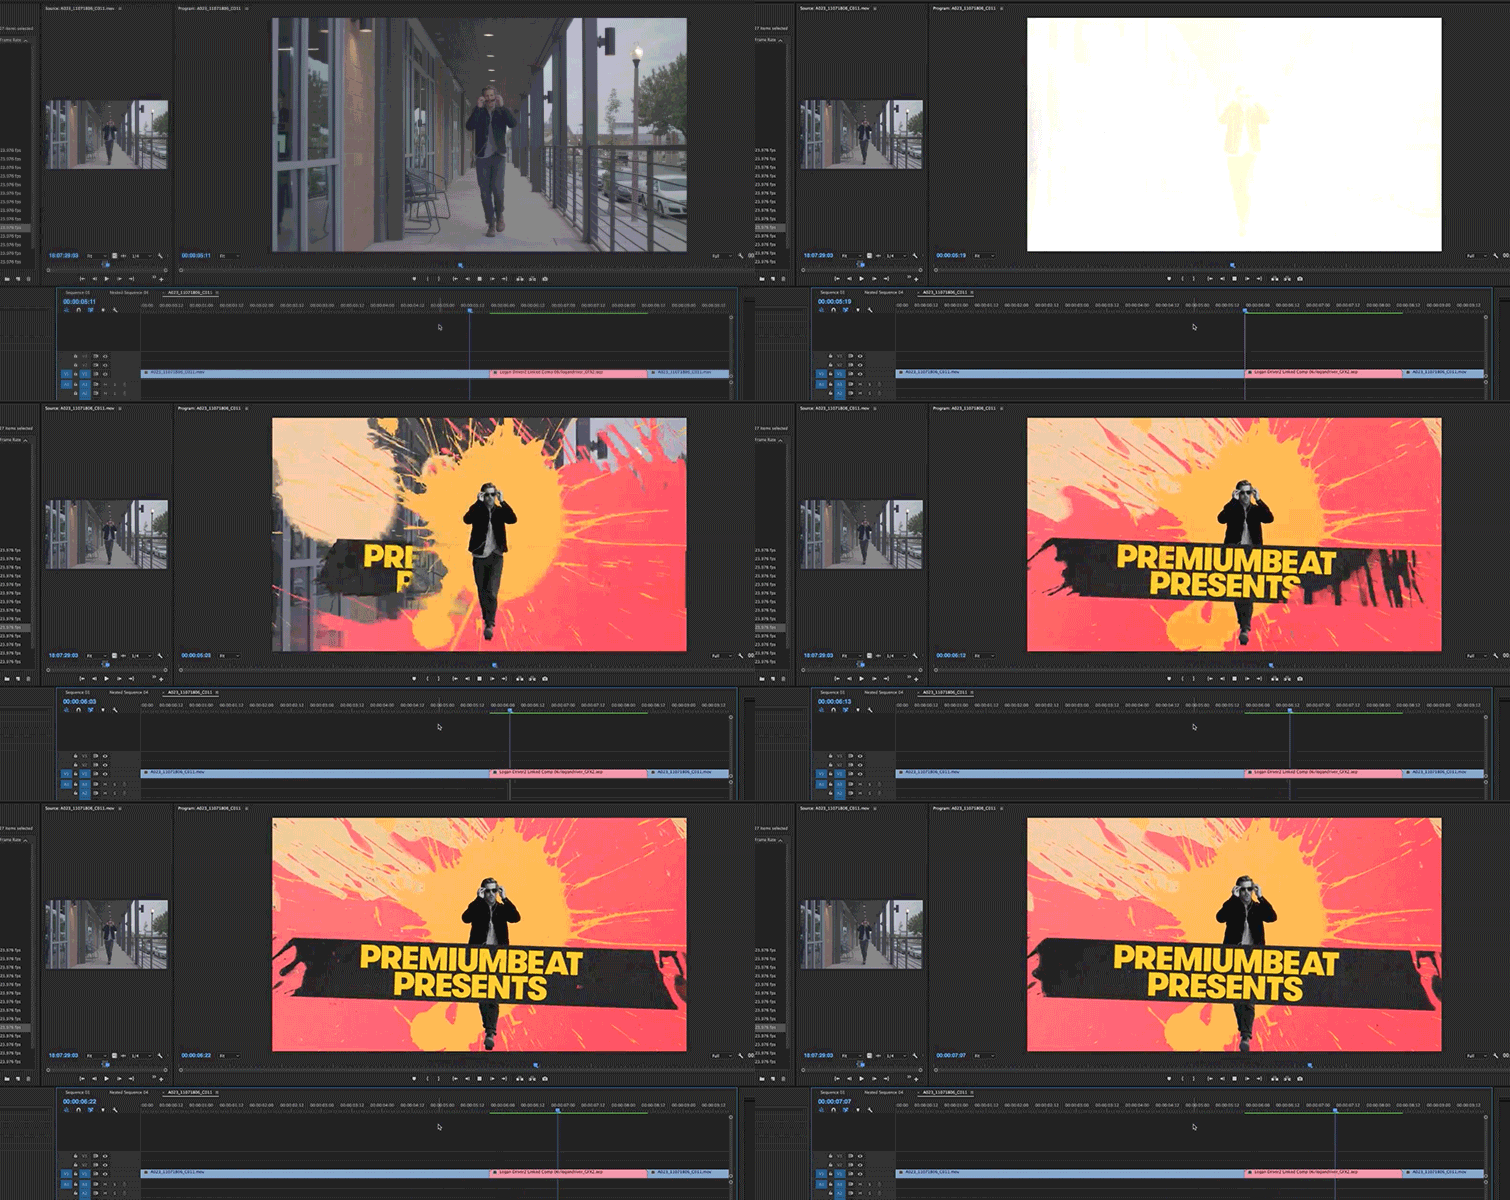
To get started, you need to set up your sequence with a still shot where you want to freeze your character. To do this, you’ll navigate to the part of your shot where you want to add the graphic, make a cut, and then scroll back one frame and select the export frame button. Select the .jpeg option, and make sure that “import into project” is selected. Next add that jpeg frame in the space that you created between the end of the shot and the front where you made your cut.
Next, you need to add a mask around your character so that you can isolate them from the background and start adding textures and elements behind them. While this part can sometimes take a while, it’s worth it to make sure that your mask is razor sharp around the character in order to properly sell the effect. Make sure to mask out any areas inside the main mask that should also have transparency (such as the areas around the character’s arm in the example above).
Start Adding Elements And Colors
Now is the fun part. This is where you can start taking your elements and adding them behind your character to customize your look. You can use the ink elements to reveal your texture of choice by putting the ink element layer above your texture and, in the track matte drop-down menu, selecting Luma Matte Inverted. This will take the luminance values of your ink layer and apply them as a track matte or alpha channel on your texture layer.
Once you have your elements revealing appropriately, you can start to add color. The easiest way is to add a Hue/Saturation effect to your texture layer — and make sure to select Colorize. This allows you to alter the hue, saturation, and lightness options to dial in the colors that you want to use.
Adding Text And Finalizing
The thing that’s great about using pre-shot elements to create graphics is that you can really enhance normal things like text and shape objects by using them for your reveals. In this case, we used some big bold text and allowed one of the ink spill transition elements to reveal the entire thing. In most cases, once you have created your text element, you’re just a few clicks away from making a really interesting text animation. Just add the ink element above your text, and again, select Luma Matte Inverted for your track matte option in the dropdown.
To finish out your graphic, you may choose to add a grow animation to the whole thing. To do this, you’ll need to make a new Null Object layer and parent every layer (aside from any grain overlays or adjustment layers) to it, and using the Scale property and some keyframes at the start and end, scale up by about 10% over the course of the animation. You can also add some flashes using solid layers, or add some new color correction to tie everything together using an adjustment layer. How you finish it out is mostly up to you.
Once you’re done getting everything how you like it in After Effects, if you’ve done everything properly, once you go back to Premiere, you can keep editing, and your graphics work should appear in your timeline just as you left it in After Effects. Now you can move on the next character introduction or graphic.
Thanks for our friends at RocketStock for providing the free ink splashes. Be sure to check out their site for incredible video assets and more AE tutorials.


