Preparing an Edit – A Simple Transcoding Tutorial for Producers/Directors

Got a producer who needs to know how to transcode your video footage into the correct format? These free tools will get the job done.

Next time your producer/director/client calls up asking you how they can prepare the footage for your edit, send them a link to this post to ensure they correctly format your footage so it really is ready to edit.
First we’ll make sure they copy the file based media correctly and then walk them through how to transcode video footage into something you’re most likely to want, like ProRes 422.
Step 1 – Copying your file based media correctly
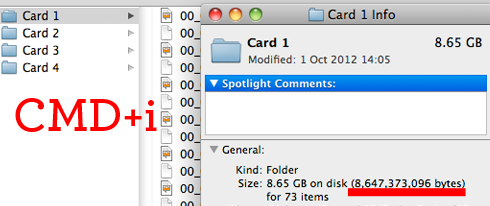
This is actually a very simple process if they have something like ShotPut Pro installed – which will copy the cards to multiple locations simultaneously (your edit drive and their back up drive right?) and do a byte-for-byte verification afterwards. But if they don’t want to fork out for that, then copying the entire card contents to a new folder and then pressing CMD + i on the original card and the folder of that copied card, will reveal the two sets of file size numbers that should be identical. This way you know that the card has copied everything.
Important cheesy acronym – ACE IT – Always Copy Everything!
If your producer/director is copying the cards themselves it is critically important that they copy EVERYTHING on the card, to keep the folder structure intact. This is important when ingesting the footage into NLE’s that need all the camera folders to be present to access the media. If your producer/director wants even more information on tapeless workflows and media management, point them here: Tapeless Workflow’s – Doing All The Right Things.
Step 2 – Downloading and installing the free tools
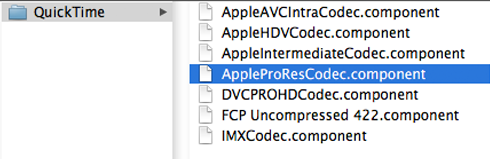
MPEG Streamclip from Squared5.com is one of the best free editing tools available. Visit www.squared5.com now to download it for either Mac OSX or Windows. Next get the free download from Apple of the Pro Res codecs. You will need to extract the pkg that you downloaded from Apple so that you can install the codecs manually in the Macintosh HD/Library/Quicktime folder on your local drive. To do this get this free tool from Tim Doug, then just drag the package onto unpkg’s icon and it will extract the contents into the same directory, with the same name. Open up this folder to see all the Pro App codecs. Drag them to your /Library/Quicktime folder and they will now be accessible in MPEG Streamclip and any other Quicktime based application.
Step 3 – Transcoding the footage with (free) MPEG Streamclip
We are going to use MPEG Streamclip to batch convert all of your video footage into Pro Res Quicktime files. Helpfully we won’t really have to change many of the default settings in MPEG Steamclip to achieve this.
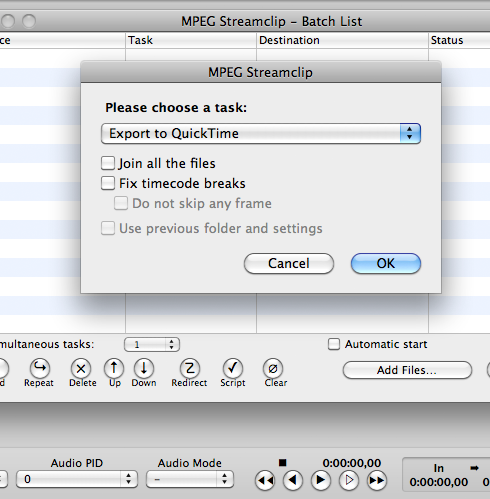
Open up MPEG Streamclip and press CMD+b to open the batch list. Then select all of the clips you want to transcode from your copied media card folder and drag them onto the batch window. Another smaller window will pop up. Just press OK.
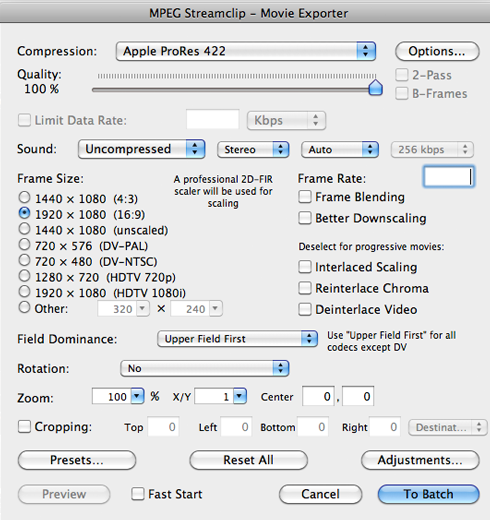
Next the main settings window will appear. You can leave most of these settings at the default. For example make sure that frame size is what you need – usually ‘unscaled’ is checked to keep the frame size the same as was shot, Also leave the frame rate box blank to keep the native frame rate of the footage. Drag the quality slider to 100% and choose Apple Pro Res 422 (or any flavour you want) from the drop down menu. You will probably end up with something looking like this…
Hit ‘To Batch‘ and all your files will fill up the Batch List. You can now add more files if you want and press ‘Use Previous Folder & Settings’ to transcode more footage into the same folder with the same settings. If you’re transcoding several cards of footage, it is better to send the transcodes to different folders (usually matching the original card name) for organizational clarity (example: Card 1 > Card 1 Transcodes)
When you are all set, simply hit ‘Go’ and then sit back and let MPEG Streamclip work through all your footage.
Got tips to share on media management?
How do you prefer to transcode your footage for video editing?
Let us know in the comments!