

What Is A Vectorscope? A Premiere Pro Tutorial

The vectorscope is an essential video scope for color grading or color correction work. In this post, we’ll examine how to use a vectorscope in Premiere Pro when tweaking skin tones and color correcting footage.

Like most video editing apps, Adobe Premiere Pro offers several video scopes to aid in post production. Video scopes provide quantitative data about the properties of a video image – much more detailed information than we can garner with our own eyes. Plus, everyone sees differently, so using a video scope is the only way to get an accurate assessment of the color and exposure of an image.
In this post, we’ll focus specifically on the vectorscope in Premiere Pro – where to locate it in the app and how to use it to improve your video image. Let’s jump in…
Accessing the Premiere Pro Vectorscope
Probably the best way to look at the ‘Vectorscope’ (apart from launching the ‘Reference Monitor’ as a floating window) is to use the Premiere Pro Color Correction workspace. To get this setup go to Window > Workspace > Color Correction. Then access the reference monitor (it should be directly below your program monitor unless, of course, you have customized your workspace in some way).
At first, the reference monitor displays composite video. However, if you click on the small icon (shown below) you can access the setting for the panel and then choose from a wide range of video scopes.
Spanner Icon – ‘Settings’
![]()
From this – about a third of the way down – click on the word ‘Vectorscope’ to get the following circular graph:
Vectorscope
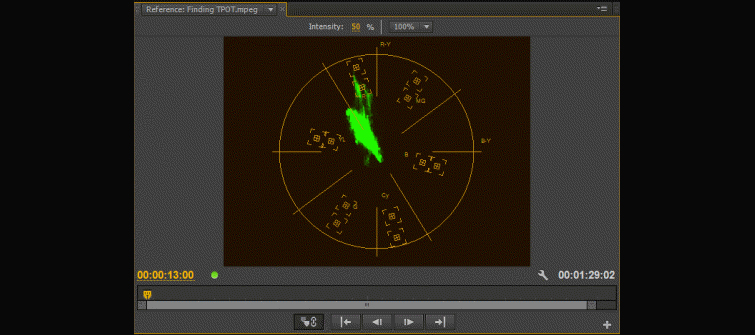
Obviously, your vectorscope will be different than mine, as you will be looking at a different piece of footage.
Reading a Vectorscope
OK, so what are we looking at? The first thing to point out is that a vectorscope has similarities to a color wheel (as can be seen from this color wheel from the Fast Color Corrector effect):
Fast Color Corrector Color Wheel
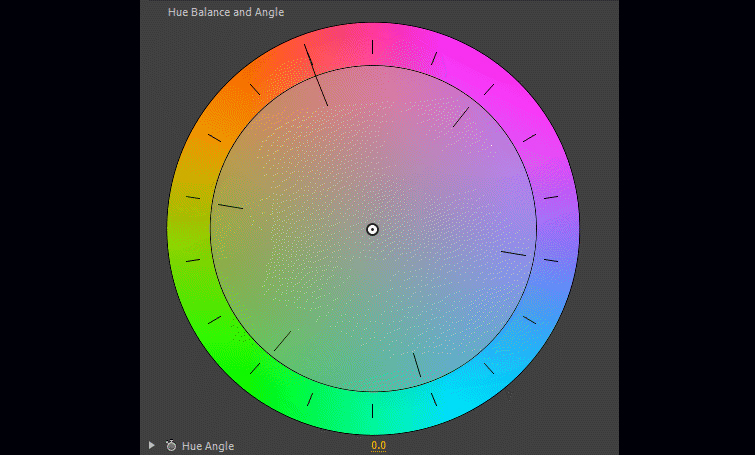
A color wheel shows ‘Hue’ in terms of 360 degrees starting at red and going around the circle to end up back at red again. The vectorscope is also displaying color in the same places as seen in this color wheel, with red to the top left, cyan to the bottom right etc. So when we see a line or dot in the vectorscope we can quickly see that it is giving us information about the color or ‘chrominance’ of a shot. This information is essentially the ‘Hue’ (or the specific color) and the ‘Saturation’ (or the strength of that hue) of the colors in your shot.
The vectorscope shows us how strong a particular color is by the length of the line out from the middle of the wheel. The longer the line, the stronger (or more saturated) the color!
All vectorscopes have small color targets:
Target Points on a Vectorscope (Magenta and Blue)
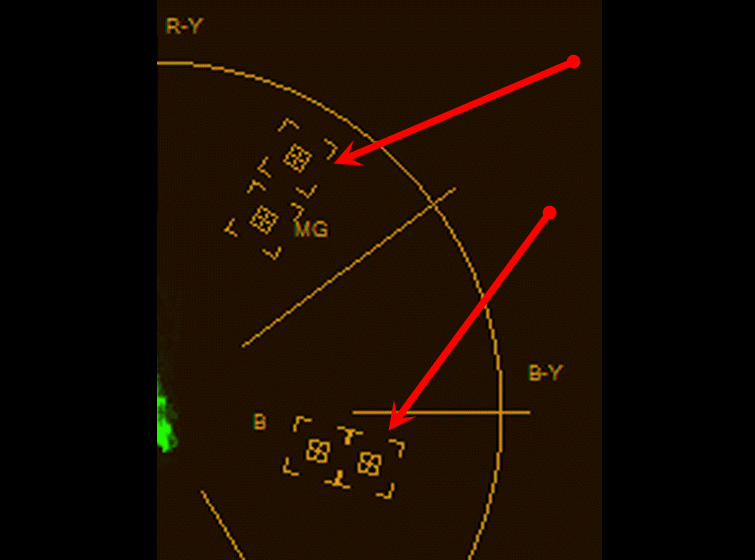
These vectorscope points are linked with a little drop-down that has is essential to reading the scope:
Vectorscope Drop-Down
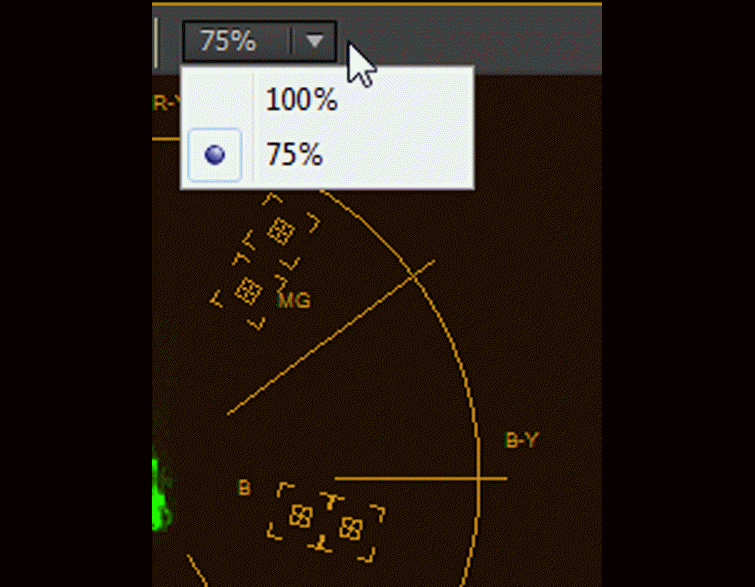
The default is set at 75%. What this means is that when you look at the two little targets in the vectorscope, the little box in the outer most target represents 75% saturation of a given color. For typical broadcast systems you should not go over that 75% limit as that will probably take you into what is called ‘illegal’ colors or ‘non-broadcast safe’ colors.
As always, you should check with your customer for their delivery specifications, but as a rule of thumb don’t go over 75%.
However, if the drop-down has been set at 100% then both of these little targets change with the inner box now being the 75% point and the outer box being the 100% (or total saturation) point.
Let’s take a look at how this translates when working with a video image in Premiere Pro. Start by creating an ‘HD Bars and Tone’ by either selecting it from the new items icon or by going to File > New > HD Bars and Tone …
Then drop this item onto the ‘New Items Icon’ to create a sequence with it. Now, have a look at the vectorscope:
HD Bars and Tone Readout in the Vectorscope
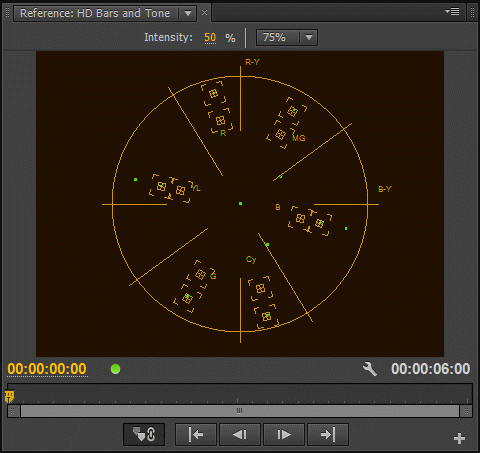
As you can see, little points of green light are placed at the 75% point for some items as well as at what would be the 100% point for others. Using color bars in conjunction with a vectorscope is actually a really great way to calibrate any reference monitors or displays that you may have attached to your system! In this instance the colors are represented just as dots because they are set colors and not gradients.
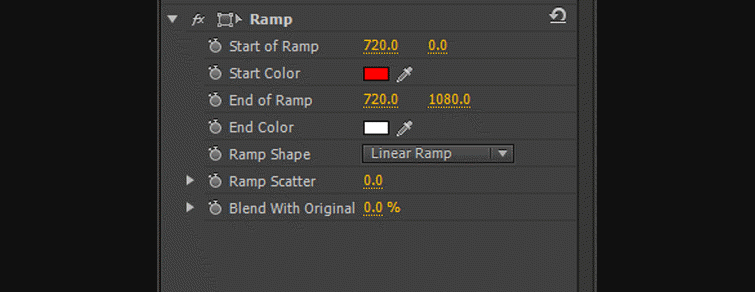
Let’s try adding a gradient ‘Ramp’ effect to a piece of footage. Change the ramp end colors as shown below (pure saturated red and white) …
Ramp End Colors
… your vectorscope will look like this:
Vectorscope Looking at a Ramp
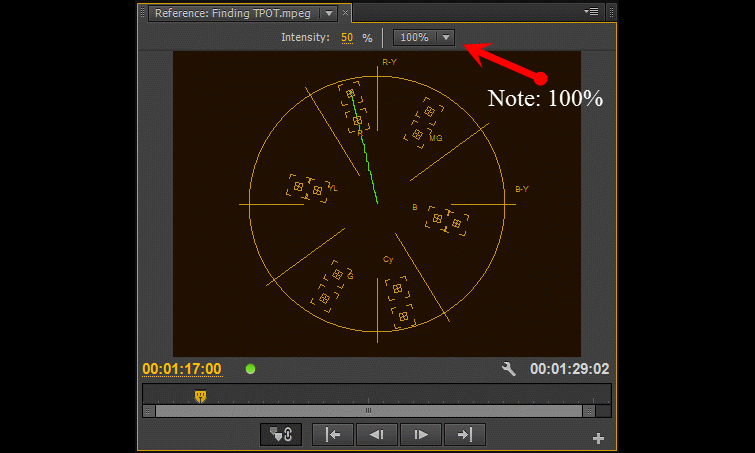
Note that this scope is set up to see 100% and that the end of the ramp which used saturated red is at the 100% target in the scope. However, as the color gets less saturated the line moves to the centre of the graph.
Also note also that this has nothing to do with brightness. I could have set the end of the ramp at pure black and the graph would have looked exactly the same.
You can also see an ‘Intensity’ option in the Premiere Pro vectorscope (default being 50%). However, this is only to do with the brightness of the display of the graph and will not affect your clips in any way.
Skin Tones & the Vectorscope
One really useful feature of the Premiere Pro vectorscope is the often used ‘Skin Tone Line’. This is the line on the scope between the Red and the Yellow sections at about the 10:30 or 11 o’clock position:
Skin Tone Line
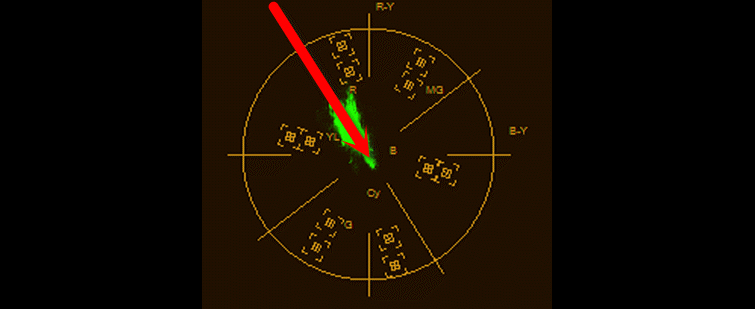
The skin tone line in the vectorscope represents the color of blood flowing through human skin. Regardless of the ethnicity of the person you’re filming, you can use this line to check the accurate representation of their skin tone color. The closer their skin tone appears to this line the more accurate the video image is to ‘real life’.
The problem, of course, is how to just look at the skin tones in a shot, when there are so many other colors in the image? The trick then to color correcting skin tones in Premiere Pro is to use a garbage matte. First, access the garbage matte:
Video Effects > Keying > Four-Point or Eight-Point or Sixteen-Point Garbage Matte.
If you apply this to the video clip you can then click on the name of the effect or the small icon next to the effect as shown below …
Icon to click to get points to adjust in the program monitor
![]()
Then pull the points so that they just cover skin of the person in your shot.
Adjusting the Points

Points Just Covering Skin
Once you’ve done this, have a look at your Premiere Pro vectorscope and see how close the end result is to that skin tone line:
Vectorscope Looking at Just Skin
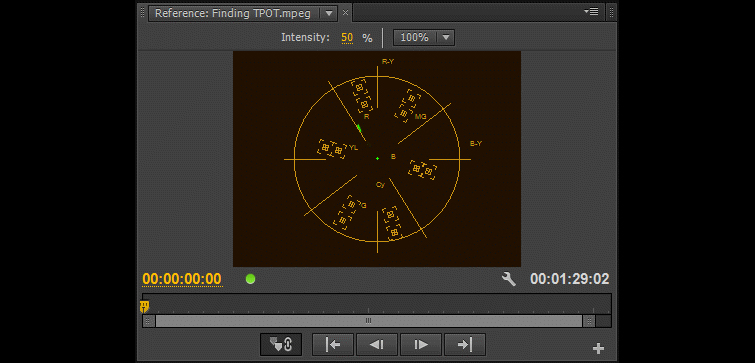
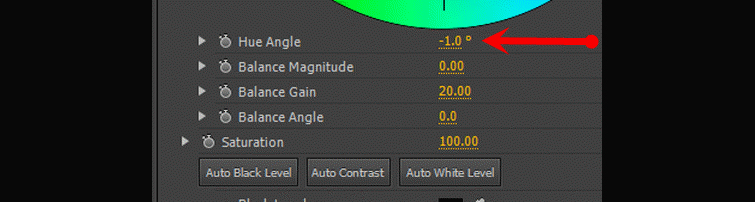
As you can see, this has ended up very close to the line. To move it, all I would have to do is apply the ‘Fast Color Corrector’ and tweak the ‘Hue angle’ until it is exactly over the line.
Hue Angle Adjustment
As you can see, the Premiere Pro vectorscope is a really useful tool to show you if your colors are broadcast safe, as well as providing an accurate representation of skin tones in your video image. However, before you make adjustments to your skin tones make sure that you have done other tasks such as white balancing your clips and basic color correction. Skin tone adjustment should really be a task done towards the end of the color correction process rather than at the start.
Although the vectorscope is important for determining the hue and saturation of colors within a shot, don’t forget to let your eyes help you in this process. If it looks odd after you’ve made a change, chances are it is odd! So, make a change, look away and then come back and check again.
Got color correction tips to share?
We want to hear from you in the comments.


