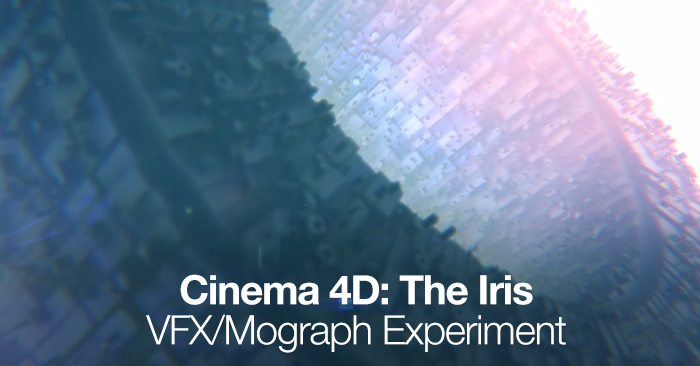
Cinema 4D: The Iris – VFX/Mograph Experiment

Maximize basic geometry from Cinema 4D with plug-ins from After Effects.
Whoa! We love this animation created in Cinema 4D and After Effects by motion design pro Aharon Rabinowitz. In the follow up tutorial, Aharon provides a load of insight into how simple geometry can be used, in conjunction with some really cool plugins, to create an interesting and detailed 3D animation.
VFX Breakdown
In C4D Aharon creates a simple polygon object and then uses the C4D plug-in called Greebler. This plug-in allows for the addition of multiple artifacts in varying shapes and sizes on top of your geometry. Once the desired settings are in place through the Greebler plug-in Aharon exports the project out as a OBJ Sequence. He uses an add-on from AEScripts called the Plexus OBJ Exporter to export out an OBJ Sequence.
Once the sequence has been exported he moves into After Effects. In AE he utilizes a number of plug-ins and add-ons such as Video Copilot‘s Element 3D, of which Version 2 is releasing this November. One of the issues that Aharon has with importing his sequence into Element 3D is the carry over of the UV Mapping. Since he exports it out as a sequence rather than an object, the texture mappings setting are different in Element 3D, which restrict mapping.
After applying a standard material preset in Element 3D Aharon adds lighting, fog, ambient occlusion and depth of field through standard AE effects. Then he uses a combination of Red Giant plug-ins such as Knoll Light Factory EZ, Magic Bullet Looks, Mojo and Trapcode Shine.
This is a great example of using a multi app, multi plugin workflow to impressive effect.