Color Grading Quick Tip: Non-Absolute White and Black Points

Not every shot has an absolute white or black point. In this post we share a quick tip for color balancing your video footage!
When doing the balancing and matching step of color grading, one of the corrections you have to make is to set the exposure and contrast of the shot. The white and black points of the image are important things to focus on using your waveform monitor, but it’s important to realize that not every shot has an absolute white or black point that fall on either 0 (or 7.5) IRE or 100 IRE on the waveform. The white and black points of a shot need to be decided based on the context and content of the shot. Look at these examples:
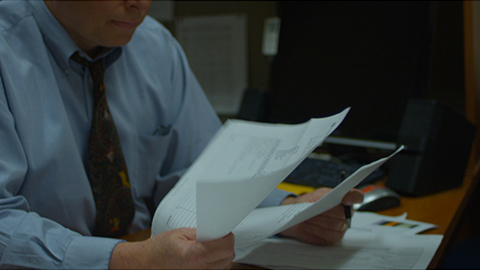
Even though this shot has something that’s pure white in it (the paper) the content of the shot tell us that the paper shouldn’t hit 100 IRE on the waveform, because the paper would be blown out. The white point for this shot should probably be between 85-90 IRE – basically, the paper should look white, but not “glow.”
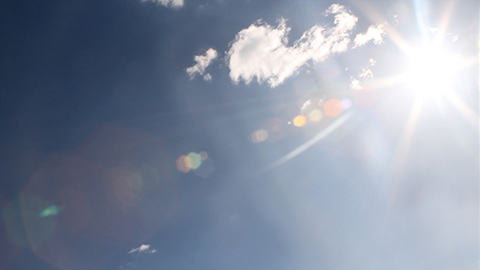
In this shot, we have an obvious white point with the sun, but even though the sky gets darker at the edge, there’s nothing that should be deep in the shadow range, or anywhere near 0 IRE.
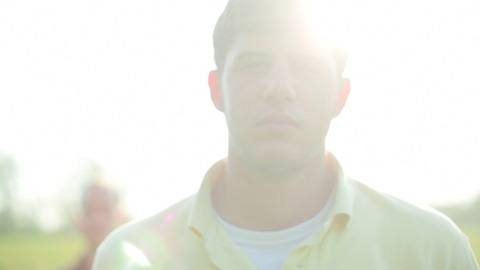
Context is important, especially when the sun is involved. A shot with a bright lens flare may not have an absolute black, even if the shot normally would if the lens flare wasn’t there.
When balancing and matching quickly, avoid just glancing at the waveform and cranking up the highlights to 100 and the blacks down to 0. Look at your shot and judge where the white and black point should really be!