Managing Transition Behavior in Final Cut Pro X

Every time you add transitions, is the duration of your show getting shorter and shorter? Change this behavior by quickly adjusting some basic Final Cut Pro X preferences!
UPDATE: Since FCPX version 10.0.3 all transitions are applied using “avaliable media” – using the media that exists outside of a clips preexisting in and out points. If there is not enough media avaliable to complete the transition FCPX will prompt and ask if you’d like to create a “full overlap” transition instead.
When you add transitions in Final Cut Pro X, the default behavior is to use your material already edited in the Timeline, rather than to use material from your shots’ handles. (Drawing from shot handles is, of course, the “old” way of doing things in previous versions of Final Cut Pro, as well as most other editing software.)
So, what does this mean? Well, this new way of doing things results in the duration of your A-side and B-side shots—as well as your entire sequence—becoming shorter with each transition you apply. This is certainly not always desirable, especially when you have timed out your show perfectly. In fact, I’d argue that you’d almost never want to apply transitions in this way, since good editors spend a lot of time finding the perfect IN and OUT points for each shot—and you don’t want to compromise that by 15 or 30 frames per edit. After all, editing is all about precision—often down to the single frame.
Let’s go quickly over the mechanics of adding a transition, and then discuss how to solve potential problems.
To add a transition:
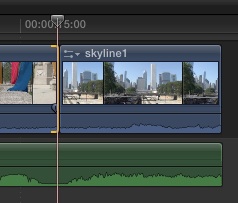
- While in Selection Mode, click on a transition, and press Command+T. (The default transition type is the cross dissolve.)
Pre-transition: Sequence is 17:18, and aligns perfectly with the music.
A transition is added. By default, it is one second long and centered on the cut, with 15 frames from each side having been used to create the transition. The duration of the sequence is thus shortened by one full second. Notice that the connected audio, which was previously perfectly aligned with the B-roll, now extends a full second beyond the end of the video.

Post-transition: Sequence is 16:18, and now stops a full second before the music ends.
Ok, so this type of behavior is fine for shots that you just throw into the Timeline, without any dependence on sync elements such as narration, music, sound effects, etc. But for the majority of projects, clips in your Timeline hardly exist in a vacuum. Therefore, randomly shortening your shots and potentially throwing your sequence out of sync can be quite detrimental.
To switch transition behavior back to “traditional” methods:
- Choose Available Media from the Apply transitions using drop-down menu within Final Cut Pro X Preferences (Command + ,)

By switching to Available Media, you’ll avoid undesired shot reduction and sync drift. (Of course, this does introduce potential new problems when you don’t have enough “clean” extra media in your handles to create a cross dissolve. For instance, if your handle contains a few frames of your show slate, that image will appear in your transition.) But, with a little rippling and/or shortening your transition duration, this is easily solvable.
Note: One way to make sure that you have enough clean transition media is to use the Precision Editor, which you can learn about in this PremiumBeat video tutorial.
What if you want to get rid of a Full Overlap Transition?
If you decide that you need to change your transition type (for any or all of the reasons outlined above), do not simply delete your Full Overlap transition! If you do this, your project would still be shortened by one second. Because rather than restoring the media, FCP X instead creates a brand new edit point in the middle of the now-deleted transition. So, if you want to restore the media, you should instead press Undo (Command+Z). If you can’t Undo, you will need to Ripple the frames back into existence, and then re-apply the transition using the Available Media method.