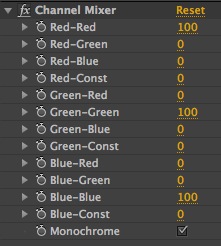
Using the Channel Mixer for a Better Black-and-White

Use the channel mixer to create great monochromatic looks that are much more dynamic than a plain desaturation!

When working on a black and white color grade in your video editing projects, typically the only tools people reach for are desaturation and contrast. However, there’s a better way to get your black and white look, and to have a lot more flexibility in the final outcome.
In this post we’ll share how to use the monochrome channel mixer in Adobe After Effects to give your video a custom black and white treatment.
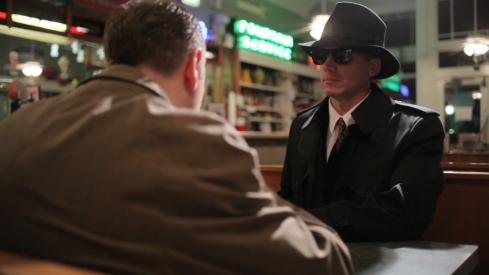
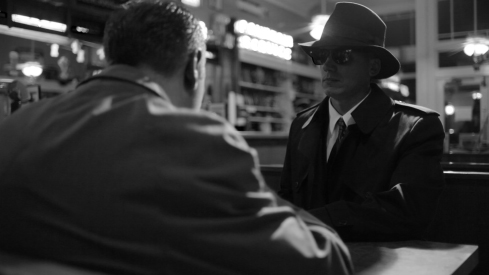
The channel mixer is an effect that mixes the amount of red, green, and blue in each individual RGB channel. It can be a little hard to work with in color, but there’s a “monochrome” checkbox at the bottom, and the black and white controls are a lot easier to use. When you’re in monochrome mode, only the red channel controls work, but you can control the brightness of each channel. With this you can basically re-light the shot. It’s easier to see with an example, so we’ll work with this shot:
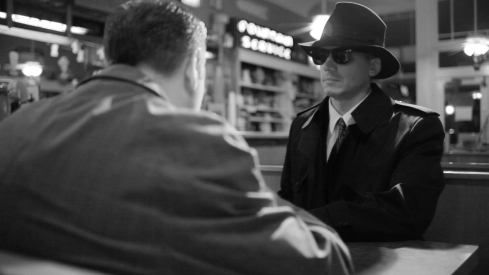
Here’s the basic black and white look; not bad, but a little bland:
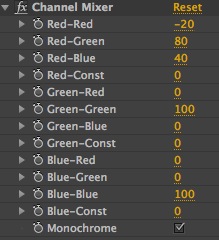
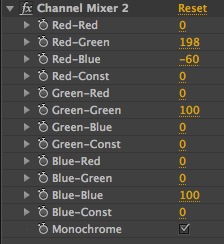
Here’s a look at what we can do with a little channel tweaking. Since most of the color in our skin is in the red channel, look what happens when we lower that channel, then raise the others to compensate for exposure:
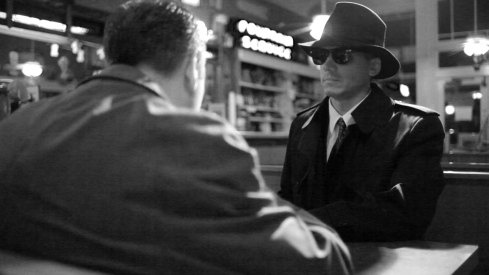
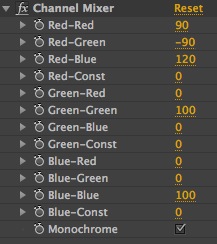
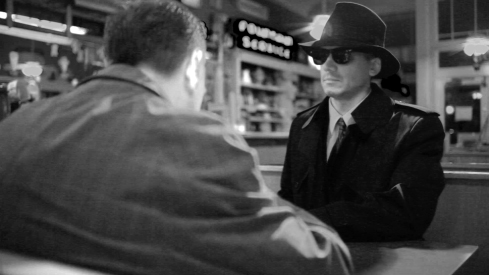
Much moodier now that the mysterious man’s face is in shadow. If you raise the blue and drop the green, it does a great job of darkening the background between the two men and removing some of that distraction:
Cranking up the red channel and dropping the other two brightens up the skintones, increases contrast, and even brings down the exposure on that sign in the background:

Cranking the green and dropping the red and blue brings the background way up for a super bloomy look:

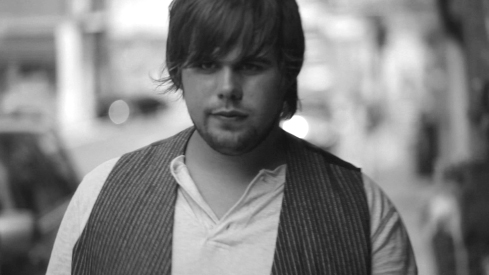
One example where using the channel mixer in After Effects is particularly useful is with close-up shots of talent. Notice how with the default black-and-white the lips don’t really have tonal definition.

By lowering the red and blue channels and raising the green, the contrast in the skintones is raised and you start to see good definition, especially with the lips:
The channel mixer in After Effects is a great tool for better flexibility with your black-and-white looks. Get finer control over skintones through the red channel and the ability to re-light shots.