Pro Tip: How to Create After Effects Assets in Adobe Illustrator
Designing your own motion graphic assets makes your animation unique. Here’s how to easily create After Effects assets in Adobe Illustrator.
We’ll start by creating everything in Adobe Illustrator and then moving it all into After Effects. The beauty of creating in Illustrator is that the elements are vector based, so we can scale them as needed once we bring them into After Effects. The most important thing to keep in mind here is that we will be working in layers. It’s very easy to go straight to creating once you open Illustrator — and that will put everything on a single layer.
Drawing the Asset in Illustrator
The reason we are creating different elements on separate layers is because each layer, when imported into After Effects, will become its own layer in the composition and can be animated individually. If all of the elements were made on one layer in Illustrator, they will all merge together in After Effects, essentially being no different than a still image.
First, create a new document (File -> New). You’ll want to set the resolution to the same size that your After Effects comp will be. For this example, I’ll go with 1920×1080. Be sure your color mode is set to RGB.

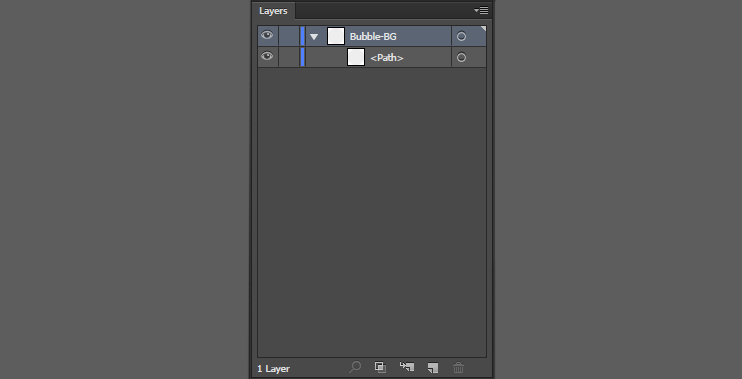
Now we can begin creating. I will be creating a set of animation icons and want my final animation to take place on a bubble, so I’ll create that first in the bottom (currently the only) layer. Notice that I’ve named the layer — whatever you name the layer in Illustrator is what the layer will be named in After Effects.
It’s very important to keep things organized as you create; you don’t want to get forced into a distracting game of Where’s Waldo with your layers. 

I’ve created a new layer for the person icon I drew at the bottom (aptly named “GuyAtBottom”). This will allow me to animate the “Bubble-BG” and “GuyAtBottom” layers independently when I bring this into After Effects.

For the next icon, I have a chat bubble with four circles in it. I want the chat bubble itself to animate on the screen. Then, after the chat bubble is completely on the screen, I want the little circles inside it to animate on one at a time. In this situation, I need to put the bubble and each circle within it on their own layers.

We’ve only got two little icons and a simple circle background, but we’re already at seven layers. This is why it’s important to label as you go and not come back to do that afterwards. Not labeling your layers properly is why we can’t have nice things.
For the third icon, I have four buildings that I want to animate individually as if they’re growing out of the ground. But while I was creating them, I got too excited and forgot to put them on their own layers.

Easily fixable — just create a new layer for each building so you can separate them. Then select the second building only (the first building will stay on our current layer).
Now, hit cmd-x (Mac) or ctrl-x (PC) to cut the building. Select the new layer you created for the second building. With that layer selected, hit cmd-shift-v (Mac) or ctrl-shift-v (PC).
This does what’s called a ‘paste in place,’ which pastes whatever you’ve cut or copied in the exact same place that you cut or copied it from. However, since we had the new layer selected, the building was pasted onto the new layer instead. Now we can separate the other buildings as well.


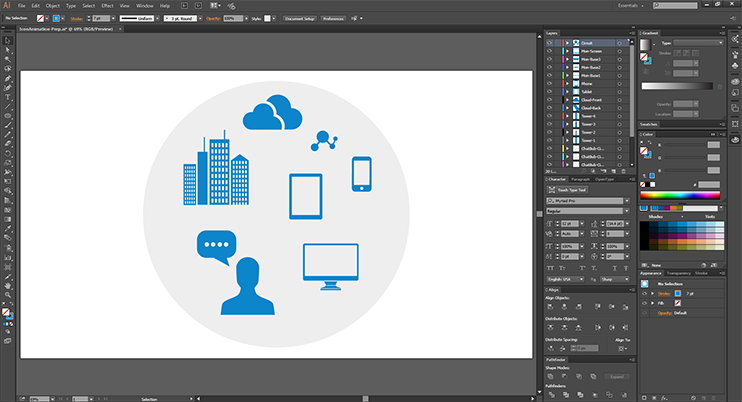
I’ve now separated the towers. I also went ahead and created a few extra icons that I want to animate in After Effects using the same technique. Time to bring this into After Effects. To save your project, simply hit cmd+S on a Mac or ctrl+S on a PC.

Importing the Asset Into After Effects
Once you have After Effects and your project open, go to File -> Import -> Files.
When the dialog box pops up, select your Illustrator project file. At the bottom of the dialog box, be sure you tell it to import as “Composition – Retain Layer Sizes.” This tells After Effects that you want to work with your layers and to keep the bounding box at the edges of the layer and not at the edges of the entire comp. If you imported it as footage, it would merge all of your layers together.
Now that the Illustrator project is successfully imported into After Effects, you can see that a comp has been created for us. When you open that comp, you can see that all of your layers are there from Illustrator. Also, the individual layers can be found in the project tab and used elsewhere within your animation.

Pro Tip: If you’re working in After Effects and notice that the shape of one of your icons (or whatever you’re making) is off, you can go back into Illustrator, fix the shape, and save the project like normal. When you alt-tab back to After Effects, the change will take effect without messing up your animation. Just be sure that you don’t MOVE the asset in illustrator; this could throw your animation off.
Since I made each asset on its own layer, I can change the color of each. added a slight drop shadow to the circle, and animated each layer as I saw fit.
![]()
Next time you have a motion graphic you need to get done quickly, use this technique to see exactly what it’s going to look like on the final frame. You can show the client a near-final looking still frame without losing valuable animating time.
If they decide to change one of the icons (or whatever you’re making), you can replace the content in that layer in Illustrator and all of the animation keyframes and attributes you’ve applied to the layer in After Effects will still be there, but with the new icon!
Want to learn more about animating in After Effects? Check out our 15 After Effects Tutorials Every Motion Designer Needs to Watch post here on PremiumBeat.

