How to Fix the Media Offline Error in Premiere Pro

Follow these quick steps to fix the Media Offline error in Premiere Pro.
Anytime you move, rename, or delete a video file that’s referenced in your Premiere Pro video project, you will get the Media Offline error code. This error code can easily be fixed by simply linking to the original file. The following step-by-step tutorial will show you how to ‘relink’ your files and get rid of this classic red screen error code.
Step 1: Locate Missing Clip in the Project

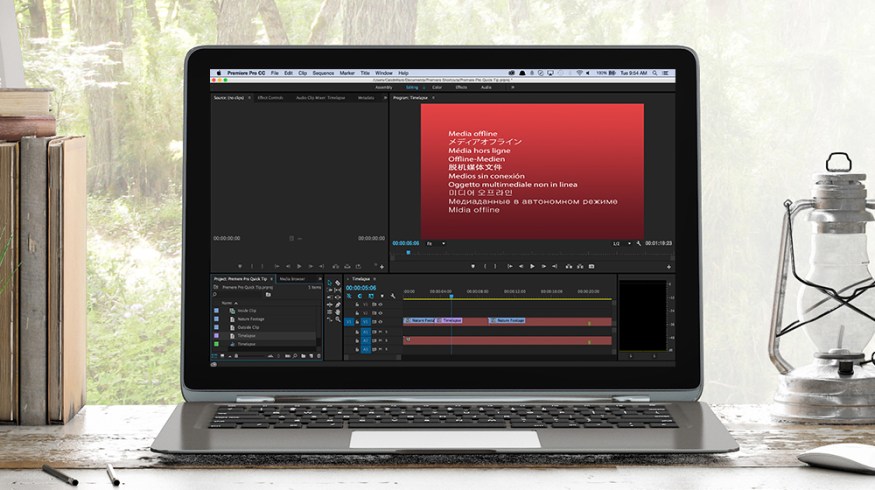
Anytime Premiere Pro can’t find a media asset on your computer, you will see a red Media Offline screen. The first thing you need to do is find which clips are offline in your project. To do this, simply navigate to the project panel or hit Shift + 1 on your keyboard. You’ll see in the project panel that your missing clips have a small question mark icon on them. Select all of the missing clips, right click, and select Link Media.
Step 2: Locate the Original File

Premiere Pro will pop up a box called a media browser. The media browser works very similarly to a regular media browser (like Explorer on PC or Finder on Mac). Simply select the file you wish to link to and select Locate. Find the clip that went missing and click OK. If you received the Media Offline error because you moved a folder to a new location, your other missing clips might automatically get linked as well — it all depends on the original folder structure. Continue this process for all of your missing files.
Step 3: Verify the Files

There shouldn’t be any issues at all with your newly linked footage. Just to be sure, go back and see if everything looks good in your project. If you accidentally connected to a proxy file (or simply the wrong footage), you can replace the incorrect file by right clicking on the incorrect clip in your project panel and selecting Replace Media. You can then simply repeat Step 2.
Have any tips for linking footage in Premiere Pro? Let us know in the comments below.