How to Properly Export Video for Facebook
Expand your reach exponentially and build your audience quickly with this tutorial on how to export video for Facebook.
As filmmakers and videographers, we should constantly be trying to push content out through the web – and in particular, on social media platforms. With that said, there may be no better social media platform to expand your reach than Facebook.
When exporting with Premiere Pro CC, Avid, or Final Cut, there are a few settings that Facebook recommends:
- H.264 video with AAC audio in MOV or MP4 format
- An aspect ratio no larger than 1280px wide and divisible by 16px
- A frame rate at, or below, 30fps
- Stereo audio with a sample rate of 44,100hz
Facebook also drops this reminder to anyone exporting video for the site: Keep in mind that videos must be less than 40 minutes long. The longer your video is, the larger its file size will be. This may affect the quality of the video.
Utilize YouTube
While you can upload videos directly to Facebook, we recommend using other sources to store your video content such as YouTube and Vimeo. By doing this you can embed YouTube videos into your Facebook timeline. This not only increases your viewership on Facebook, but it also links to your YouTube channel, which expands your audience reach.
For an example, KingTutsPro gives a short run-through on how to properly export videos for use with YouTube. Note that he is using Premiere Pro, but the settings used here are pretty standard, as noted above from Facebook.
Also, Rudy Washington from TeachMeYoutube.com gives us a short and simple way to embed those videos into our Facebook timeline.
Export Videos Using Premiere Pro CC
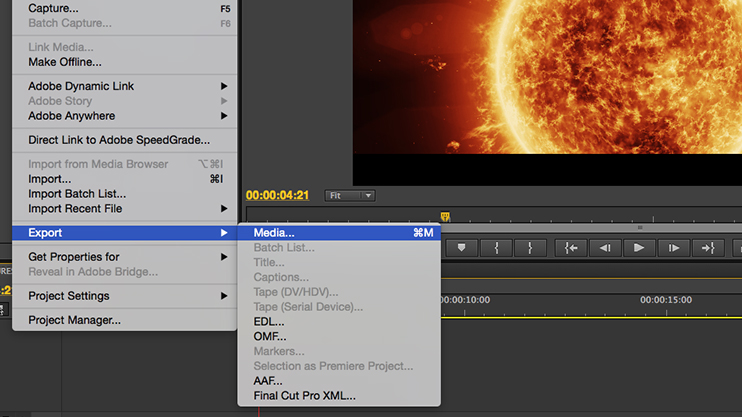
Once you have your edit done, you will want to export your video for Facebook. Go to File > Export > Media.
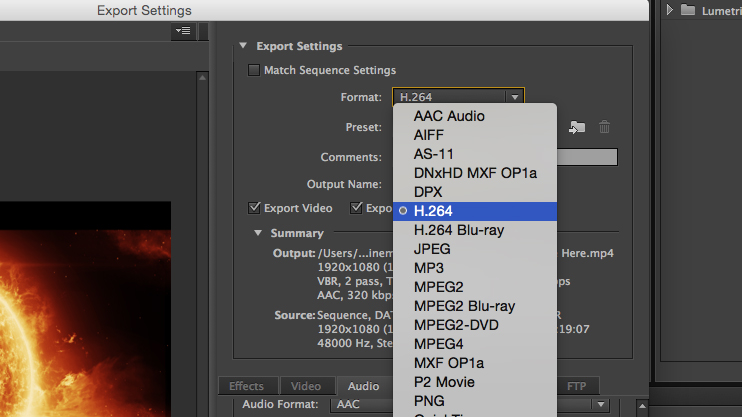
Next up, let’s set our Video Settings. Be sure to select H.264 and then, under the presets for this particular format, you should have a wide variety of options.
We tend to use the YouTube 720p or Vimeo 720p preset, but you can use which ever preset you feel comfortable with.
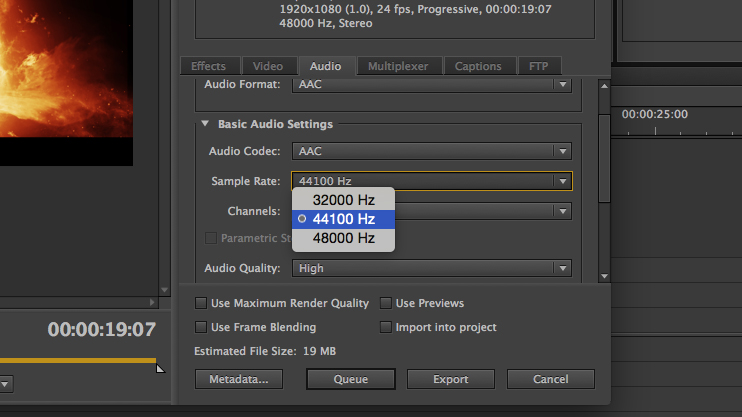
Finally lets make sure our audio settings are correct and then export. Select the Audio Tab and make sure the sample rate is set for at least 44100Hz.
Once you’ve done this, all you need to do now is name the project and pick an export location. Then click Export and wait for the process to complete.
Using Avid Media Composer
Avid Media Composer is a little more involved when exporting with specific settings for Facebook. First, let’s start off as usual by going to File > Export.
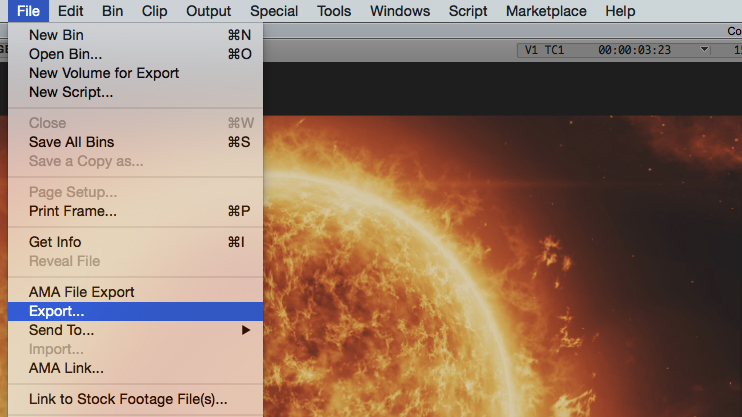
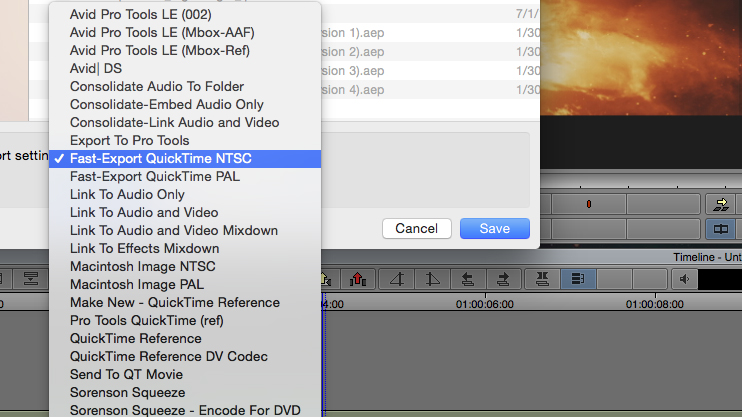
Now, you’ll want to set your export location first. Once you’ve done that, select the Export Settings preset.
I’ve found Fast-Export QuickTime NTSC to work really well. Now, click the Options button located directly underneath the Settings drop-down menu.
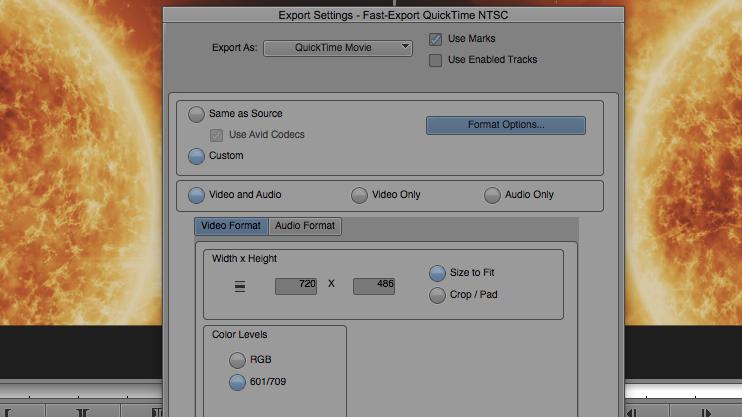
The Options button will pull up a new window that gives you the export settings. Be sure to select Custom and then click on Format Options.
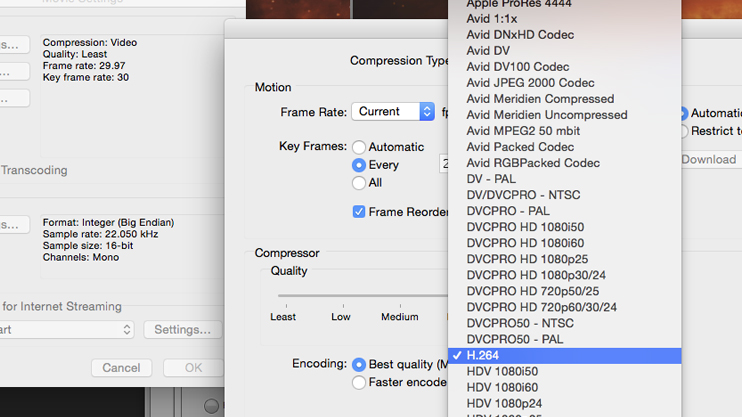
Once in the Format Options window, let’s select Video Settings, then click the drop down menu Compression Type. We want this set for H.264.
Then click OK.
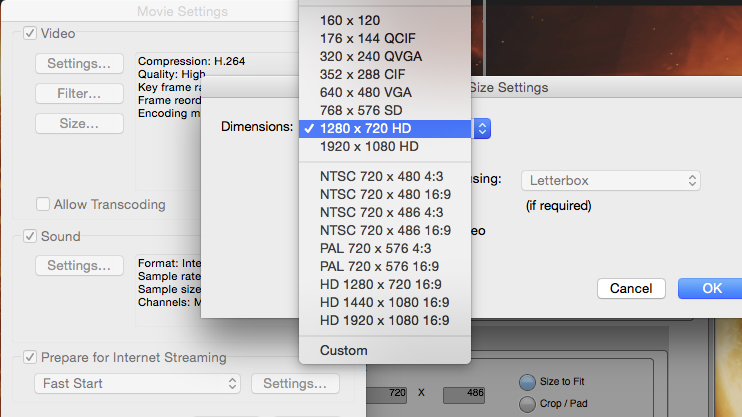
Next up, let’s select Video Size. In the Dimensions drop-down menu we’ll select 1280 X 720 HD. Then click OK.
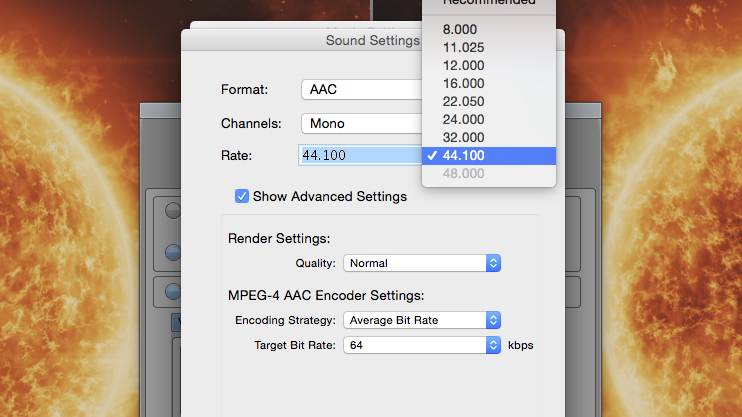
Finally, let’s click on Settings under Sound. Set the format to AAC, channels to Stereo or Mono and Rate to 44.100.
Click OK, then OK again. Now you’re ready. Hit Export and sit back and wait for your latest creation to process.
Using Final Cut Pro
Apple has made the process of sending video to Facebook as easy as possible. When you have completed your edit, simply go to File > Share > Facebook.
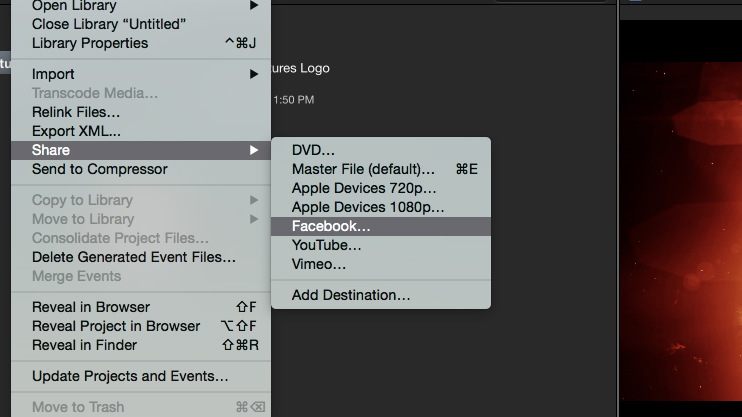
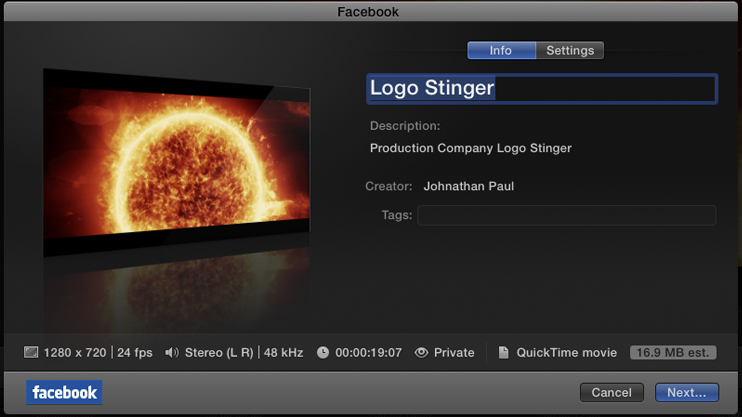
Now let’s setup our info. Give your project a title and then give it a description. Finally, add your name and give it some tags to increases its visibility.
Now let’s click on Settings.
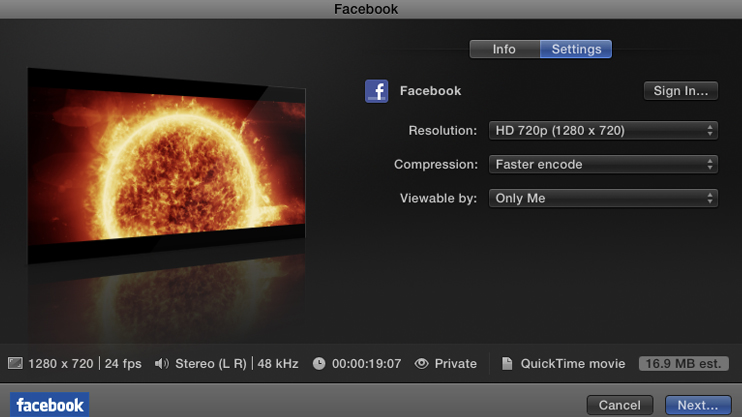
In Settings, you can see that FCPX has essentially applied the settings that are compatible with Facebook.
If you have never used this process before, you will need to sign into Facebook before clicking Next and completing the process.
Hopefully this info will help you get your work in front of more people. Here are a few more posts about getting your stuff out there:
- Create a Video On Demand Strategy For Your Film
- 7 Tips for Promoting Your Indie Film on Social Media
- 5 Tips to Increase Your Chances of Getting ‘Staff Picked’ by Vimeo
Are your Facebook friends going nuts for your content? Do you have any other advice on spreading content across the web? Please let us know in the comments below.


