
Organizing your clips in FCP X: Part 1

Get organized in FCP X!
Organization is key to a good editing workflow — after all, you don’t want to be slowed down trying to find the clip you need while you’re building your story. Fortunately, Final Cut Pro X has some pretty intuitive ways to quickly find clips. In this two-part tutorial, we’ll explore some of these organization tips using keywords, ratings, folders and filters. This post (Part 1) will explore how to assign important metadata regarding keywords and ratings.
Understanding clip name origins
When you import clips into FCP X, the clip names are derived from the media files with which they are associated, which in many cases, is determined by the camera on which the footage was shot, or a different file naming system. Additionally, if you imported an entire folder, the name of that parent folder becomes part of each clip’s name association. And of course, you can always change the name of a clip once it’s imported into FCP X by simply clicking on the name and renaming it.
So, already, you potentially have multiple criteria from which you can search, even without adding any subjective data like ratings or keywords.
To search for a clip, just type the search term(s) into the search field in the upper-right above the Event Library.
![]()
Caution: Be careful to clear out the search field after you’re done, or FCP X will continue to only show the clips that meet the criteria you’ve set.
Adding Keywords to Clips
To make clips even easier to find — and to build a powerful filtering system that will allow you to quickly drill down to locate exactly what you need — it’s a great idea to add keywords to your clip. The quickest way to do this for a large group of clips is to first assign keywords to the Keywords Shortcuts bank.
To add a keywords to the Keywords shortcut bank:
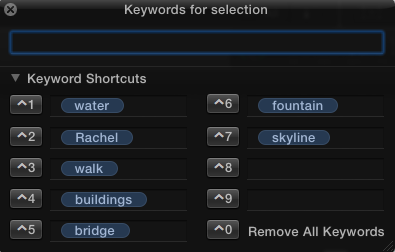
- Click on the key icon in the toolbar above the Project Library to open the Keyword Editor.

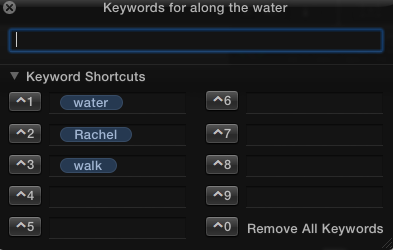
- Click on the disclosure triangle to display the Keyword Shortcuts menu.
- Type a keyword on each line to describe the majority of your clips.
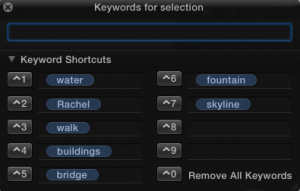
Take note of the shortcut keys that you are assigning. You will later apply keywords to other clips that meet similar criteria by simply using these shortcut keys.
To add keywords to your clips using the shortcut keys:
- Command + click on the clips you would like to assign a common keyword.
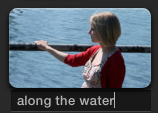
- Use the shortcut keys that you assigned in the previous steps. For example to assign the keyword “water” to the below selected clips, press Control + 1. The keyword is applied in bulk to the highlighted clips.
- Repeat this step for each clip in your Event Library to which you want to assign a keyword.

Note: You can also add a keyword directly to a clip (without first creating a keyword shortcut) by selecting the clip, then opening the Keyword Editor and typing a keyword in the box.

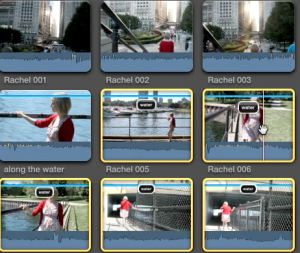
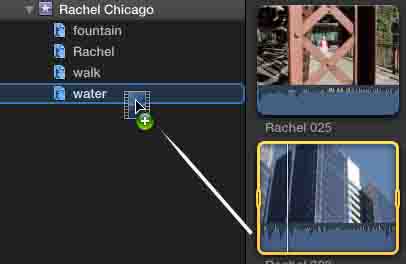
As you begin adding keywords to your clips, you’ll see a collection of keywords forming underneath the Event name. If you want, you can also add keywords by clicking and dragging the clips on top of a keyword name.
Adding Ratings to Clips
In addition to keywords, it’s a smart idea to rate your clips so that you can filter not only on descriptive data, but also by rank, so that you can look at your best material within a specific description set.
To add ratings to clips:
- Select a clip, or Command + click to select multiple clips.
- Do one of the following:
-Click the Favorite button
-Click the Reject button
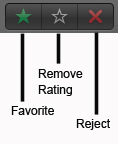
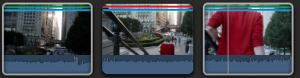
A red or green stripe will appear on the clip to indicate if you’ve marked it as a favorite or a rejection. If you want to remove your rating, click on the Remove Rating icon.


Ok, I’ve assigned the data — now what?
Adding keywords and ratings is a really great way to quickly assign information to your clips. And if you front-load the work in creating this metadata, you’ll thank yourself later when you need to quickly filter through the dozens (or hundreds) of clips. In Part 2 of this tutorial series, we’ll take a look at how you can use the keyword and ratings data that you added to effectively search and filter through your clips.


