3 Simple Tips For Shooting With Available Light
Shooting with only available light is enticing because it requires less setup time than using a lighting kit but can still produce incredible results when approached properly. Follow these 3 tips for effectively shooting with available light.
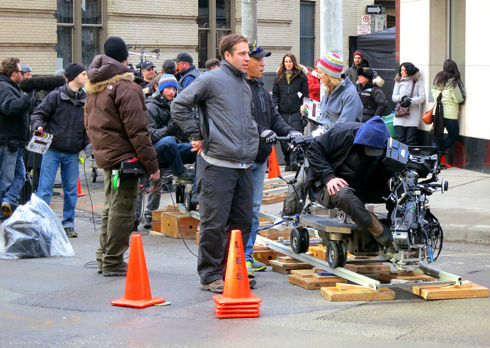
Before you decide to go out and shoot your next film with no lights at all, there are a lot of pros and cons to consider along with some general cinematography principles which are worth noting. For instance, it is important to recognize is that any time you save setting up your lighting/shots you will need to spend extra time in prep or post. I’ll elaborate more on this throughout this blog post, but generally getting a really nice shot takes time no matter how you swing it.
Here are my top 3 tips for shooting with available light:
1. Prepare
Shooting with available light doesn’t mean you can be lazy. In fact it can actually be a lot more difficult in many situations to get a nice looking image when you can’t just pop a china ball in front of someones face. This is where preparation becomes essential. For instance, let’s say you want to shoot a scene in a parking garage that involves dialogue between two actors. If you haven’t done any test shooting or proper location scouting, you may arrive and realize that there are so many mixed sources of light in that location that it makes it nearly impossible to shoot in. Or maybe the fluorescent bulbs are weak and causing a flicker on your image. There could be a thousand and one issues that you will not have control over when you actually arrive to set to shoot, so if you prepare at least you’ll know what you’re getting yourself into.
The same logic applies to daytime/sunlight shots. If you don’t prepare and just walk out on the beach to get your shot in the middle of the day, your actors aren’t going to look good. They’re going to get raccoon eyes and your image is going to be very contrasty, so make sure you know exactly which time of day is best to shoot there. Ultimately whether you’re shooting interiors or exteriors, you absolutely need to plan ahead, and recognizing this fact alone will put you ahead of the curve. Location scouting is crucial.
2. Block Your Actors Effectively
This may sound obvious, but I can’t tell you how many films I’ve seen that were shot using available light that could have looked fantastic, but ended up looking pretty amateur as they suffered heavily from poor blocking. If you have a scene with two characters set next to a window and then they get up and walk to a darker part of the room, you need to be very careful about their blocking/marks to ensure that you don’t completely lose them in the shot. Set their ‘number 2’ mark to fall in a pocket of light cast by another window or by a practical light source in the background.
If you’re outside, this is especially true. Using the sun as a backlight is absolutely critical if you want to maintain a nice looking image when shooting in daylight without a lot of fill. You can get some gorgeous results by letting the sun hit the back of your actors heads and creating a natural rim light. Whether you’re shooting interiors or exteriors, sometimes the slightest changes in blocking or positioning can make a world of difference. You may rotate an actor 45 degrees for example, and now instead of having an ugly light source next to them that is blowing out in the frame and creating a harsh side light, it can act more as a back light, being effectively hidden from the frame.
There is no exact science to this, just your own intuition and willingness to pay attention to detail.
3. Color Grading Is Critical
Shooting with available light can cause a lot of little issues that need to be addressed in post-production. One of the examples I gave above involved mixed light sources that didn’t come across well on camera. While you are going to do a lot of prep work to get your shots looking just the way you want them to, there will still be issues. There always are! But that’s okay as long as you address them in post.
In the mixed light scenario, you could color grade your shot in a way that would minimize the different color temperatures in the image, or go a step further and adjust specific colors. For example, you might have a scene that was shot inside of a house using mostly warm tungsten bulbs, but in the background there is some sunlight pouring through the window that looks neon blue (assuming you are white balanced at 3200). In this scenario you can simply pull a ‘key’ of the blue light and change it’s color to be warmer and less saturated. There is a lot you can do in post, especially if your original image is looking good to begin with.
Another issue that you will likely encounter if you’re shooting with available light is noise or grain. Shooting a night scene under a street light is going to mean that you’re probably shooting at a high ISO – maybe 1600, 3200 or above. This is bound to create grain in your image which can look absolutely terrible, but is fixable with plugins like Neat Video, or even built in denoise tools you may have in your NLE or compositing software.
When Available Light Doesn’t Work
Shooting with available light can be challenging, but can also yield some stunning results when approached carefully. Many directors (Terrence Malick for example) primarily use available light and make it work for them beautifully. There is certainly a time and place to use it – in fact it’s probably my favorite way to shoot. But there are also productions where it isn’t appropriate to go this route. And not necessarily because of the budget or size of the production, but more so because of the subject matter and genre.
I tend to believe that available light works really well with dramas, horror films, certain comedies and thrillers, but not so well with sci-fi or action films. There are exceptions to this rule of course, but if you try to picture a blockbuster like ‘Iron Man’ being shot with available light, you can probably imagine it wouldn’t be as effective. If you’re going after a really commercial, blockbuster type of look, you’ll always want to use some type of lighting set up. You’ll need to get more specific with your placement, creating rim/fill light on many shots and generally making it feel more polished. That’s not to say it looks any better – just different.
In short – only use available light if it truly suits your project and genre, and not as a means to cut corners as it is still a lot of work. If you do go down this path, do lots of prep work/test shooting before hand, make sure your blocking is spot on during production, and save time and money for post so you can get the most out of your image.


