Clips, Tracks and Audio Effects in Premiere Pro CS6

In this post we’ll show you how to apply effects to audio clips and tracks, as well as discuss a new audio track type in Premiere Pro CS6!

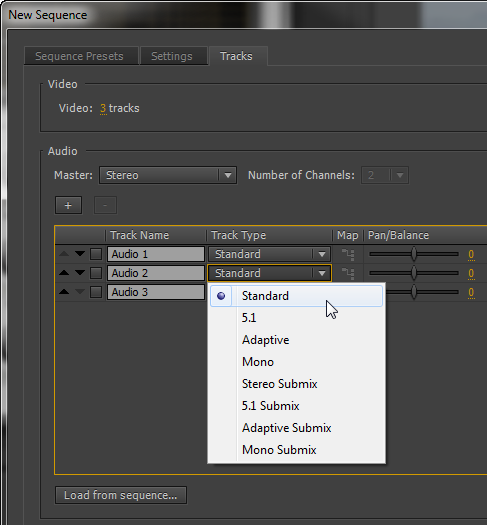
In previous versions of Premiere Pro there was a need to be specific about the type of audio you were going to be adding to your sequence – mono, stereo, 5.1. In Premiere Pro CS6, Adobe has brought in the new ‘Standard’ audio track that can cope with mono and stereo in the same track! This means that you can use footage with different types of audio tracks on the same audio track if it’s set to Standard.
As well as saving time and making for a better organize timeline, this change also reflects the recent updates to Premiere Pro which have done away with the need to select effects in terms of their type (i.e. Mono, Stereo & 5.1). All effects now in one single ‘Audio Effects’ category that will apply to any audio clips or tracks without the need to be selective.
All this means that the audio workflow in Premiere Pro is becoming smoother and easier for the editor. With Audition now being part of the Adobe suite we have very powerful audio options at hand.
Applying Effects To Audio Clips
Applying audio effects to clips in Premiere Pro is the same workflow as applying any other effect to a clip. Simply go to the list of audio effects in the Effects Panel, select the desired effect you want to use and either drag it to the audio clip you want to apply it to or if the clip is already selected simply double-click to apply the effect.

Once effects are applied, you can open the effect up in the ‘Effects Control Panel’ and work with its parameters there.
Applying Effects To Audio Tracks
Any of the effects that you can apply to individual clips can also be applied to whole tracks – although ‘Balance’ and ‘Volume’ aren’t available as effects because they can be controlled by a dial and a slider in the Audio Mixer Panel.
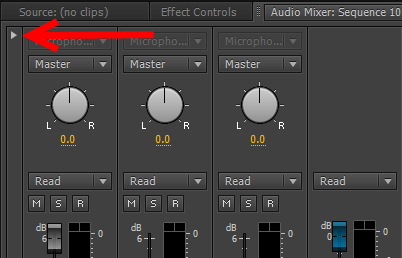
So, where are the track based audio effect in Premiere Pro and how do you apply them? They are found in the Audio Mixer Panel although somewhat hidden. Simply click the little triangle shown below …
Finding the Track Based Audio Effect in the Mixer Panel
Effects & Sends in the Audio Mixer Panel

Then to get to the actual effect, click the little down arrow shown below:

However, there are some limitations as the image below shows, with a division of 2 sets of 5 slots:
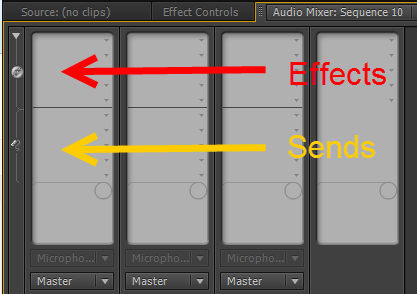
Only the top 5 slots are available for effects as the bottom 5 slots are reserved for something else called ‘Sends’ which I hope to cover in a later blog post.
This means that you can only have 5 effects on a given track (which is usually more than enough). Even then, finding out how to use those effects needs a little more explanation.
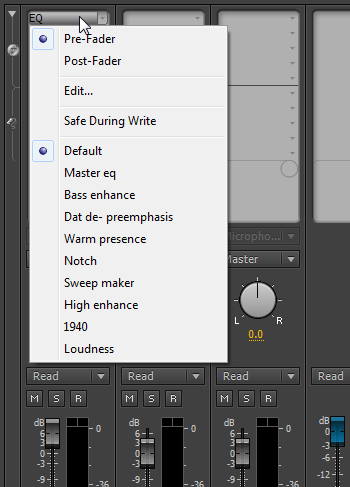
Say for example, I click the little drop-down arrow and then select EQ from the list given. ‘EQ’ appears in the slot and also a little dial at the bottom of the slots as shown here:

At this point, if you want to get access to all the parameters for the EQ effect, then you can do 1 of 2 things. First, you can click the little drop-down arrow at the bottom of the slots that says ‘OutputGain’ to change the function of the little dial.

While this will do the job it isn’t really practical, so the second option of just double-clicking the slot with the word ‘EQ’ in it is far better because that brings up a floating window:
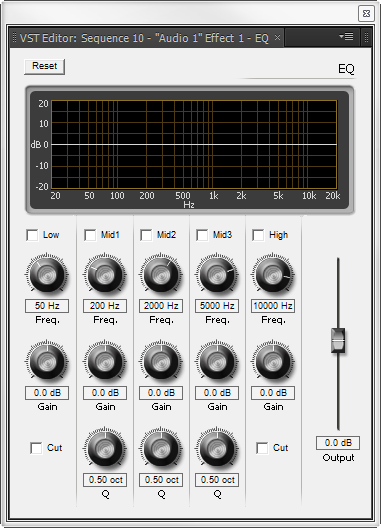
With this window open you can get to all the controls at once and start to make a real difference to the audio of the track you are working on.
It’s worth noting there is one other somewhat hidden option. If you right click on the slot with the effect in it you will get access to a list of presets which can be applied to the track or used as a starting point which you can work on as needed. The only downside being that you can’t then save any changes you make as new presets (as of version CS6).