
Keyframe Tips and Tricks in Premiere Pro

Discover keyframe tips and tricks that will help give your video editing animations a more professional look in Adobe Premiere Pro!

In this post we’ll share a few tips for animating keyframes in Adobe Premiere Pro – including the differences between temporary and spatial keyframes. This is essential knowledge for any video editor looking to improve their Premiere Pro projects!
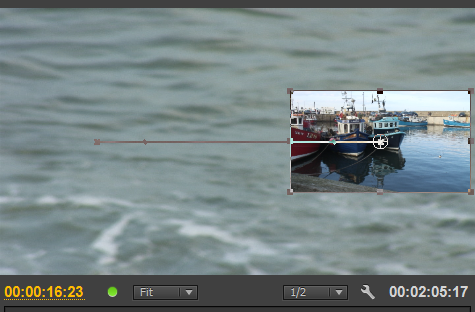
Animation Path for a Picture-in-Picture in Premiere Pro
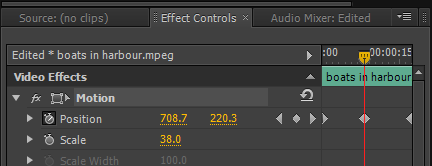
Effect Controls for the Above PiP Animation – On “Position”
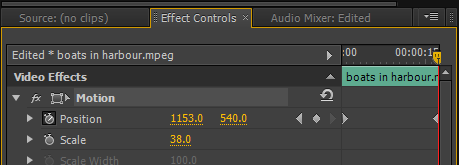
If Your “Effect Controls” look like this Click the Arrow Shown
![]()
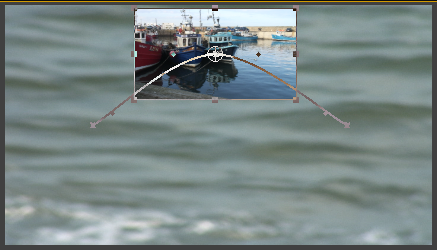
The keyframes created for this simple animation are called ‘linear’ keyframes and are diamond in shape (as can be seen when I add an extra keyframe to the path as shown below).
Additional Keyframe Added to Show Keyframe Shape
Additional Keyframes Influence on the Motion Path
However, what you are actually seeing on the screen isn’t a linear keyframe! But the keyframe in the Effect Controls is! So what’s going on?
First, there are 2 different types of keyframes in Premiere Pro – Temporal & Spatial.
Let’s break it down into even more simple terms – these are keyframe options that deal with how things move in TIME ( or temporal, the diamond you see in the Effect Controls Panel) and keyframe options for how things move on the SCREEN (or spatial, the fact that the motion path curves and isn’t a triangle on screen).
You can find out a lot more about these types of keyframes in Premiere Pro with this help document.
What you see in the Premiere Pro Effect Controls deals with Time while what you see in the Program Monitor deal with Space. However, both types are changes in the Effect Controls panel.
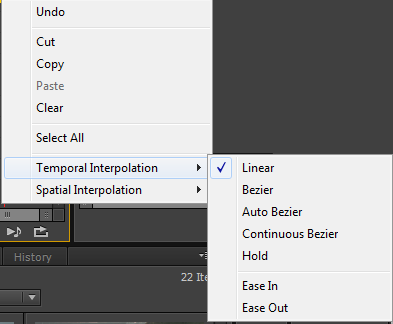
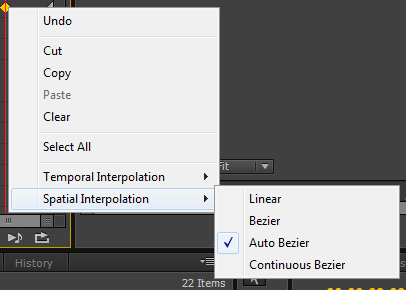
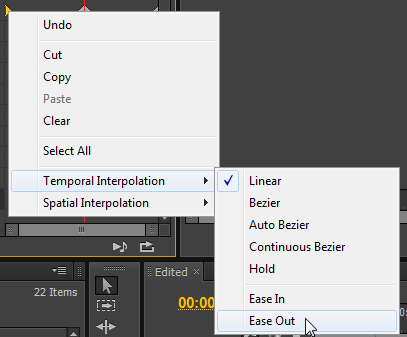
You can change your keyframe type by right-clicking on the keyframe you want to change:
Temporal Interpolation Keyframe Options
Spatial Interpolation Keyframe Options
I mentioned above that the keyframe in the Program Monitor – the Spatial keyframe – wasn’t linear. So, to show you what linear looks like, I’m going to right click on the middle keyframe and select Spatial Interpolation and change it from the default ‘Auto Bezier’, which is giving the motion path that nice smooth curve, and change it to ‘Linear’. You can also do this by shift clicking on the keyframe in the Program Monitor to toggle between linear and Bezier. I get the following result:
Motion Path with Middle Keyframe Changed to Linear
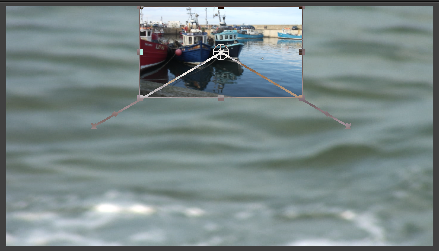
As you can see, the end result is that the nice smooth motion path turns into a triangle with a constant speed up to the keyframe, then an instant change to the new value and a constant speed from the keyframe to the end of the animation. This, generally speaking, doesn’t look organic and isn’t very good animation.
A very similar thing happens with keyframes effecting timing in Premiere Pro. Even if we were to change the Spatial keyframe type back to ‘Auto Bezier’ the Temporal keyframe would remain linear which would mean that the speed of the animation from the first keyframe to the second keyframe would be constant and then there would be an instant change of speed from the second keyframe to the last keyframe. The transition from one keyframe to the next would be jumpy and to be honest, it wouldn’t look very professional.
So in Premiere Pro, for Temporal keyframes (or time) the default is a linear keyframe while for Spatial Keyframes (how things move on screen) the default is Bezier – giving us a nice smooth curve.
If you want a little more control you can also get access to handles on each side of the keyframe to adjust either the shape of the motion path (in the Program monitor) or the speed of change (in the Effect Controls panel).
So, if I were to change the Spatial keyframe from Auto Bezier to Bezier I would get this result.
Bezier Spatial Keyframe – The Addition of Handles
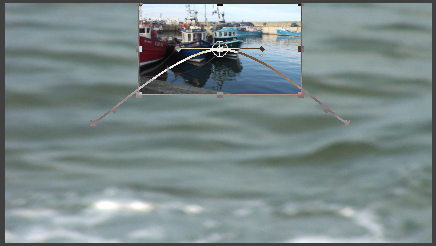
So now I have handles, I can play with both the angle of the handles AND the length of the handles to change the motion path to whatever I desire. Have a play with this as it takes a little getting used to how the handles work. You can even ‘break’ a handle by holding the ‘ALT’ (PC) or ‘OPTION’ (Mac) key when you select it to get even more interesting motion paths.
Temporal Keyframes in Premiere Pro
Now that we have some idea of what’s happening with Spatial keyframes, let’s have a closer look at the Temporal options. These can really make a very big difference to the look of our animation. For example, by changing our keyframe types we can have our animation accelerate and decelerate, giving the animation a very professional, smooth look.
So how would I do that in Premiere Pro?
Starting with the first keyframe, right click on it and choose Temporal Interpolation > Ease Out.
Selecting Ease Out
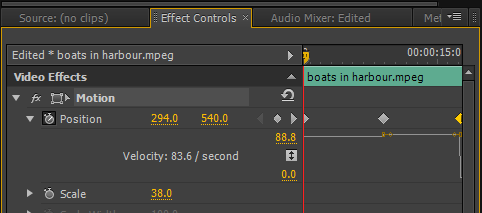
Next, click the disclosure triangle next to the word ‘Position’ in the Effect Controls to reveal a graph.
Before Easing Out and In
After Easing Out and In
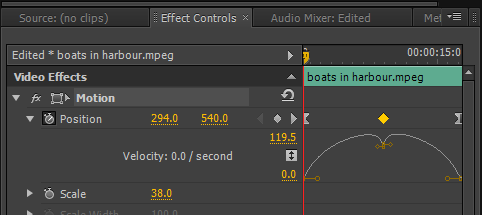
Now, I’m not going to go into depth on this, but you can clearly see that the TIME element is now changed. The graphs show that the speed goes from zero to full speed from the first to second keyframe – in other words accelerating. Next, from the second keyframe to the last keyframe it slows down – deceleration – which gives smooth professional looking animation. AND, if you want to change the speed of that animation you will notice that you have handles to play with!
Temporal Interpolation – Playing with the Handles
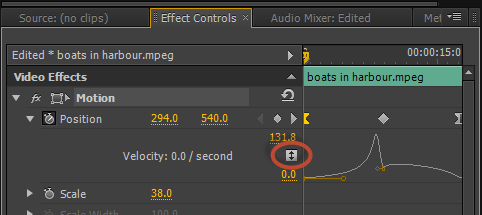
In the above image I have played with the handles and the graph has redrawn to fit (because the little box shown in the red circle is ticked). If this box isn’t ticked the graph will not re-scale.
For a more detailed explanation of the various keyframe types see this Premiere Pro help document.
Finally, there is another type of keyframe called ‘Hold’ and that does exactly what it says. It holds the value it is at until it comes upon another keyframe and then instantly changes to the new value. This can be very helpful, if for example you wanted your item that you are animating to jump from one place to another instantly. If you select ‘Hold’, the item will stay where it is until the next keyframe and simply jump at that keyframe. It has limited use, but for times when it’s needed it’s nice to have available.
Experiment with keyframing in Premiere Pro and discover how you can improve your own animations!