How to Chroma Key in Adobe Premiere Pro
In this write-up, we’ll show you how to chroma-key your video footage in Premiere Pro without sending your clips to After Effects.
In the past, chroma-keying was a job for After Effects. However, with some updates over the years, Premiere Pro has also become an extremely useful tool for keying. In this article, we’re going to dive into what you need to do to get a successful key from your footage in Premiere.
This is a step-by-step guide to getting a good key in Premiere Pro, so you can follow along with your own footage. But a great key doesn’t start on the computer — there are plenty of steps you should follow from the outset of your recording. To learn more about the entire process, check out our complete guide to green screen.
Step 1: Set up Your Footage for a Good Key

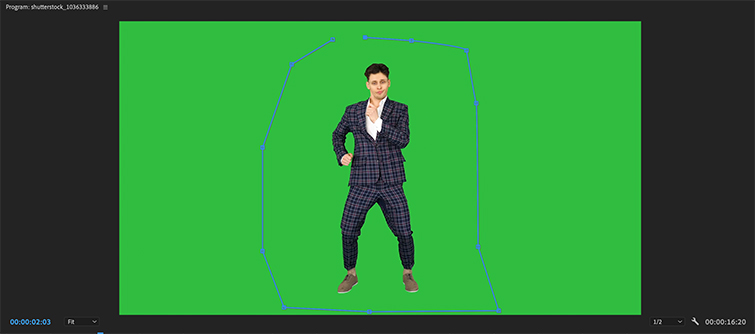
If you’re just starting out with chroma-keying, begin with footage that has a simple foreground. (Image via FunKey Factory.)
Premiere Pro comes with a powerful, built-in chroma key effect called Ultra Key. Before you use this tool, there are a few steps to clean up the footage.
First, we’re going to apply a matte to the footage to get rid of excess parts of the frame, making the clip easier to work with. I usually apply a 16-point garbage matte to my footage and move the points loosely around my subject. If your subject is really simple, you can get away with only using the 8-point garbage matte.
You’ll have to click the effect in your Effects Controls window to move the points around.
Step 2: Apply the Ultra Key
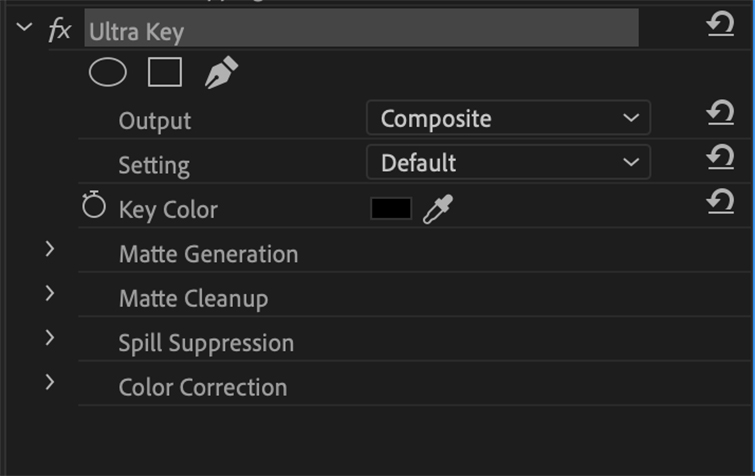
Now that we’ve trimmed our frame a bit, we’ll apply the Ultra Key effect. To find the Ultra Key effect, go to Effects > Video Effects — it’ll be nestled in the Keying menu.
Once you’ve applied the effect, go to the Effects Controls window and select the eyedropper tool. This is how you’ll select the green chroma color of your footage. Now, click the green screen in your clip with the eyedropper. Choose a point that’s close to the subject’s face. If your green screen lighting wasn’t great, you may have to choose either a lighter or darker shade of green in your clip. If this is the case, choose the darker shade. This will make it easier to get a perfect key.
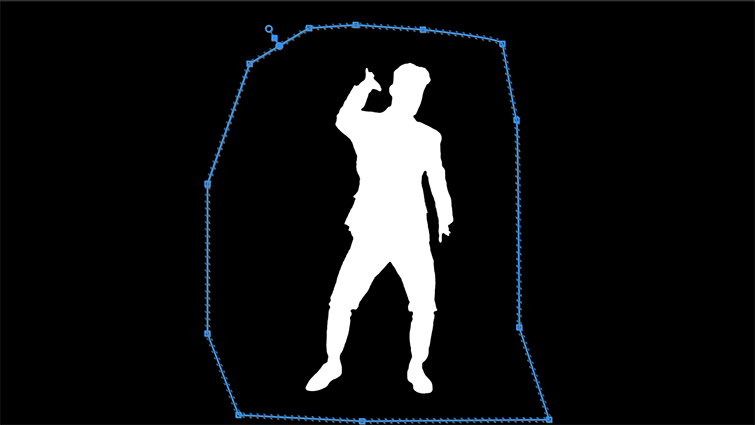
Change the output view to Alpha. This will help you see the details of your subject when you’re adjusting parameters. Alpha channel is a great method to use while trying to refine the edges of your chroma key. It separates the colors into a black and white channel so you can see if there are any issues with your key. If the white area of the channel is transparent in places, that means that the key did not take in that specific area, so you’ll have to tune a little bit further.
If your alpha channel reveals that your key is almost perfect, go into the setting tab of the Ultra Key and select Aggressive. This bumps up your key a notch to get a solid border between your key and the separated background. The Aggressive tool essentially bumps up the stock key parameters a little more, without diving into the settings of your key.
If you lit the green screen evenly when you shot your footage, you won’t have to adjust many of the parameters. These parameters include the Matte Cleanup/Generation and Spill Suppression tools. But, if your green screen lighting wasn’t quite perfect, you’ll need to adjust some of the parameters — which we’ll explain in detail below.
Step 3: Adjust the Transparency and Pedestal
There are a few main adjustments that we’ll take a look at. These address the typical chroma key issues you might encounter when you switch to Alpha view.
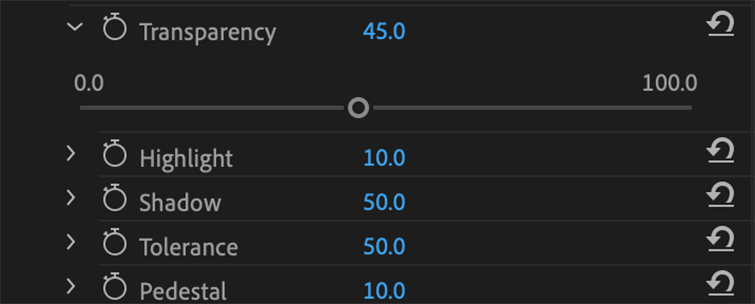
First, if your subject (in white) has some black scattered throughout, adjust the Transparency slider under Matte Generation to the left. Its resting amount is 45.0, so minimizing that number will refine edges, while adding more transparency will soften edges. This will clean up your subject, making sure that the hair and small details are in your key at full opacity, instead of being transparent. If you’re having trouble with the background showing through your subject in some places, the best thing to do is minimize the amount of transparency of your key.
Next, to clean up the background (in black) adjust the Pedestal slider. Moving the Pedestal slider up will completely remove your green screen from the clip. It cleans up the background and makes it completely black in this alpha view. Bumping up the Shadow parameter will add softness to the edge of your matte — or a “shadow” of the edge. If you’re keying a person, adding shadow will make the subject appear more natural compared to a very hard key.
With these two tweaks, the image is looking pretty good, but we’re not quite done, yet. Set your output view back to Composite so you can see how your video is looking, and place a backdrop behind your subject for a better visual reference. To add a backdrop, simply import what you’d like to place behind your subject, then move your keyed clip up to the second video layer (V2) on your timeline. Then, drop in your background clip under the keyed clip. Since you have already established a key on your top clip, the background will appear below the subject.
Step 4: Finish up with Matte Cleanup Tools
In most cases, we’ll need to choke and soften the key a bit. Choking the key is the act of “shrinking” in the key. Softening the key is the act of “feathering” the key out at the edges. Both of these help to create the illusion that your subject is seamlessly in the scene with your background.
Under Matte Cleanup, increase the Choke slider slightly. A little bit goes a long way with these two tweaks. Don’t increase too much, or it’ll look weird. I try to never go above 25 with Choke.
Next, adjust the Soften slider until the blending of your subject’s edges looks good — I try to never go above 20. Soften blurs to the edges of your key, so adding a small amount can help blend a subject into the background. However, if you add too much, you run the risk of your subject looking like a bad Photoshop job.
If you have some green spilling through your subject’s hair, play with the Spill Suppression settings. I sometimes have to bring Luma and Spill up a bit when keying difficult clips. With subjects that have big, wispy hair that moves around the screen, Premiere will sometimes have a tough time discerning this part of the green screen from the subject. These two tools will target the green within your subject and begin to remove it the more you add to each parameter.
There you go. You’ve just chroma-keyed in Premiere Pro!
Chroma-keying directly in Premiere Pro will save you time by avoiding the necessity of dynamically linking to After Effects. It’ll also save you render time, which is always good. Depending on your editing system, you might be able to play the keyed footage back in real time, without rendering.
This post was originally published in January, 2013. It has been updated to reflect changes in the industry.
Looking for more on working with green screens? Check out these articles.


