FCPX Color Correction Tip: Using Adjustment Presets To Give Your Footage A Stylized Look!

In this post we’ll take a look at FCPX color correction presets – how to take advantage of the ones that come with the application, as well as how to save your own for future use.
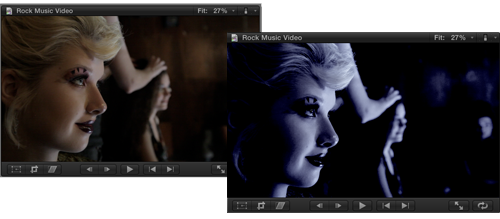
Color presets provide a great starting point for doing basic color correction work in Final Cut Pro X. They can give footage dynamic, highly stylized looks or provide more simple adjustments (warming or cooling the footage, adding a bit of contrast, etc). The FCPX presets give your footage specific color grades and looks by modifying saturation, color and exposure settings.
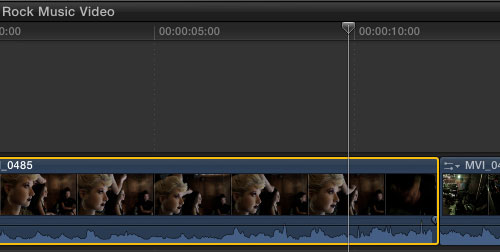
- Select one clip in the timeline whose color you’d like to adjust.
Note, initially you can only apply presets to one clip at a time. However, you can later copy the new color attributes of a clip and paste them onto other clips in the timeline or save a custom preset.
- Use the shortcut COMMAND + 6 to open up the Color Adjustment window.
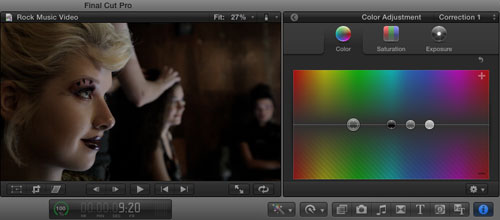
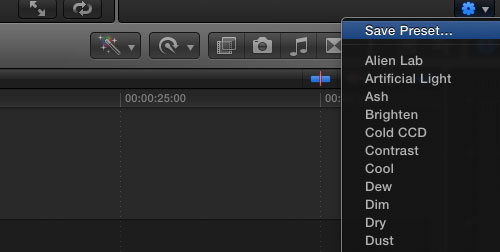
- Click the “wheel” dropdown on the bottom right of the Color Adjustment window to reveal the FCPX built in presets.
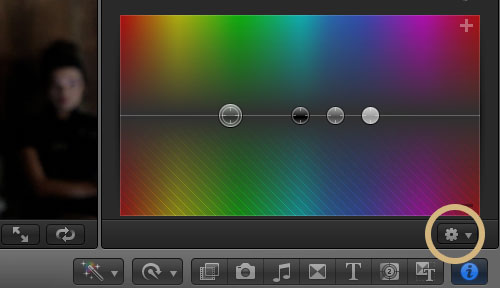
- Choose a preset to change the look of your footage!

Note, initially you can only apply presets to one clip at a time. However, you can later copy the new color attributes of a clip and paste them onto other clips in the timeline or save a custom preset.


Understanding FCPX Color Correction Presets
Understanding how FCPX creates these looks will give you insight into how you can further tweak them to create your own custom color settings. Essentially, when you choose a color preset, Final Cut Pro X has a pre-assigned value for the black, mids and highlights in regards to color, saturation and exposure.
Let’s break it down a bit in simple terms…. If you look at the color board you’ll see three buttons on each of the adjustment panes (color, saturation, exposure). The black “button” represents the darkest parts of the video image (blacks), the dark gray represents the midtones and the light gray represents the lightest parts of the image (whites). When you drag these buttons around each of the panes, it will effect different parts of the image accordingly. If you were looking to really explore FCPX color correction in detail, I’d highly recommend these free video tutorials from Color Grading Central over on Vimeo.

Create Custom FCPX Color Correction Presets
Use the presets to let Final Cut Pro X approximate a color look for you. THEN, go and tweak the buttons on each of the panes to create a custom color grade. When you’ve got a look you like, save it as a preset.
- Click the “wheel” dropdown and choose Save Preset…
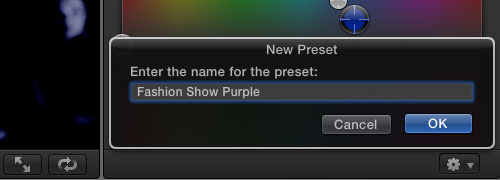
- Create a descriptive name for the preset and choose “OK”
- Your preset will appear in the preset list. Now, you can quickly add it to additional shots in this project or a future one.


From the editors I’ve spoke with recently, there definitely seems to be some division between those that are really keen on the new Final Cut Pro X color correction tools and those that strongly dislike it. Some features from Apple’s Color made their way into FCPX, but as we know now, it came at the expense of cannibalizing that program. Personally, for most basic color correction tasks, I think FCPX has all the tools I need. For more complex color work I’d take a look at DaVinci Resolve. The newest updates to that program are quite extraordinary (especially for the price) and fill any void left by Apple’s Color application.
Stay tuned to PremiumBeat.com for more Final Cut Pro X tutorials and tips!
Do YOU like the new color correction tools and interface in FCPX? We want to hear from you in the comments!