
Filmic Blend Technique – Making Video Look Like Film in Premiere Pro

Want to make your digital video footage look more like film? In this post we share a quick tip for getting a film look in Adobe Premiere Pro!

Film is a chemical process. A frame of film has color evenly distributed over the whole plate.
Video on the other hand, is a digital media, and is made up of scan lines. HD video for example is made up of 1080 lines from top to bottom. This means, that by its very nature, there are spaces between these lines and making video somewhat less ‘full’ than film. At times it can seem as if your video is a little ‘thin’ and needs ‘filling out’. In this post I’ll demonstrate a Premiere Pro technique to use in those instances when your video needs to seem ‘fuller’ and ‘pop’ like film.
Giving your video a film look in Premiere Pro will add to render time, so be sure you have the time to spare!
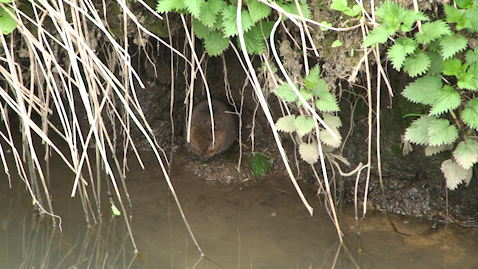
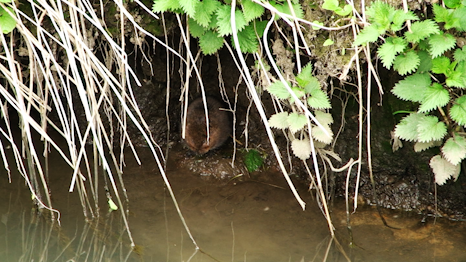
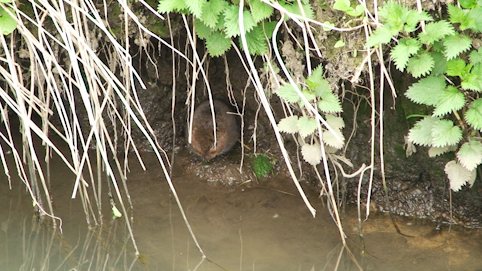
Image before Filmic Blend
The first step is to make two copies of the clip you want to use. This is done in Premiere Pro by hold the ‘Alt’ key and dragging the clip up to the next track in your timeline. If you don’t have a spare track just drag the copy up to the grey area at the top of the timeline and Premiere Pro will automatically create a new video layer. You should end up with something like this:
Three Copies of the Video Clip in the Timeline
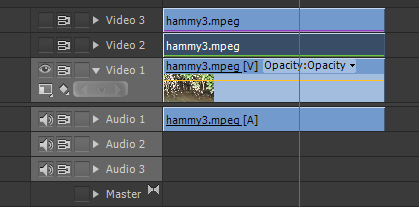
Notice that I have the eyeball turned off for Video 2 & 3 – this is because these are the layers we will be working on and we need to deal with them one at a time (or else we won’t be able to see the changes we make).
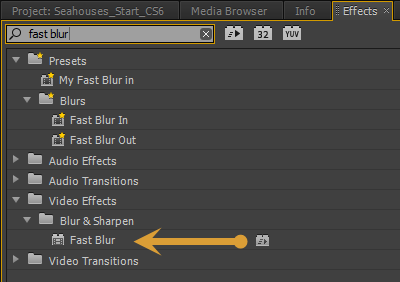
Apply Fast Blur to Video 2 & 3
Fast Blur Settings
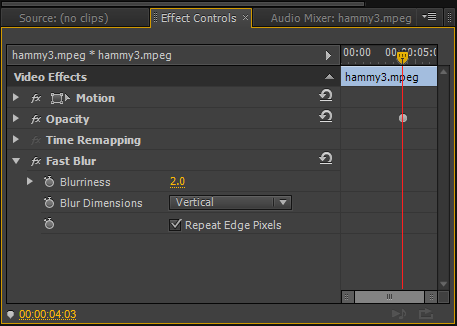
We start by applying the ‘Fast Blur’ Effect to both the copies in Video 2 & 3. What we want to do is blur in the vertical (up & down) dimension to ‘fill in’ the gaps between the lines. I have chosen to use 2 for ‘Blurriness’ although you may be able to get away with less. I have also selected the ‘Repeat Edge Pixels’ option because if you don’t the edges of your image will start to have transparent lines around it (and we don’t want that!)
Now, you may think that by adding a blur we will simply be making the image unusable. However, the beauty of this technique is that we will be looking at the bottom layer with the top two layers ‘blended’ over the clip in Video 1. What this means is that we still see the sharpness of the clip in Video 1 but with the richness and brightness of the clips in Video 2 & 3…giving a composite image which still looks sharp even though we have been using a blur.
Once we have set up the fast blur for the copies in Video 2 & 3 we need to turn on the eyeball for the clip in Video 2 and go to our ‘Effect Controls’ Panel. With the clip selected, open up the ‘Opacity’ disclosure triangle to find the ‘Blend Mode’ drop-down.
Finding the Blend Modes
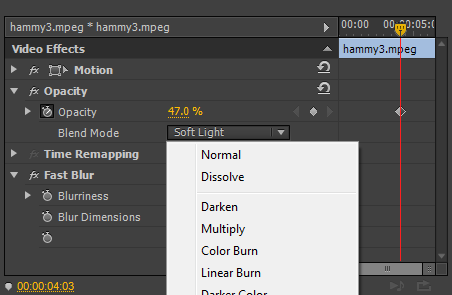
Blend modes are a way of blending the pixels of the image in one layer with the pixels of the image in layers below. They are split into different sections to show the general operation of the modes. These include options that ‘Add’ pixels in various ways or ‘Overlay’ or ‘Darken’ pixels etc.
What we are trying to do with the clip in Video 2 is to blend in such a way that we add film-like color depth to the overall image. Note, that this will cause the image to darken but we will deal with that in the next step.
Choose a blend mode that works with your image. This will usually be from the ‘Darken’ or ‘Overlay’ categories with common choices being ‘Multiple’ and ‘Overlay’. You can see from the picture above that for this image I felt ‘Soft Light’ from the ‘Overlay’ category gave me the best results (but all images will vary so take your time to choose the one that works best for you).
To finish with the copy in Video 2 you need to ‘dial back’ the blend mode by reducing the ‘Opacity’ value for the clip. You can see that I ended up with 47% for this clip.
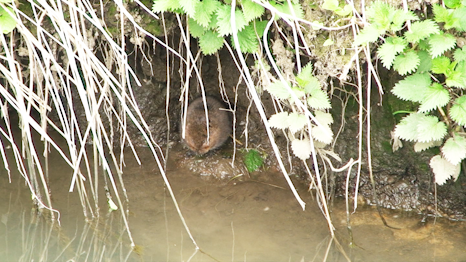
‘Soft Light’ at 100%
‘Soft Light’ at 47%

As you can see from the above the ‘Opacity’ value is akin to a ‘volume’ dial for the strength of the effect.
Now we have a richer color to our clip we are able to turn on the copy in Video 3. Because the clip doesn’t presently have a blend mode selected it will look like the original image with a slight blur.
Select the clip. In the ‘Effect Controls’ open up ‘Opacity’ again and choose from the ‘Add’ category – I used ‘Screen’ which is a slightly less powerful version of ‘Add’ and dialed back ‘Opacity’ to taste!
‘Add’ on Video 3 with ‘Opacity’ at 100 %
‘Add’ on Video 3 with ‘Opacity’ at 37% – Final Version
Original For Comparison
Well, that’s it! To see the difference you’ve made to your clip turn the eyeballs off for Video 2 & 3 and then turn them back on again and see the richness you have added. This is a handy trick for getting a film look in Premiere Pro.
If you aren’t satisfied with the end result try changing the blend modes and opacity values you’ve chosen to increase or decrease the ‘power’ of the effect on the color layer in Video 2 and the brightness layer in Video 3.
With this film look technique applied it can make a massive difference in your work…and that leads to happy clients!


