

Timeline Trimming Shortcuts in Premiere Pro

Discover how to use the J/K/L keyboard shortcuts in Premiere Pro for trimming in the timeline. A surefire way to supercharge your video editing workflow.

In this post we’ll show you how to speed up your timeline editing in Adobe Premiere Pro by utilizing keyboard shortcuts.
Heads and Tails Footage
As with clip trimming in any non-linear video editing application it’s important to have head and tail footage on the clips you use. This will give you all kinds of options and can save you from problems down the line.
What do I mean by head and tail footage? Well, if you look at the picture below…
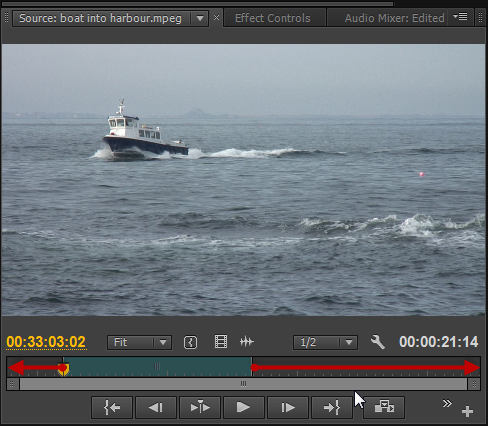
… the red arrows show extra footage in the clip that isn’t being used on the timeline. So, the footage to the left is ‘head’ footage (i.e. extra unused footage before the ‘in’ point for the clip) and the footage to the right is ‘tail’ footage (i.e. extra unused footage after the ‘out’ point for the clip).
If you are ever involved in shooting a production you’ll know that it is always useful to roll the camera for a good 5 to 10 seconds before any ‘action’ takes place…and for 5 – 10 seconds after the ‘action’ has completed. Doing this will allow you to capture good head and tail footage which can be used for a number of things in post.
First, this footage can provide good ambient audio – something that people often fail to realize is important until they need it! For example, if you wanted to record extra speech after the filming and make it sound like it was recorded at the same time and in the same place it is almost impossible to get it to match unless you have some ambient audio which you can put under the new recording (room tone).
Second, head and tail footage gives plenty of room for applying transitions. If you want a crossfade to work, you need footage to apply the crossfade to. This cushion is useful for applying many different types of video transitions.
Third, and most important for our discussion of trimming shortcuts, having plenty of head and tail footage can allow you to do slip, slide and rolling edits.
Timeline Shortcuts in Premiere Pro
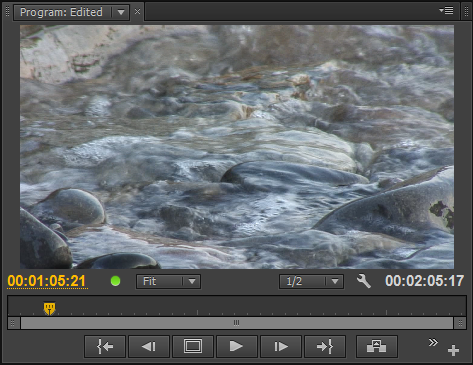
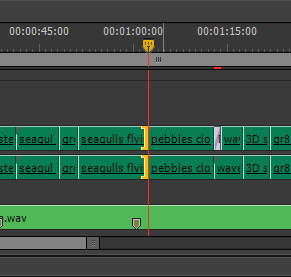
To get into ‘Trim’ mode, with the sequence panel selected, simply tap the T key and you should see the following changes in the program monitor and on the timeline …
Program Monitor In Trim Mode
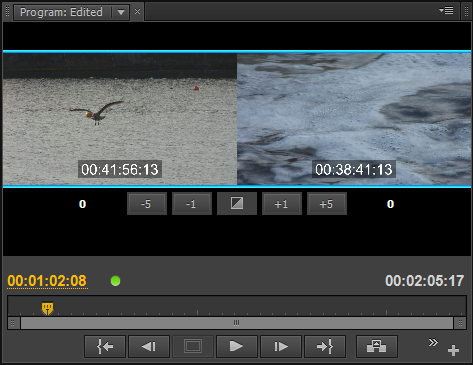
Timeline In Trim Mode With Rolling Edit Tool Selected
What you can see in the timeline is the play-head snapping to the nearest edit point and the ‘rolling edit’ tool becoming active. To change to another tool simply hold the shift key and tap T repeatedly and you will cycle through the tools until you come back to the rolling edit tool.
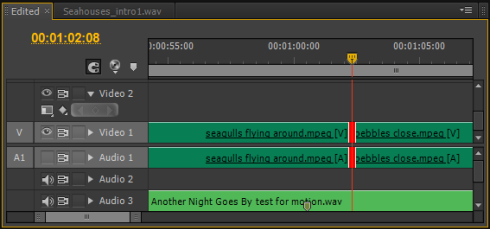
Now let’s do some editing.
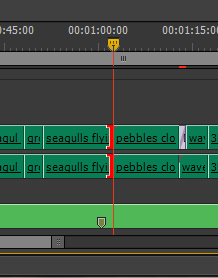
So, L plays forwards, J plays backwards and K stops. These are the very basic keyboard shortcuts of all video editing apps.
As long as you have head and tail footage linked with the clips in your timeline and you are in Trim mode, hit L or J to play to the point where you would like the edit to move to and then tap K and the edit will snap to that point – it’s as simple as that! And, because we are using the Rolling Edit tool, when it comes to the end of any head or tail footage available, playback will stop.
However, if you were using the Ripple Edit tool (Yellow) it would ripple edit as long as you let playback continue and there is head or tail footage.
Ripple Edit Tool
The same is true with the Trim Edit (Red bracket) but only to the end of the clip and then playback would stop again.
Trim Edit Tool
One last thought – what about slow motion use of JKL?
Well, although you can playback in slow motion using the shift + J/L keys, you can’t edit using this function. The nearest you can get to this is moving one frame at a time in either direction.
What you need to do when in Trim mode is HOLD the K key and then tap either the J or L keys to trim backwards or forwards. Repeated tapping of the J and L keys will move your edit point forward one frame at a time.
Then, to move to the next trim point use the up and down arrows and you’ll move up and down edit points in your timeline. As you can see, J/K/L shortcuts are not just useful for playback, but also in trimming on the fly in your Premiere Pro project!


