

Lift & Extract in Premiere Pro: Moving Clips

Getting the right portions of selected clips from one sequence to another is simple in Premiere Pro using the ‘Lift’ & ‘Extract’ options. Here’s how to use this timesaving tool.

Sometimes it’s useful to seperate cameras into sequences of their own to simply the editing process. You may want to put all the media clips from one camera end-to-end in a single sequence and call it “Camera 1”. Of course, this may result in multiple sequences each representing different cameras.
The question then is how to grab footage from each of these sequences and bring them into a master sequence for the main edit. You could select clips and cut/paste them into the master sequence, but more often than not you don’t want whole clips. Instead, what you need is select portions of clips.
You could nest each of these sequences into the main sequence, but this is a very difficult way of working and not recommended.
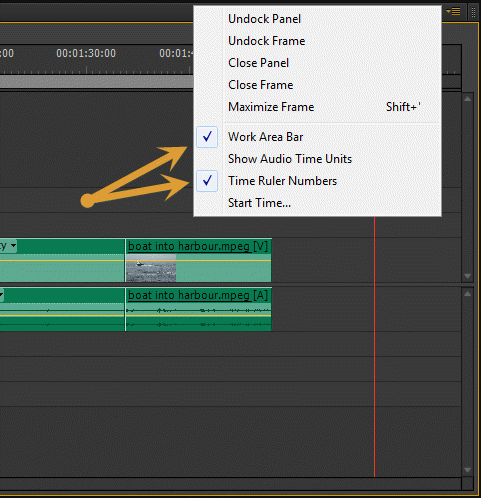
This is where the “Lift and Extract” option comes into play in Premiere Pro. In this post, we’ll take a look at how to use Lift and Extract, a quick way of moving portions of clips around from one sequence to another. Before we start, it’s worth noting that some people don’t like to have a work area bar and a time ruler in the sequence/timeline window and just like to work with IN and OUT points. Did you know you can turn both of them off in Premiere Pro CS6? Just go to the panel menu and un-check these options.
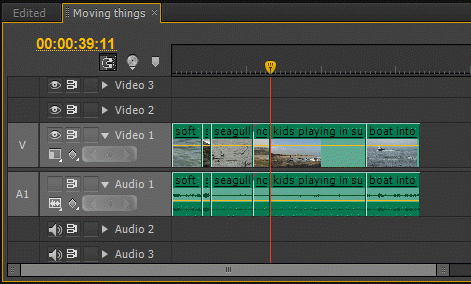
Options to Un-Check to De-Clutter Timeline
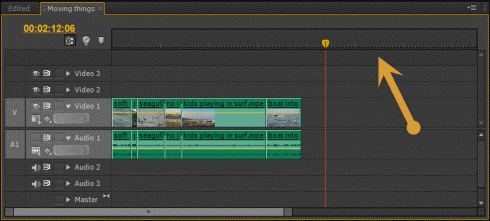
The end result is that your timeline looks like this (you don’t have to do it, but it certainly leads to a cleaner looking timeline):
After Un-Checking Options
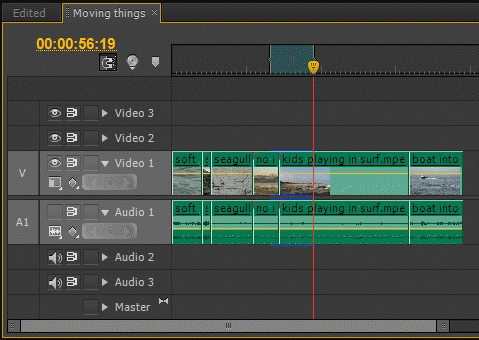
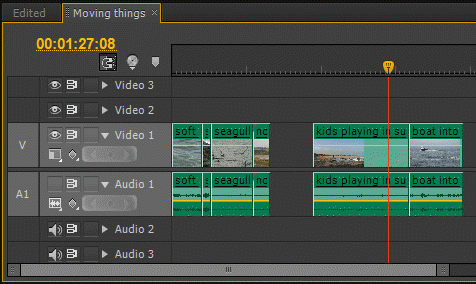
Now, it’s just a case of going through your footage with the sequence selected and choosing IN (shortcut is i) and OUT (shortcut is o) points in the TIMELINE of the ‘camera’ sequences. This can include as much or as little of the clips as you’d like, and doesn’t have to be complete clips.
IN and OUT Point Selected In The Timeline
In Premiere Pro, the ‘Lift’ & ‘Extract’ buttons are found here in the Program Monitor:
LIFT & EXTRACT Buttons in the Program Monitor
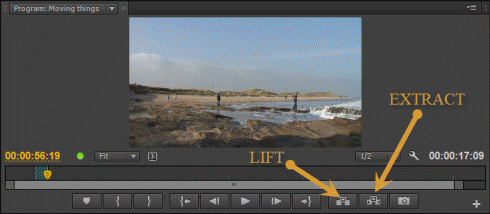
LIFT (keyboard shortcut is ; ) will copy the clip to your clipboard and remove the selected portion from the timeline, leaving a hole in the timeline shown below:
LIFT
Whereas EXTRACT (keyboard shortcut is #) will copy the clip to your clipboard, remove the selected portion from the timeline AND close up the resulting hole as shown below:
EXTRACT (with gap closed)
The useful thing about this is the exact portion you wanted from the original ‘camera sequence’ is now on your clipboard and ready for you to paste it into your main sequence.
At this point you may get a little worried that while it will paste in, it will overwrite whatever is present in your master sequence. You may feel the need to do an INSERT edit rather than an OVERWRITE edit.
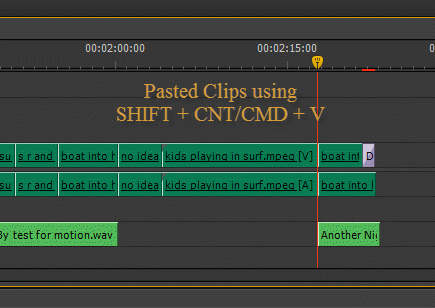
Instead of just doing the normal shortcut for paste (on a Mac it’s Command and V, on a PC it’s Control and V), simply add a SHIFT to the combination and you will end up with an insert edit of the clips you lifted or extracted from your camera sequence. This will push the existing footage down the timeline to make room for the copied clips.
SHIFT + CNT/CMD + V = Insert Edit of All Clips From the Clipboard
Use Lift & Extract in Premiere Pro to move portions of the clips you want into a new timeline with ease.


