
Premiere Pro: Reference Monitor & Video Scopes

Want to improve the look of your video footage? Check out this helpful primer for using the video scopes in Adobe Premiere Pro!

The Reference Monitor in Premiere Pro is a handy virtual display which can be brought out as a floating window to assist with lots of color correction tasks. In this post, we’ll take a look at how to best use Premiere Pro’s Reference Monitor and video scopes to improve your video editing projects.
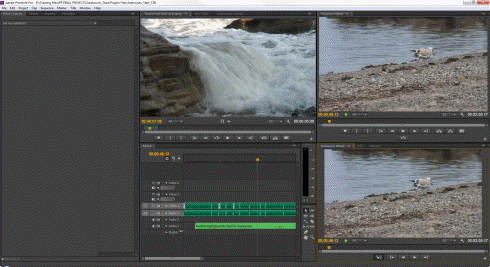
When you choose Window > Workspace > Color Correction you get the following layout ..
Color Correction Workspaces
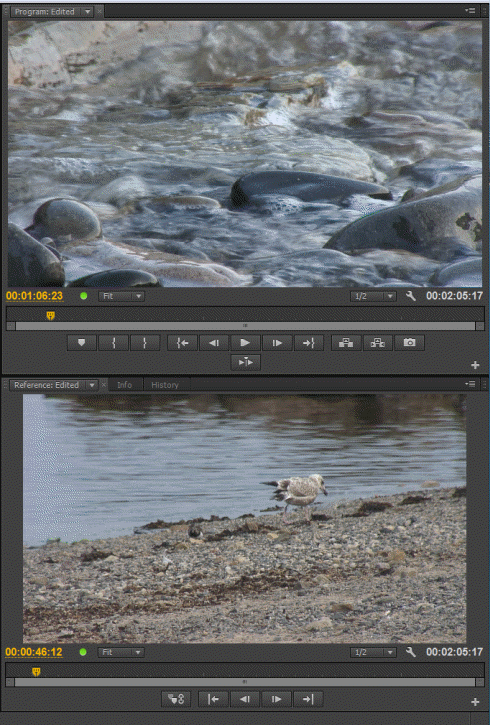
Part of that workspace is the very helpful Premiere Pro Reference Monitor:
Reference Monitor in the Color Correction Workspace
At first sight it may just seem like an additional player similar to the Program Monitor, however this little window gives you options and provides you with lots of additional information when it comes to color correction and color grading.
Reference Monitor – Closer Look
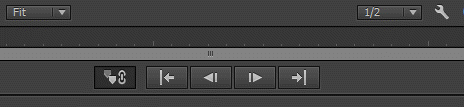
As you can see from the image above, there are less controls on the Reference Monitor than on either the Source Monitor or the Program Monitor (although you still have the + button to add more buttons should you wish to). However, the Reference Monitor has one button that is not on the Program Monitor – see it to the left of the controls.
Reference Monitor Controls
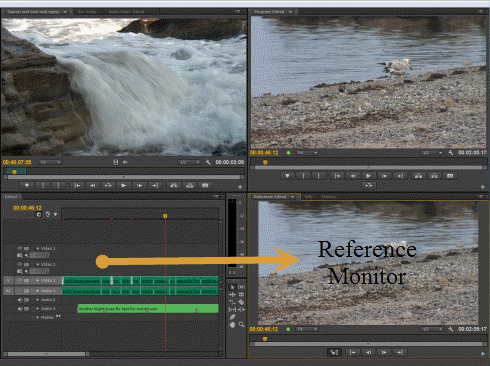
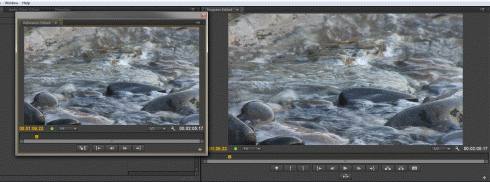
This button is the Gang to Program Monitor button and is extremely useful because it allows you to have the Reference Monitor displaying a totally different part of your timeline than what is shown in the Program Monitor. By default the Reference Monitor and the Program Monitors are ganged together, but by simply clicking this button they become independent of each other. This is ideal for when you need to do tasks such as matching the look of one piece of footage with another.
Program Monitor & Reference Monitor ‘un-ganged’
Set up like this (or even moved side by side) it is very easy to see subtle visual differences in your footage from one shot to the next. You can quickly make changes needed to avoid jarring the visual experience of your audience as they watch your “masterpiece”.
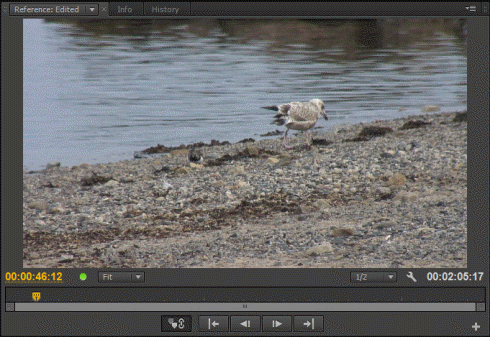
It’s important to note that you don’t need to change workspaces to get access to the Premiere Pro Reference Monitor. It is possible to have the Reference Monitor as a floating window in any workspace you choose.
Reference Monitor as a Floating Window
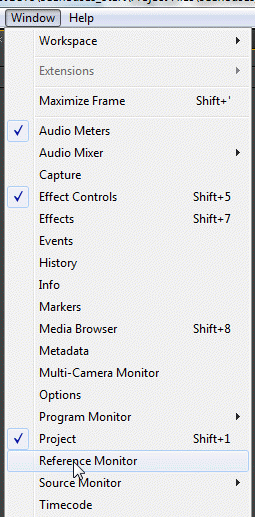
To get the Reference Monitor up (as in the example above) simply go to Window > Reference Monitor. It will come up as a floating window that you can place anywhere in your screen space.
Menu to Get the Reference Monitor
Video Scopes in Premiere Pro
As well as being able to use the Reference Monitor to match footage, the greatest strength of this display is the ability to use a wide selection of video scopes in Premiere Pro. This will give you much more accurate information about your footage. You will get more precise info than you could ever get with your eyes!
The video scopes in Premiere Pro are accessed either from the Panel Menu or by choosing the Spanner Icon shown below.
Panel Menu
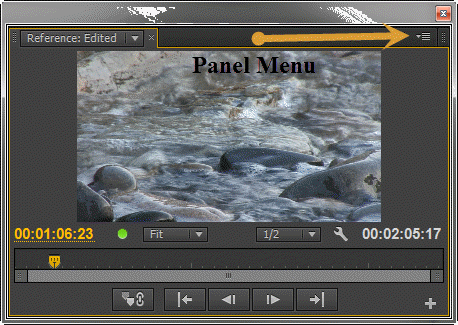
Spanner Icon Menu
![]()
Both lists are pretty much the same except for a few options extra at the top of the Panel Menu list to do specifically with panel options.
Reference Monitor Showing a Graph
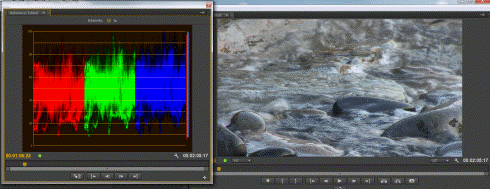
While you can access scopes with the Reference Monitor, it is also worth noting that you could leave the Reference Monitor showing Composite Video (which means ‘normal video’ to the rest of us). Then, display the scopes in the same way as described above but in the Program Monitor (via the Panel Menu or from the Spanner Icon). The key is, with 2 monitors, you can see both the normal video and have access to various scopes to ensure you get the best results for the production you’re working on.
So, my advice is get used to using the Premiere Pro Reference Monitor – not just when you’ve moved to the color correction workspace but generally to get an idea of how the changes you are applying either match with other footage in your production or affect the various color and brightness elements of your footage.


