
Video Editing 101: Using the RGB Parade

The RGB Parade is a helpful video scope in Premiere Pro for separating out the 3 color channels of digital video: red, green and blue. In this post we explore how to use the RGB Parade to improve your video edits.
Want to enhance the color in your video images, while also insuring you stay within a “broadcast safe” range? The RGB Parade is a handy tool for doing just that. Let’s dig in…
You can access the RGB Parade in Premiere Pro by clicking on the small spanner icon in the monitor window or by clicking the panel menu at the top right hand side of the panel (the icon that looks like a series of lines with a small downwards facing arrow to the left of them). Then, select whichever scope you require from the displayed list (in this case, the RGB Parade).
The RGB Parade
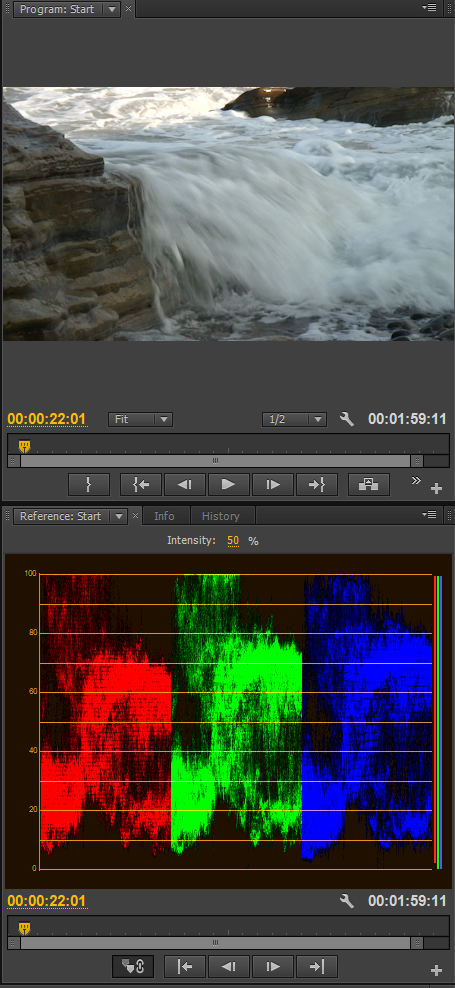
As you can see the RGB Parade shows the three color channels (Red, Green and Blue) side by side (thus ‘Parade’) in a single scope. The graph should be read as follows:
- Each of the three color channels represent the whole of the image from left to right. Thus the Red section represents the Red color channel for the whole of the image and not just the first third of the image. Same goes for Green and Blue.
- The vertical scale from top to bottom shows the intensity or the strength of that color channel at the appropriate part of the video image – such that the brighter parts are shown at the top and the darker parts are shown at the bottom of the image on a scale of 0 to 100. You can see this in the example above as the darker rock is composed of darker colors (left side of the R, G and B) and the water is composed of brighter colors (right side of the R, G and B).
The ‘50%’ beside the word ‘Intensity’ at the top of the RGB Parade is only to increase or decrease the intensity of the actual graph itself and will not affect the shot or results in the RBG Parade in any way. This can be a very useful feature when you have subtle areas which are not showing very clearly which can be amplified by turning up the intensity or if the whole graph is too bright in your editing station and only needed for simple reference. In this case the intensity can be turned down so that you can still see the graph but it is not getting in the way of your other Premiere Pro video editing tasks.
As can be seem from the clip above, all three color channels are similar to each other which is an indication of a well balanced shot. When I use this graph I tend to look for offset between the color channels (as shown below). This is an indicator of potential problems.
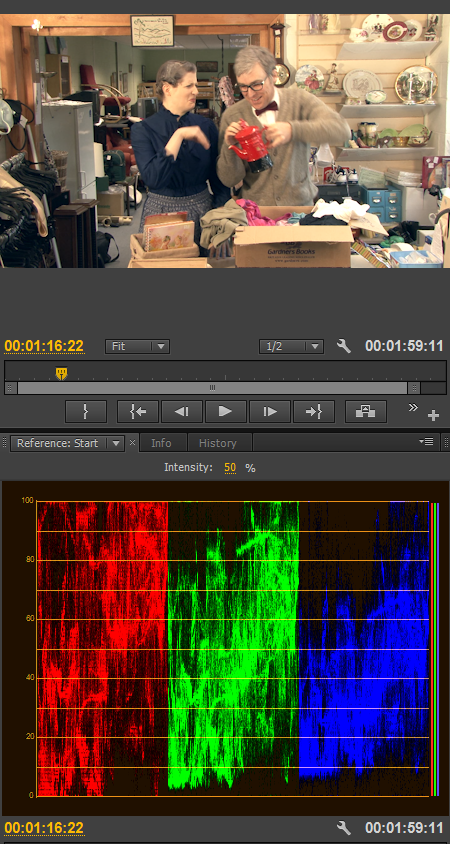
Unbalanced Color Channels
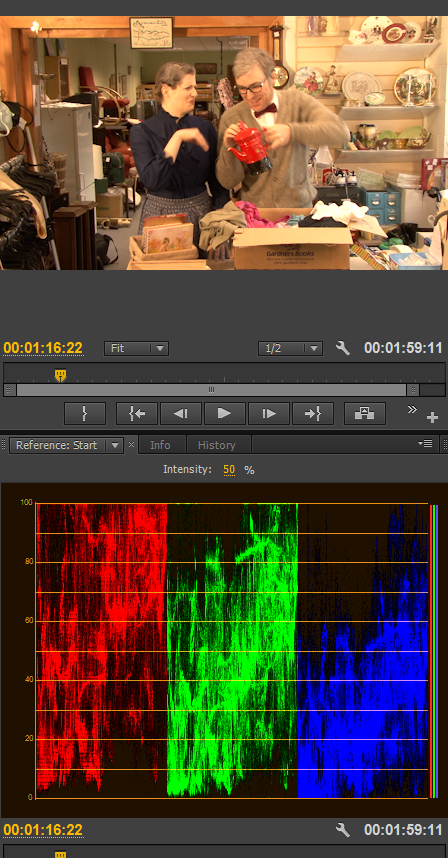
This may be a slightly extreme example as you can clearly see with your eyes that there is an issue with this shot. However, when we look at the shot with the RGB Parade we can very quickly see that the red channel in particular skews to the top of the graph, indicating a problem. In addition to this, we can see that the blue channel has far less information in the higher or lighter end, again showing that some change may need to be made to this shot.
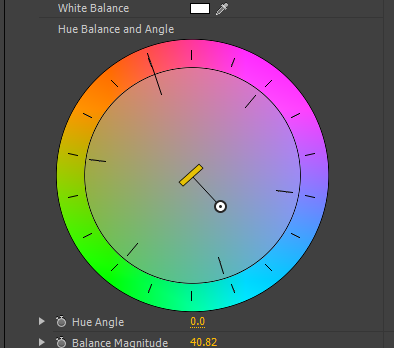
For this example, a simple solution would be to add Premiere Pro’s Fast Color Corrector to this footage. Make a quick adjustment, which will in turn start to balance the channels more for us.
Fast Color Corrector (FCC) – Color Wheel
Change to the Image and RGB Parade after FCC Change
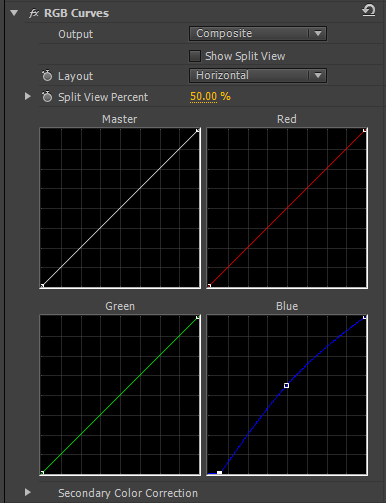
Another tool to adjust an individual color channel would be the RGB Curves effect:
RGB Curves Effect – With Change to the Blue Channel
After RGB Curves Effects Applied
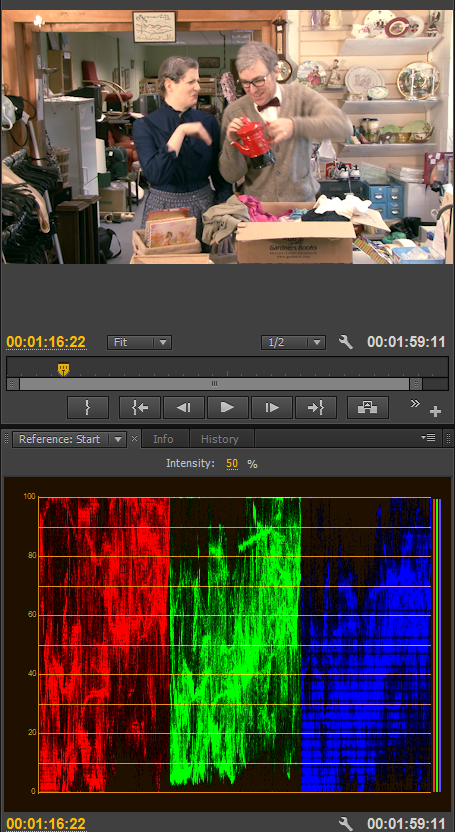
This type of incremental work can help to correct the shot with valuable feedback from the RGB Parade. It’s worth noting that there may be times when the colors are dynamically skewed or at radically different levels. For example, in the shot above, there is quite a significant amount of red in the actual shot when you take into consideration the wood at the top of the shot, the teapot and other various red items. This in turn would mean that you could expect to have a stronger red channel for much of the shot in comparison to the other channels.
So, just because one channel is more dominant than another does not necessarily mean that the shot itself is unbalanced. Be sure to examine the shot yourself and make sure that the feedback in any graph you use is helpful to correct (or grade) a shot.


