
4 Awesome Final Cut Pro X Features You May Not Know

While FCPX has been criticized over the years for being overly simplified, the software actually has some incredibly useful and powerful tools under the hood that are often overlooked.
I’ve been using FCPX from the beginning and really have grown to love the software. FCPX has a lot of powerful features that are buried beneath the surface. Unlike other NLEs, Apple has made a concerted effort to keep the user interface of FCPX very clean looking, even if it means that some users don’t know where to find certain tools – or don’t think they are available to them at all.
If you want to up your Final Cut Pro X game these tips are for you.
1. Optical Flow
If you do any sort of slow motion or speed ramping work in FCPX you’ve likely come across the Optical Flow setting…but may not realize just how powerful it is. Much like Twixtor, Optical Flow (which was originally brought over from Shake) allows you to slow down your footage with much better results, when compared to using Frame Blending (which was often the go-to choice for slow motion in years past).
Optical Flow essentially creates new frames by interpolating the surrounding frames in a clip. This effectively allows the clips to be slowed down further than it normally should be. Say for instance you are working with a clip that was not over cranked (shot at 24 frames per second). You wouldn’t normally be able to slow this down well in a 24p timeline as the clip would jump from frame to frame (as a result of not having enough frames to fill up each second on the timeline). By simply selecting Optical Flow under the ‘Video Quality’ retiming sub menu, you will get far better results. FCPX will analyze your clip in the background and apply the slow motion effect so you are able to use your clips in a way that wouldn’t otherwise be possible.

2. Jump Cut At Markers
This is a tool that I knew existed for a while, but that I hadn’t started using until very recently. It’s quite common to want to jump cut multiple times within the same clip in any number of editing situations – but especially when working on a music video or any other really stylized piece. You could go the traditional route and just chop up a single clip multiple times and slip the edit of each of the following clips a certain amount to achieve the effect, but this is a fairly time consuming process.
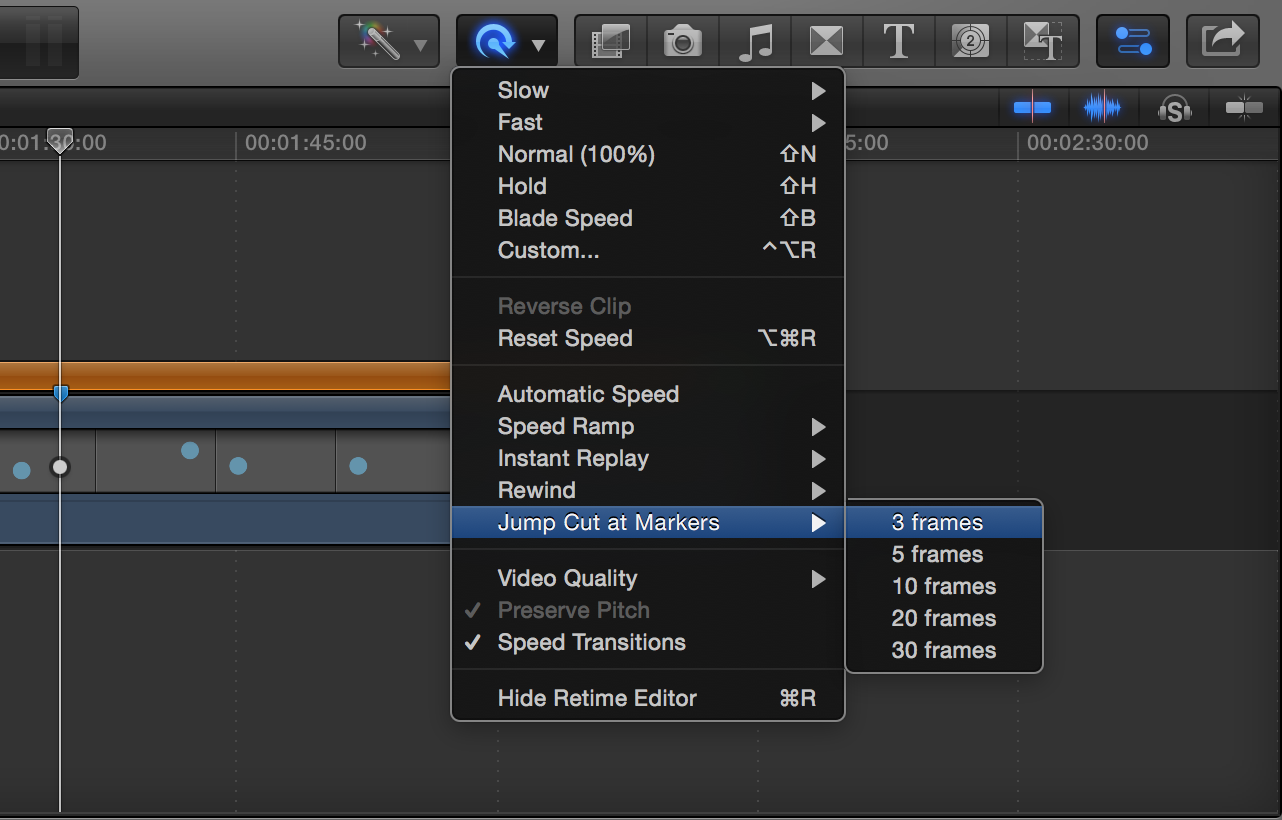
In FCPX you have the option of simply adding markers to your clip in the spots that you want it to jump cut and then selecting Jump Cut At Markers from the retiming menu. From there, you can even specify how many frames you want it to jump by (5, 10, 20, etc.), which makes the entire process way easier. It’s also great to be able to work this quickly so you can test out the effect quickly before committing to it. If you had to do this the traditional way, it would be a lot of work that might end up getting thrown out if you decide the effect doesn’t work for your project.
3. Use Markers As Subtitles
There’s so much that you can do with markers in FCPX. Aside from using markers to create jump cuts, you can also use them to subtitle you film. Rather than integrating an entirely different tool within FCPX to use for subtitles, Apple kept things more streamlined by allowing the user to opt into using chapter markers as subtitles when outputting to certain formats.
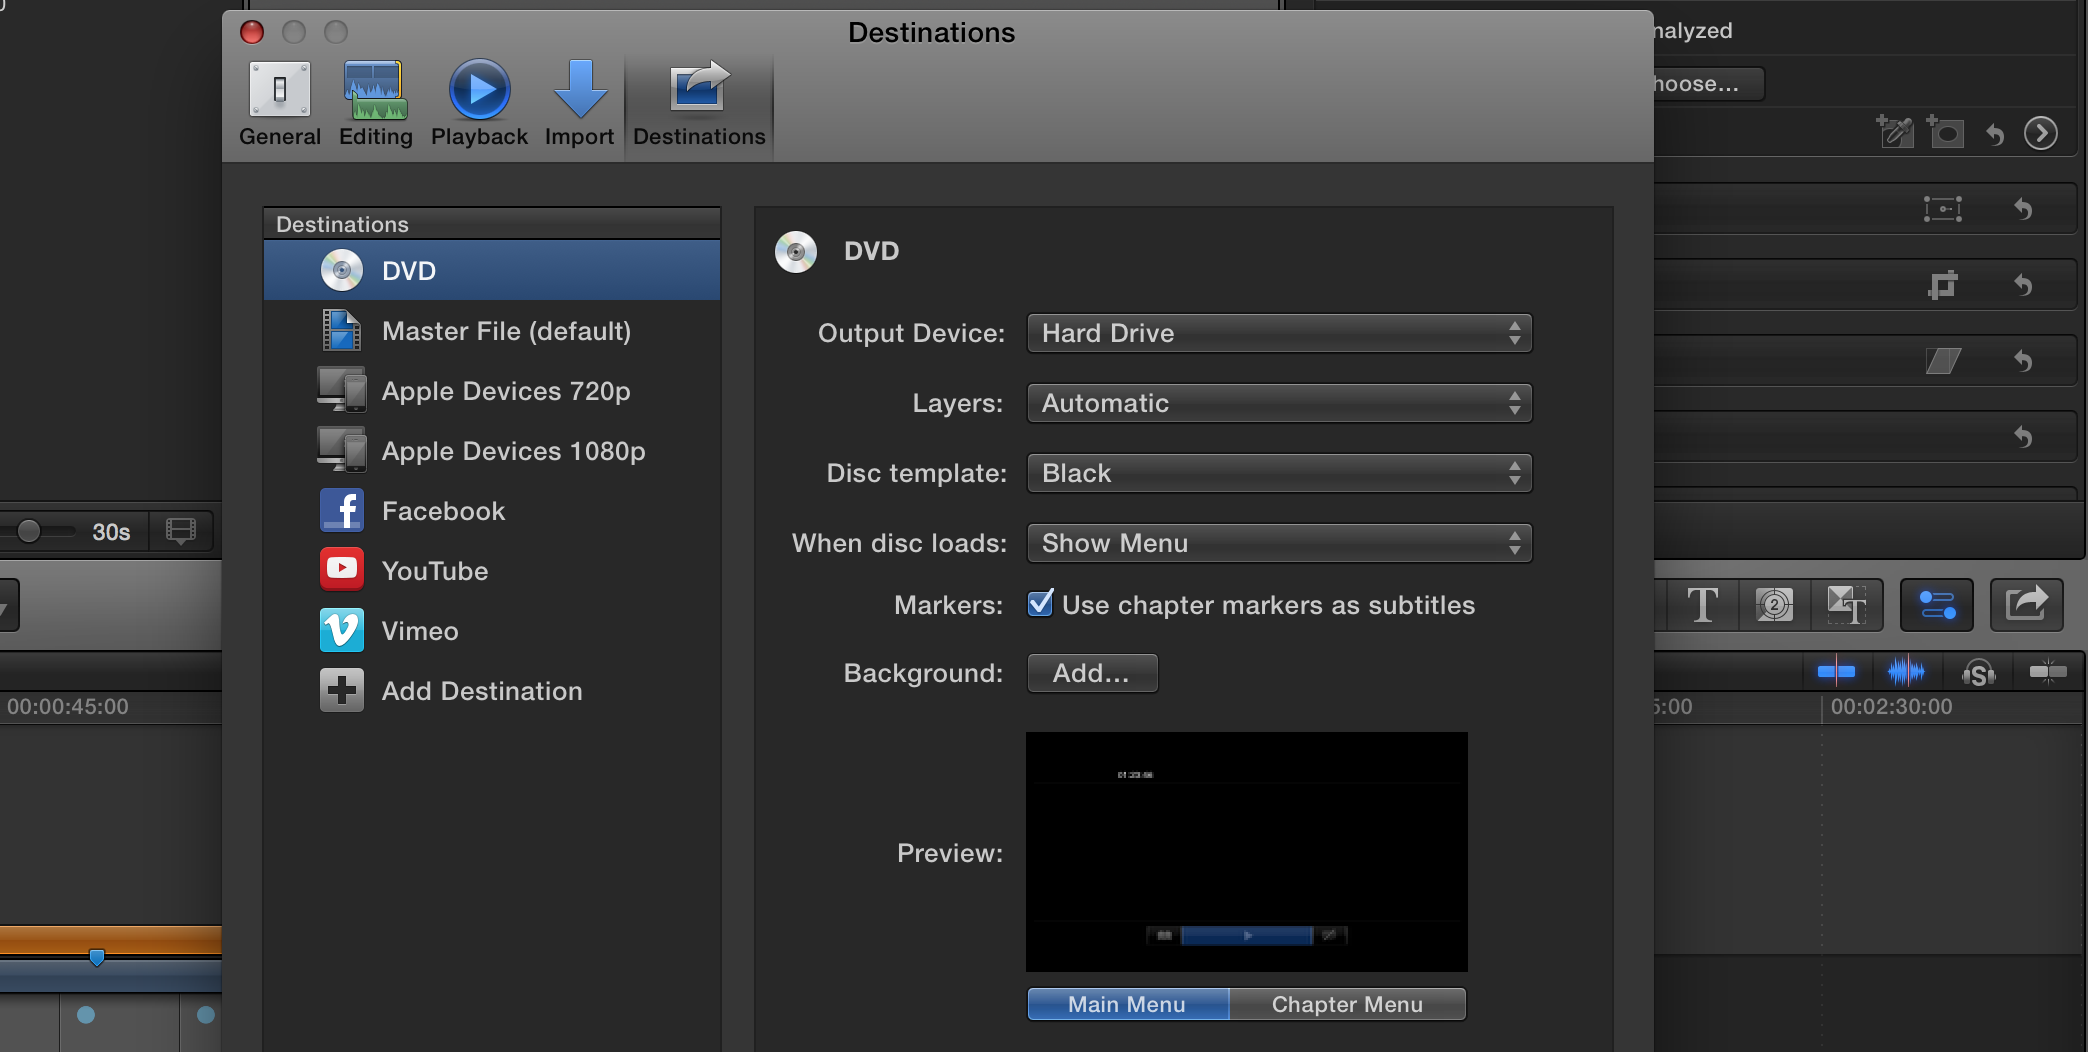
The key to using this method is that you need to ensure you are using chapter markers as opposed to standard or ‘to do’ markers. This is helpful if you like to use a lot of markers on your project, as it won’t prevent you from using regular markers throughout your project in addition to the chapter markers/subtitles. When outputting to Blu-ray or DVD, be sure to select the option ‘use chapter markers as subtitles’ in the share window in order to use this feature.
4. Adjustment Layers
This feature might be of particular interest to Premiere Pro or After Effects users who have become accustomed to using adjustment layers. For anyone that doesn’t know what an adjustment layer is, it is simply an empty layer that can have any effects, transitions, color work, etc. added to it, and will apply those parameters to any clip below it. Adjustment layers are helpful if you want to try out an effect on your entire timeline, as you can create an adjustment layer with that effect and have it span the duration of the timeline. You also might want to use it to do quick color correction passes on large chunks of your project at a time, as opposed to modifying color clip by clip. There are no limits to how you can use adjustment layers, and once you start working with them they’ll likely become an integral part of your video editing workflow.
Final Cut Pro X doesn’t actually come with an adjustment layer feature built in, however it is very easy to create one using Motion, and then publishing it to FCPX. Alternatively, if you want to skip that step, you can download a pre-created adjustment layer from Alex 4D’s website here, and follow his step by step instructions for installing it on your system. The instructions for creating the layer from scratch can also be found on Alex 4D’s site, and are very easy to follow if you have Motion installed.
For more on how to approach your next Final Cut Pro X edit, what to look for and what features it offers, check out this tutorial!


