

Autodesk Smoke: Tips for Creating 3D Text in Action

In this post we share the secrets of the 3D Text node inside of Smoke’s Action. Create impressive 3D text!

You can easily create extruded 3D Text within Action, Autodesk Smoke’s true 3D compositing node. It’s simple enough.
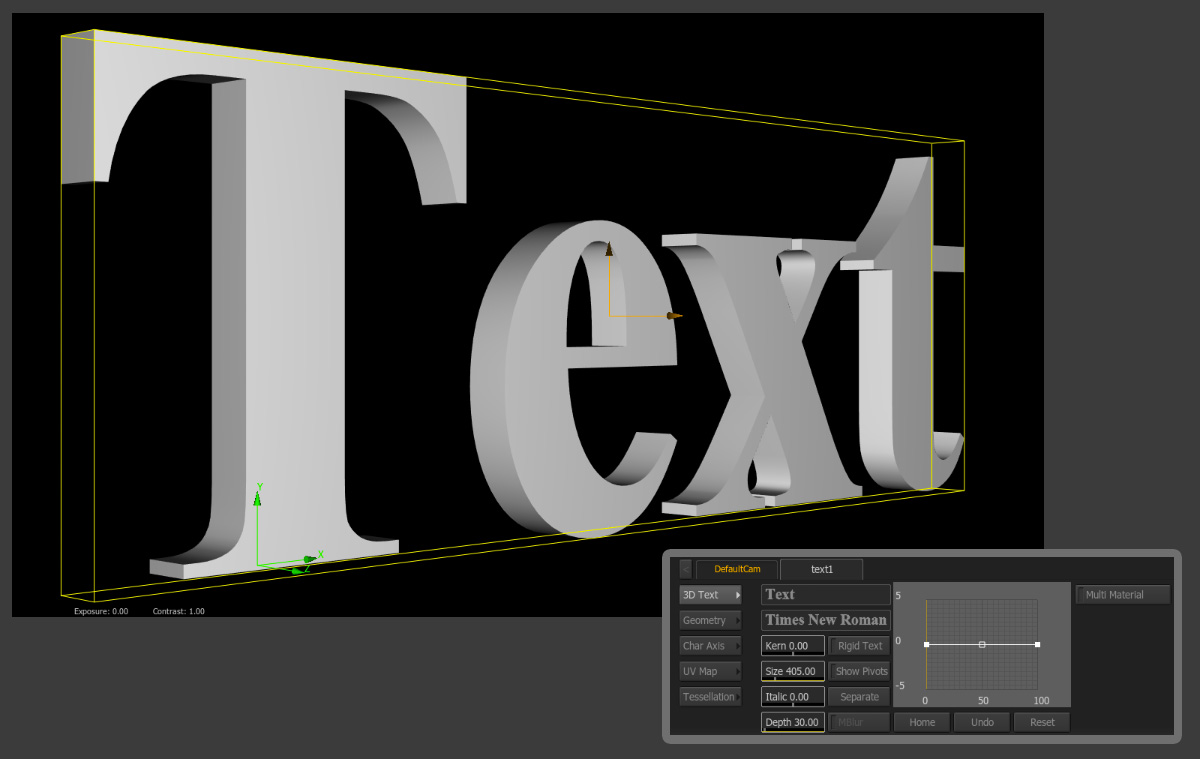
 Double click or drag the 3D Text Node into your Action schematic or scene. The text comes in as the word “Text” on screen. Let’s take a look at the Properties Tab, which will allow you to customize this text for your needs.
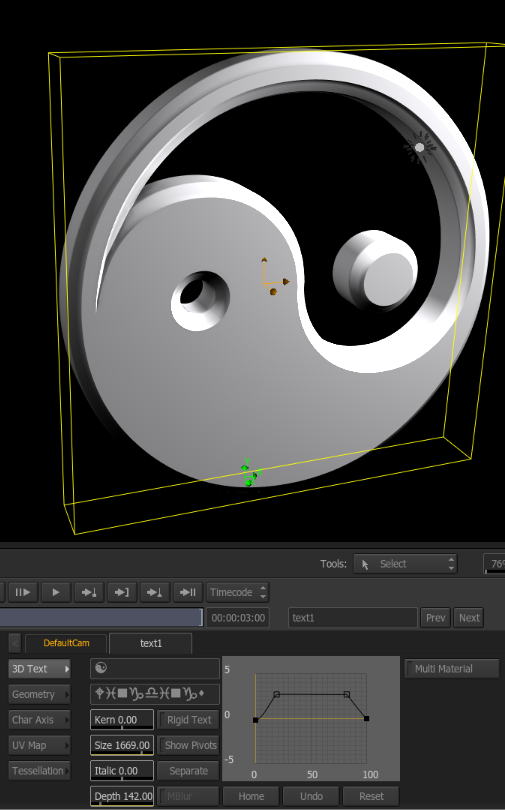
The Properties Tab contains 5 Sub Menus: 3D Text, Geometry, Character Axis, UV Map, and Tessellation.

The 3D Text Menu is where the Text attributes are applied in Smoke. Each 3D Text Node can only create 1 line of text (although that line can be quite long). The limit is 999 characters. In the font name field you can choose the font style you would like, which takes you to the same font selection as the 2D text.

Since all text is treated as vectors, this makes it easy for Smoke to extrude it into 3D. The rest of the properties are standard text features: Kerning, Size, Italic, and of course the Depth setting, which sets the depth of the extrusion in pixels.
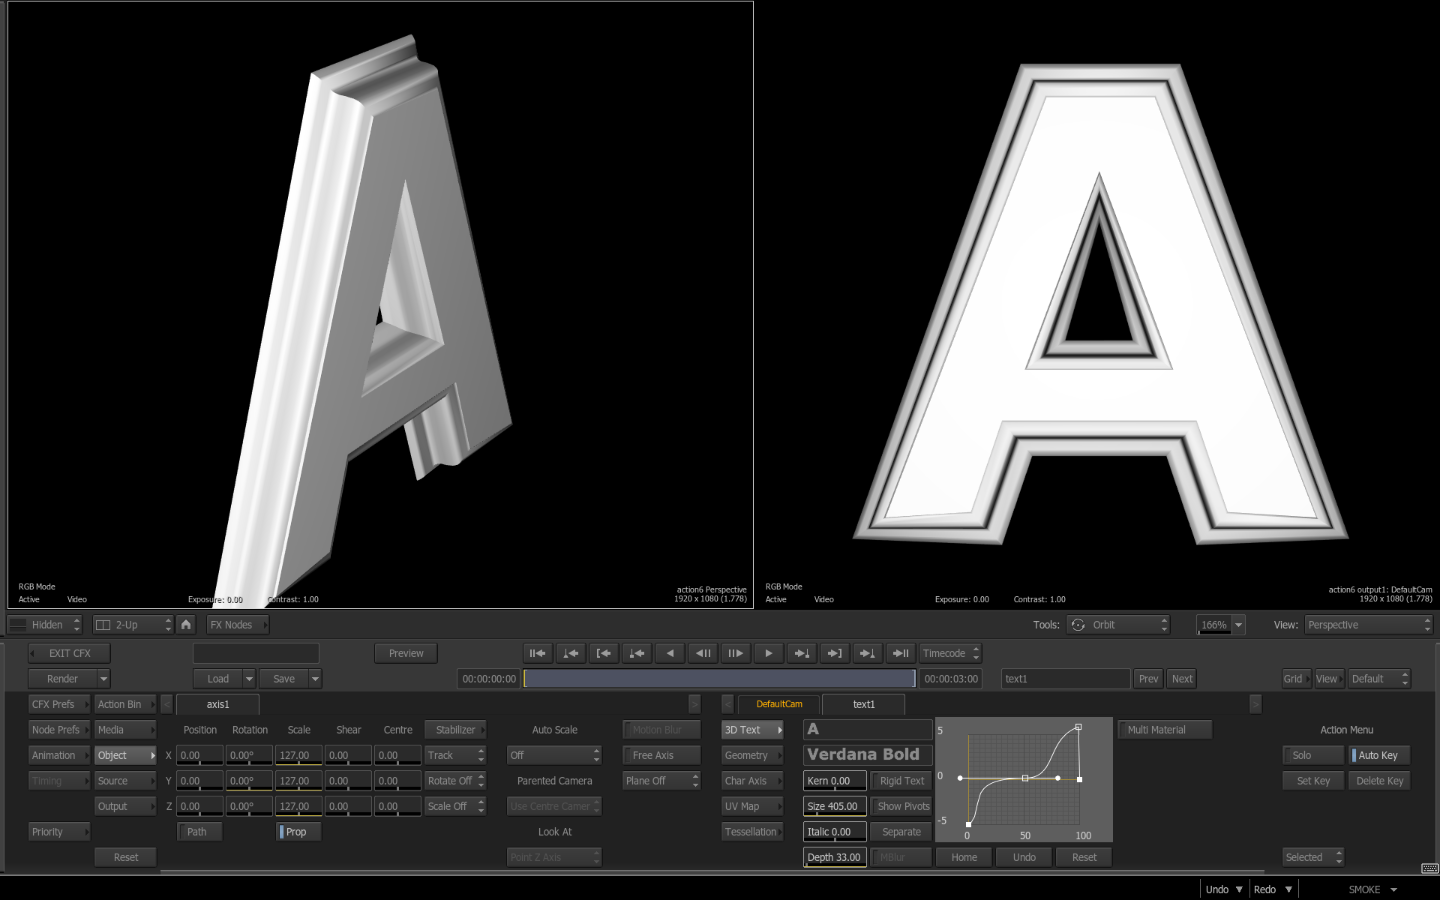
Text is extruded from the center out in both positive & negative Z space. Once the text is extruded, your attention can be turned to the Bevel Profile Graph.
The Bevel Profile settings work like many of the the other Curve Graph Functions in Smoke. You can Add and Move points at will and Break Tangents to get a sharp point. When you create a curve on the graph, that is the shape that the Text will take when seen from the Side View.
Click image for larger view:


This makes the the left side of the bevel the Front of the Text and the right side is the Back.
Normally I will create a simple bevel by adding a point and adjusting the points, as shown. However you can also create some very complex bevels for a more creative and personalized text look.
 You can Zoom and Pan inside of the Curve Graph. If you hold down ALT while moving the points they will snap to the graph and move in whole numbers.
Save and load a Bevel Profile by selecting the 3D Text Node, going in to Node Prefs for Action, and then Load or Save by going to the Text option. This only saves the Bevel and not the other properties.
The Geometry Menu gives you access to the base material properties of the Text (Diffuse, Specular, & Ambient Colors), as well as blending modes, and transparency.

 You also have settings for how the Text reacts to lights within the scene. You can force to shade Both Front & Back, or just Front, or just Back.
This can come in handy when you also have transparency with the Text as it can hide the back polygons. The Shine value will create Specular Highlights on the geometry as light hits it. Geometry can be set to Cast+Receives Shadows, Casts Only, Receives, Only, and No Shadow, or to just create a Shadow Only. Shadow Only mode is quite useful, as it will hide the physical geometry and just display its shadow. Use it to enhance your scene by adding shadows without having to clutter it up with seen objects as it acts as a shadow projector.

The Char Axis Menu is used to animate the Text on a per character basis (you have access to the similar transform controls found in the Axis node). Although you can freely move the center axis of rotation, there are pop-up buttons for quickly setting it to various points in X & Y. These may misalign your text however if you are using upper/lowercase text, as the ascenders/descenders mess things up.
The Master Character slider sets which character the animation begins on, and the cascade will offset the animation by frames. You can also set the direction of the cascade to travel in various directions left & right. Smoke makes it easy to create some quick and easy text animations.
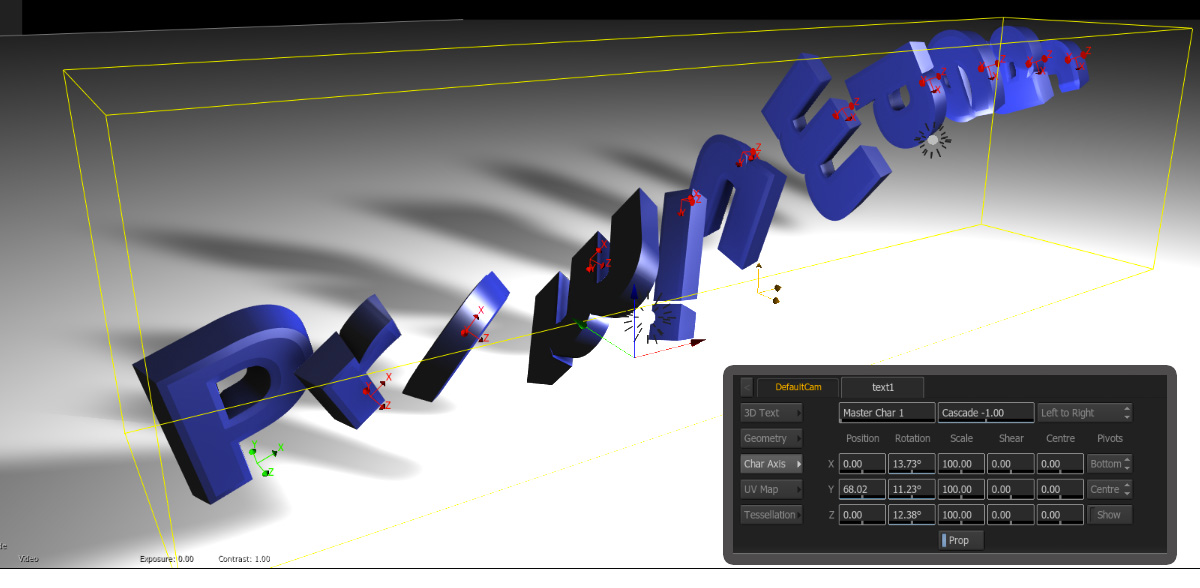
Since you can keyframe the Cascade Value and the Master Character, you can create some unique animations. You can speed up the cascade or change the point of cascade throughout the animation with the Master Character.

There are several 3D Text Preset Animations that you can load to give you a good base for your text animations.
Drag up a Preset Node from the Action Bin and it will display the 3D Texts Presets to load in a nice visual layout:

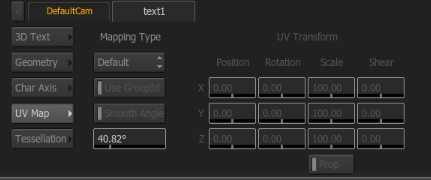
You can apply different UV Mappings to the 3D Text. This applies to any Diffuse Map Textures appled to the 3D Text. You can choose from the standard UV wrap selections. And if needed, you can use the UV transform controls. This is not like the general Position Axis controls on the Diffuse Map, as the UV controls actually transform the UV Coordinates along the surface.
 The Tessellation Menu can help improve the wireframe mesh of the 3D Text by tiling geometric shapes across the surfaces. Standard (GLU) is the simplest method but is also the least precise. It is the default setting for 3D Text, and works for most purposes. Some font styles may require you to select one of the other methods (Delaunay & Medial Axis).
These both have additional settings to improve the quality of the geometry which will provide for better shading, and displacement. You can view the original wireframe as well as the modified one to see the improvements.

Now that you have your 3D text extruded, beveled, and animated you can texture your text by adding a Diffuse Map and/or a Reflection Map (Note: you can add texture maps at anytime in the 3D Text creation). Mapping textures requires a separate blog post of it’s own, so look for that coming soon. However, there are a few other notable functions of 3D Text to be aware of:
Your HWAA settings under CFX Setup will greatly improve the quality of your 3D Text edges. It is recommended that you always enable HWAA with at least a setting of 4x. I personally use 8x. This is hardware AA and therefore won’t impact rendering time.
Under the 3D Text Menu button, you will find the the Ridged Text option. Normally when you attach a 3D Text with a 3D Path to create text on a path, the characters will bend along the path. If for some reason you don’t want the characters to separate and you want the entire word to move as one, then you can enable the Ridged Text option.
You can’t kern the characters of the text easily with 3D Text. If you need to kern your text, you can click the Separate Button. This will split out your text characters into a set of Axis, Offset, and Geom. These will all be connected to several control axis. The original GEOM created will also be retained and it will become hidden. This is a nice safety in case you want to return back to the original. Now that the characters are separated you can animate the text characters at will.
Click image for larger view:

Note: If you plan on using the Char Axis menu for animation and text cascading, you need to do this before you use Separate. After separation the Char Axis and Cascade properties and timings will be retained, but any adjustments in this menu will no longer be tied to the separated text. If you need to make adjustments, you need to delete the separated nodes and unhide the original GEOM.
One other ‘gotcha’ is that if you adjusted the Centre Axis via the pop-up buttons in the Char Axis menu, it will revert to normal positions (Bottom,Center) when you Separate. This will alter the animation slightly. You will have to reset it for each character afterwards or it would be better to set the centre via the centre axis controls.
To get the most out of 3D Text, you can use fonts that aren’t letters. You can load Windings fonts or download some shape fonts, like snowflakes or ornament fonts and create some quick and easy 3D shapes inside Action for motion graphic design.


In the upcoming blog post on texture maps, I’ll show you how to use some simple 3D Text Shapes in motion graphic design. I hope this post sheds some light on the functionality of 3D Text inside Autodesk Smoke.
Got questions or comments? We’d love to hear them! Feel free to post below.


