

Autodesk Smoke: Preset Menus, Full Screen UI & Group Nodes

We’ve got 3 more smokin’ hot tips for Autodesk Smoke. Find out how to make Custom Presets Menus, Full Screen UI, and create your own power Group nodes in ConnectFX.

1. Add a Smoke Presets Menu to Other Nodes
![]() Ever wanted to have the presets menu that you have in Smoke nodes like Damage, Glow, and Stylize for your own custom effects? Having the presets menu like this in other nodes would make it a lot easier to organize your own effects. Well, this is quite easy to achieve in Autodesk Smoke. Click image to the right for larger view.
Ever wanted to have the presets menu that you have in Smoke nodes like Damage, Glow, and Stylize for your own custom effects? Having the presets menu like this in other nodes would make it a lot easier to organize your own effects. Well, this is quite easy to achieve in Autodesk Smoke. Click image to the right for larger view.
Flame Artist Andy Dill pointed this out to me, so credit goes to him.
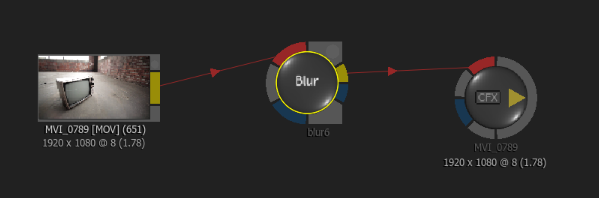
1. Enter ConnectFX and drag up a node that you would like to add presets to:
2. Double-click the node to bring up it’s controls.
3. Activate Node-Prefs & then Load Node:

4. You are now in the Projects node folder for that node. Navigate to the same node folder but inside the version of Smoke that you are using. Currently that version is smoke_2013.2.2.
![]()
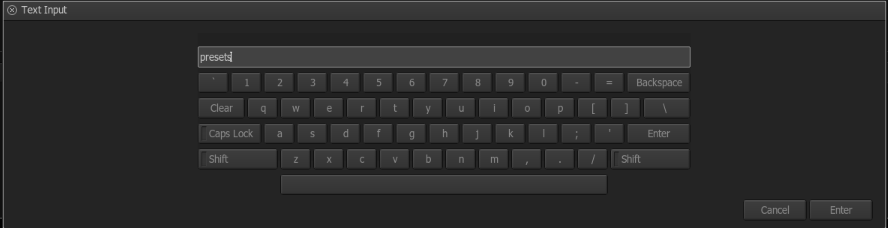
5. Press the New Directory button on the left of the file browser. This will open up a text input box. Type the word presets.
NOTE: You may get a permissions error if you don’t have read & write permissions. If this happens you can give your OSX user read & write file permissions. Once you have your permissions set, for smoke_2013.2.2 folder and it’s subfolders you will be able to add folders via the Smoke file browser. Or you can manually add the folder in the appropriate directory.
WARNING: In changing permissions on smoke_2013.2.2 I freaked out Smoke to the point that it wouldn’t launch. It gave me an error of “Effective User ID not 0 (root!)” This caused me to have to reinstall Smoke. I’m not OSX savvy, so it may have been user error.
6. Exit the Load Node file browser.
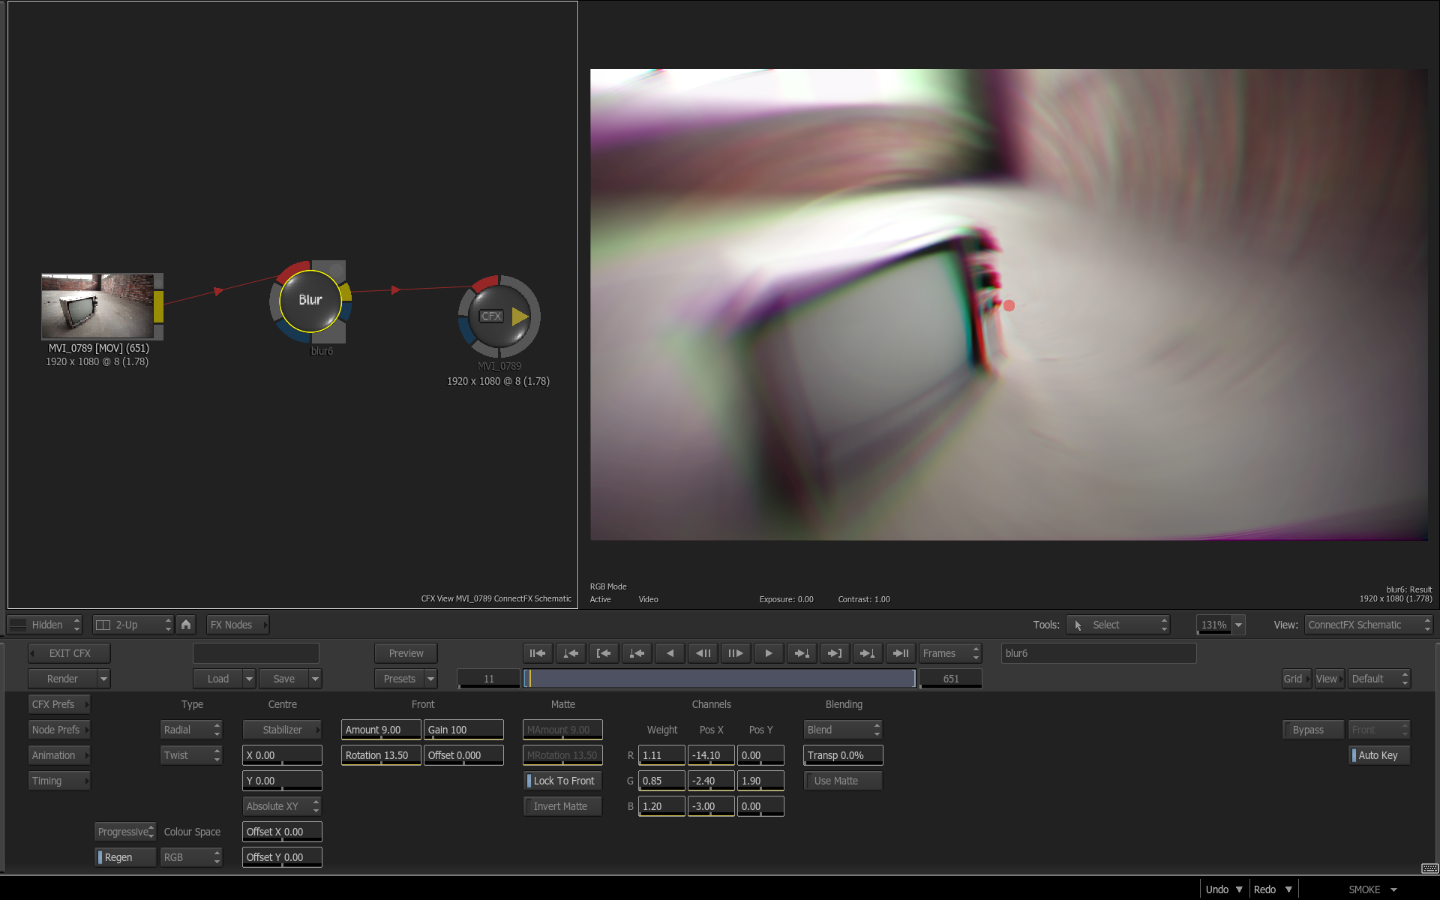
7. Now, create an effect that you like and would want to save. In this example I have created a Spin Blur effect with RGB offsets.
8. When you like what you have, press Node Prefs and Save Node.
9. You should still be in the same /usr/discreet/smoke_2013.2.2/blur/presets directory that you just left. Give your custom effect a name, hit Save, and then exit Save Node.
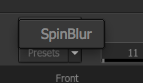
10. Now you may not see the Presets Pop-Up button appear right away. Delete the node from CFX and then re-drag the node back into the schematic. This will refresh the node and the Presets Button will now be available. If you hold down the arrow, you should see your custom named preset in the list.
 11. You can now create more presets for this node or repeat the steps for other nodes that you would like custom presets for.
Power User Tip: You can create sub folders within the presets to better organize your looks. When you had sub folders you will get a divider line in the list.
When you upgrade your Smoke software to future versions you will have to manually move these custom preset folders to the directories in your new version. EX: /usr/discreet/smoke_2013.2.3/blur/presets
2. Remove the OSX Menu Bar for Smoke
Don’t tell Apple, but you can remove the OSX menu bar at the top of the screen and run Smoke in a full screen mode. When you do this, a new Smoke-style menu gets added to the lower right of the UI which includes Undo and Redo buttons which remain active through the entire UI.
1. Shut down Smoke.
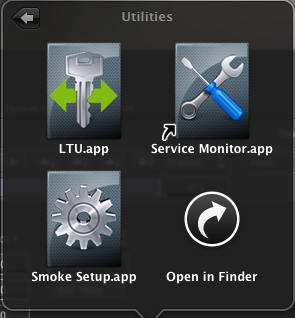
2. Open up the Smoke Setup App located in your Utilities folder in the Autodesk Folder in Applications.
3. In the General panel, change the Menu Bar setting from YES to NO. This will deactivate the OSX menu bar.
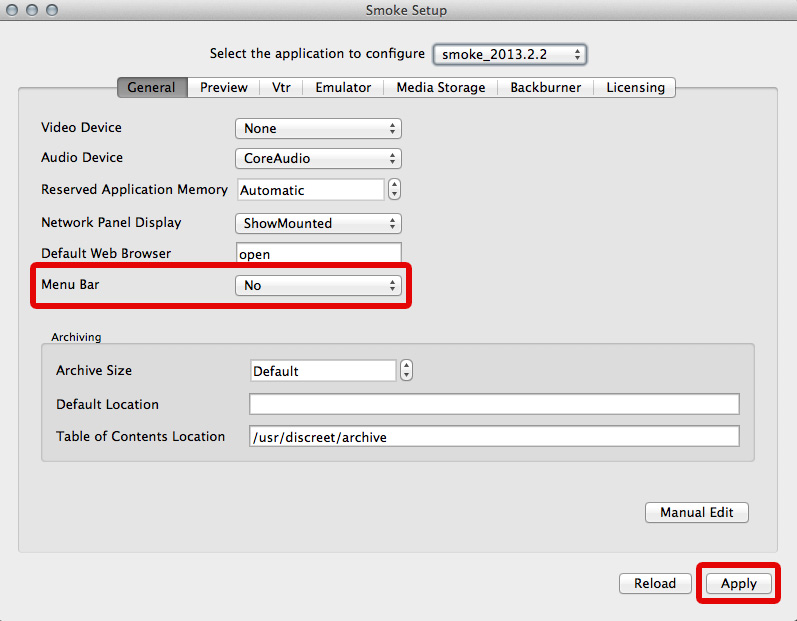
4. Press Apply to save your change and Exit the app.
5. When you launch Smoke now, you will have the “much cooler” Smoke Menu button in the lower right with all of the OSX menu bar options easily accessible from any Smoke Tab you are in.

3. Create Custom Power Nodes in ConnectFX
 By using the Group option with multiple nodes in ConnectFX you can consolidate a large group of nodes into one. This is different than creating a CFX Clip, which also consolidates multiple nodes down to a single element. The Group function allows you to maintain input and output points. You can also select which inputs and nodes you would like to display.
One custom node I have created is a Dual-Mux node that I use to easily create a 1 frame range for any input fed into it. This node has 2 Mux nodes tied together for Front & Matte inputs. I’ll use this as an example to explain Grouping, and you can use the concepts on for many other custom nodes you make.
I use this Dual-Mux node to speed up renders in CFX when using the Text Node. The Text Node isn’t optimized as well as it could be, so it has to re-render the text for every frame of the effect, even if the text is static with no animation. The Dual-Mux node will limit the range of the Text Node to 1 frame and thereby, speeding up the render overall as now the Text only needs to be rendered once.
1. Enter ConnectFX and drag up a Text Node.
2. Drag up 2 Mux Nodes and use the Mimic Link [Shift+W] to bind the 2 Nodes together so that a change in one generates the same change in the other.

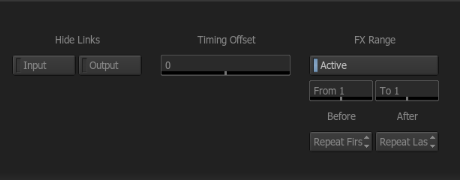
3. Enter 1 of the MUX Nodes and activate the FX Range and set the From & To numeric fields to 1. This will essentially create a freeze frame at frame 1.
4. Change the BEFORE & AFTER settings to Repeat First & Repeat Last. This will keep the freeze frame visible across the entire length of the effect.
5. Attach the TEXT Node Result Ouput to the input of one MUX and the Matte Output to the other MUX Input.
6. Rename 1 MUX as Front and the other MUX as Matte.
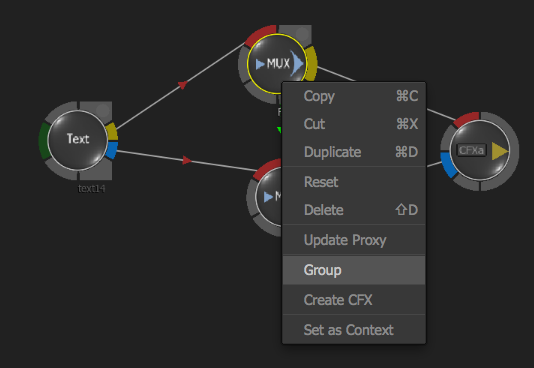
7. Box Select the 2 MUX Nodes with CMD+Drag.
8. Once selected, right-click and choose GROUP from the menu.
9. Now the 2 MUX Nodes are now grouped into 1 node. Rename the Group Node to “DualMux”.

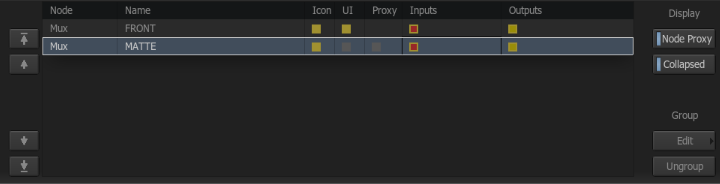
10. If you click the group node now you will see the group menu where you can customize the inputs and outputs for your group. You can also turn off the Node Proxy to make the node a bit smaller to work with.
11. Drag the DualMux Group Node to the User/Project Node Bin to save for later.
 This is a simple example and not much needs to be customized with the inputs/outputs (as we need all the inputs/outputs used). But here is a more complex grouping that you can create with some customizations:
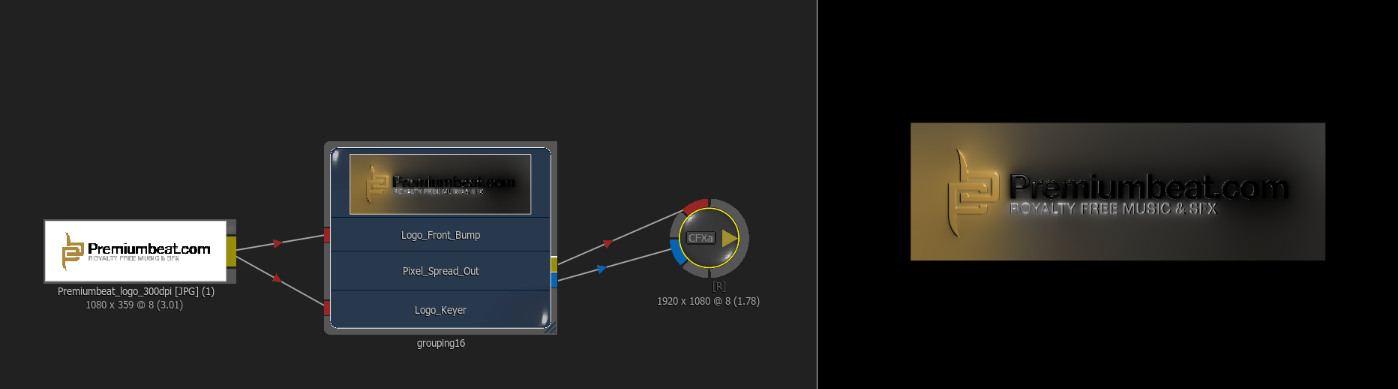
I often get print logos over white that I need to use. These take a few nodes to Key & Invert and I also want a Bump Displace to emboss the logo. A Pixel Spread Node is added at the end and set to Interpolate to help create a cleaner key.
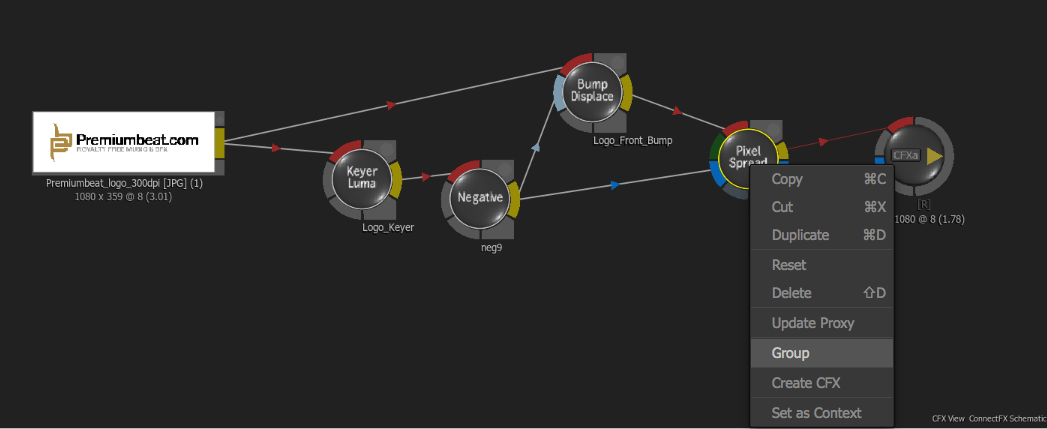
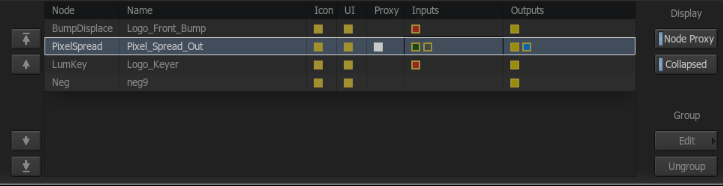
If you take this setup and group it, you get a grouping showing the 4 Nodes with the 2 unused inputs from Pixel Spread and all 5 Outputs. I don’t really need all of this visible for this effect. I just need the Bump Displace and LumaKey Inputs and the Pixel Spread Result/Matte Outputs.
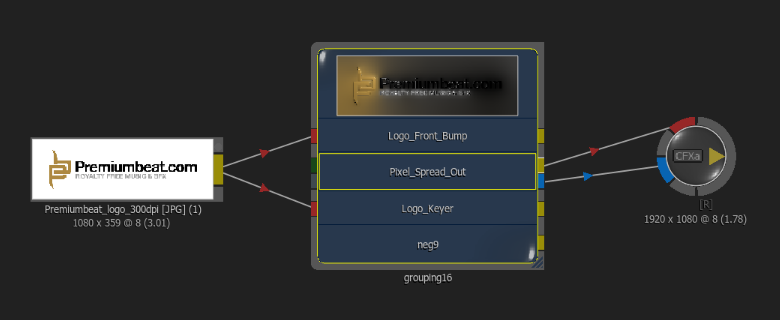
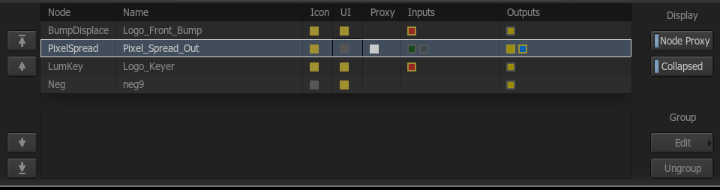
You can rename the nodes with the Group Menu interface as well. You can give the nodes friendly nodes to make it easier to see how the node should be used regarding the ins & outs. You can also resize the node as desired by dragging the lower right corner.
You can deselect the little boxes in the Group Menu to hide the elements you want. You can hide the Neg node completely, and hide the inputs to the Pixel Spread. You can then hide the outputs from the Bump Displace and the Keyer. You can also choose what is displayed in the Proxy Icon. For this I choose the Pixel Spread Result. Rename the Group and save it to the User/Project Bin for later use.
If you double click the Group Node you will enter it and see the nodes normally. You can make adjustments as needed.
I hope these tips are useful and that you can find a way to use them in your next project on Smoke.
Have Autodesk Smoke questions? Share in the comments below!


