
Removing Black Sun Spots in DaVinci Resolve

When shooting directly at the sun, some digital cinema cameras suffer from the “black sun effect,” which can leave a nasty-looking hole in your image. Here’s how to fix it in DaVinci Resolve.
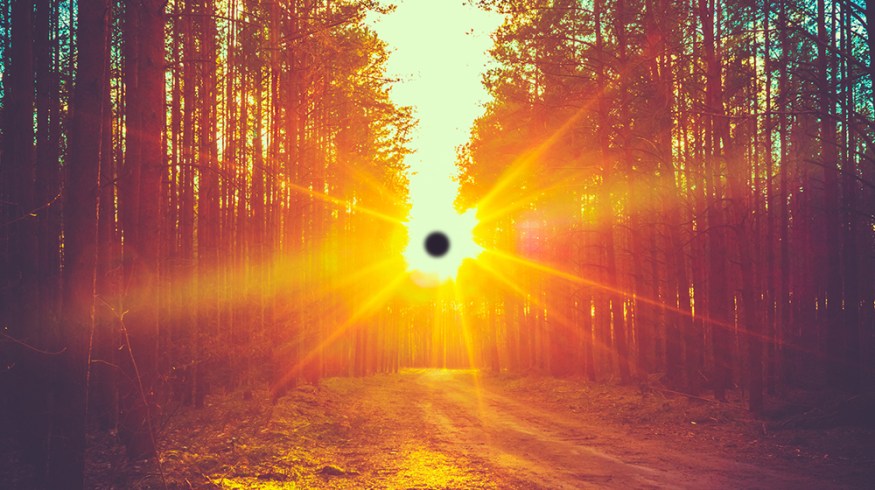
Top image via Shutterstock
One very common (and frustrating) issue that most filmmakers eventually face is the black sun effect. If you’ve ever experienced this issue, you know just how annoying it can be to review your otherwise perfect looking footage, only to realize there’s a big black hole right in the middle of the shot.
Most often, this artifact is a result of extreme overexposure — hence why it’s so common when pointing your camera at the sun. The center of the overexposed portion of your image will simply clip to black, as opposed to clipping to white, which inevitably leaves an ugly mark on your footage.
 Image via Shutterstock
Not all cameras will have this issue. In fact, most don’t suffer from this problem. But some digital cinema cameras (such as the original Blackmagic Cinema Camera) are prone to it and need to be handled carefully in post to get rid of the problem.
The good news: it’s actually very easy to fix this problem in just about any color correction software. For the purpose of this post, I’ll describe the steps that I’d recommend using in DaVinci Resolve — but keep in mind, you can apply these principles no matter what color software you’re using.
Step 1: Add a Window

The first step you need to take after importing your footage is to create a power window around the black spot on your footage. This usually works best with a small circular window positioned directly on top of the black hole. You might want to add a touch of softness (or feathering) to the window, but try to limit the overall size as much as possible. You really only want it affecting the black spot and maybe a few surrounding pixels.
Step 2: Track
![]()
Once your window is set up properly, the next step is to use a tracker (such as DaVinci Resolve’s built-in tracker) to track the mask to the black spot. This step might not be necessary if you were shooting a locked-off shot on a tripod, but if you were panning, tilting, or shooting handheld, you’re definitely going to need to track your window. Once the track is complete, you can move on to the final step.
Step 3: Levels Adjustment
With your window now tracked perfectly to the black spot on your footage, all you need to do is lift up your shadows as much as possible. The easiest way to do this in DaVinci Resolve is to crank up the “lift” wheel as far as possible, so that your black level effectively turns white. This will completely eliminate the black spot in your footage, leaving you with a perfect final image.
To help visualize these steps, be sure to check out the video below. It will show you exactly how to remove the black sun effect on your footage.
Have any additional tips/tricks/techniques for adjusting sun spots? Please share them in the comments below.


