
Creating Timesaving Presets in Compressor
Create timesaving presets in Compressor for common compression tasks – or just download these free presets to get you started!

Creating presets in Compressor, Apple’s video encoding application, is an incredibly easy way to save time and effort when it comes to common compression tasks. In this post I’ll quickly show you how to create Compressor presets yourself, as well as provide a link to download some ones I made. Save time and effort!
Creating a Compressor Preset
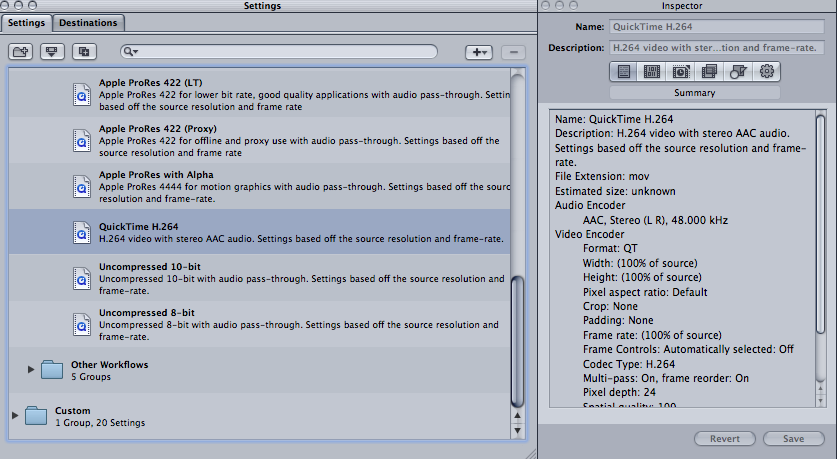
The easiest way to create a Compressor preset is simply to duplicate an existing preset and then make some suitable adjustments. We’ll create my ‘Client Viewing’ settings in this example. To do this open Compressor and in the Settings tab open up Apple> Formats > Quicktime > Quicktime H.264.
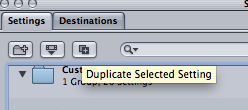
Next press the ‘Duplicate Selected Setting’ icon – third in from the left at the top of the settings tab. This will create a duplicate setting in your ‘Custom’ folder and it also means you’re not saving over Compressor’s default presets.
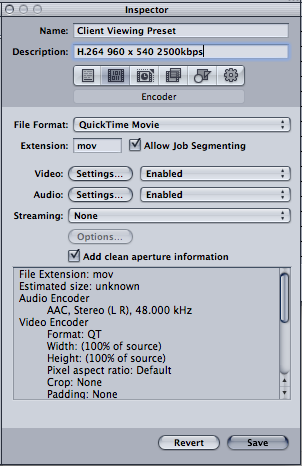
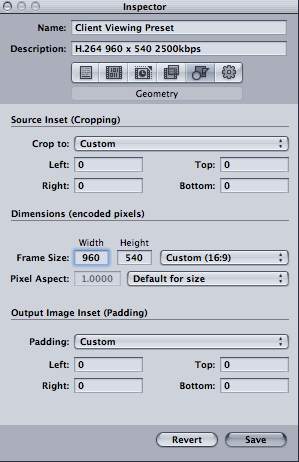
In the Inspector pane name the setting something relevant based on the task you’ll use it for and fill in the description with some of the essential attributes it will have to remind yourself what it is supposed to do. Here I’ve called it ‘Client Viewing Preset’ and given it the description “H.264 940×560 2500kbps”. This is going to make a Quicktime file that’s great to send to clients for approval, as its decent quality without a huge file size. Note, 960×540 is 50% of full HD 1920 x 1080.
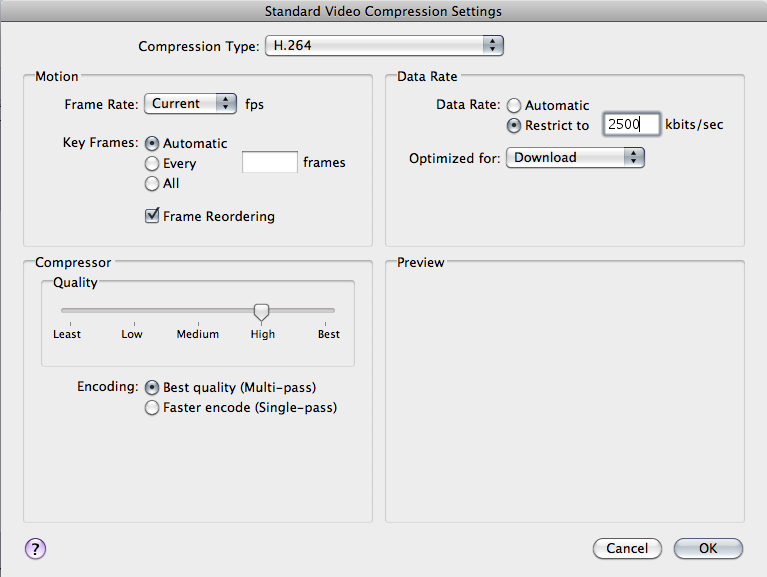
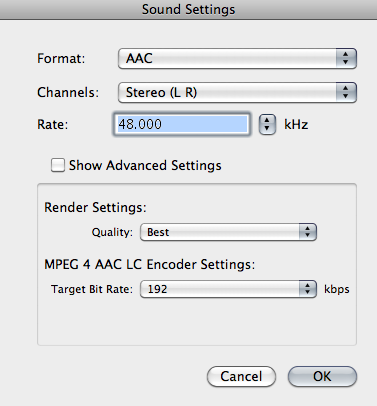
Now click on the Video Settings button in the middle of the inspector and check the ‘Restrict to’ button and type in “2500” in the box. This will cap the data rate at 2500 kbits/second. You can leave the other settings alone. This way Compressor will read the native frame rate of the file you’re working with. Next, click the Audio Settings button and drop the ‘target bit rate’ down to about 192.
Finally jump over to the Geometry section of the Inspector and set the dimensions to: Custom 16:9 and type in 960 x 540. Or you could set it to 50% of source if you want a bit more flexibility on using it on files other than 1920 x 1080. Last of all remember to press SAVE!
Free Custom Presets For Compressor
In that example we looked at creating a nice preset for client approval videos, however the same technique can be used to create any Compressor preset.
To save Compressor presets to a USB flash drive, Dropbox folder or email simply drag the preset from the settings pane into a finder window. I have created some Compressor presets of my own use that you can download from this link: Download Four Free Compressor Presets
Inside the .zip file are 4 presets:
1. Client Email Settings – 512 x 288 500kbps – designed to create small files that are easy to email.
2. Client Viewing Settings – 960 x 540 2500kbps – Bigger and nicer to look at files that are useful for client viewings.
3. Vimeo 720 HD – 720 x 1280 5000kbps – This is Vimeo’s recommended preset for 720p HD video and non pro/plus accounts.
4. Vimeo 1080 HD – 1920 x 1080 10,000kbps – This is Vimeo’s recommended preset for 1080 HD video. You can crank it all the way up to 20,000 but its probably over kill.
Click here to view Vimeo’s recommendations for compression settings for several different frame sizes etc. One additional note, you may want to double check the frame rate settings for your country. As I’m UK based I’m a PAL editor, so my frame rate is set to 25 fps.
Which application do you prefer for video encoding?
Share your thoughts/experiences in the comments below!


