Tips For Configuring Adobe Premiere Pro CC
Having trouble configuring Premiere Pro CC for best performance? Here are a few quick tips that’ll speed up your Premiere Pro video editing.
Finding the right settings to make sure you’re getting the best out of Premiere Pro CC can sometimes be a bit tricky. Check out these quick tips to find out how to configure your RAM usage, change your label colors into sensible descriptions, use two monitors for playback, use a hidden hot key and more.
What’s the video at the top of this post got to do with configuring Premiere Pro CC? Not much! But it’s a pretty fun intro to Premiere Pro from the Conan editors.
Understanding Premiere Pro CC Memory Settings

Digital Rebellion has a very clear breakdown of how Premiere Pro CC makes use of the available system RAM and how to get the best performance from your machine.
Premiere, After Effects, Encore, Prelude, Media Encoder and Photoshop all use the same memory pool so the RAM is assigned between them. Premiere and After Effects are assigned the highest priority within the pool so closing these applications can improve performance in the other apps.
As a quick aside if you get ‘low memory warnings’ while rendering you can get around it by doing the following:
By default, Premiere Pro renders video using the maximum number of available processors, up to 16. However, some sequences, such as those containing high-resolution source video or still images, require large amounts of memory for the simultaneous rendering of multiple frames. These sequences can force Premiere Pro to cancel rendering and to give a Low Memory Warning alert. In these cases, you can maximize the available memory by changing the rendering optimization preference from Performance to Memory. Change this preference back to Performance when rendering no longer requires memory optimization.
Select Edit > Preferences, and select Memory in the Preferences dialog box.
In the drop-down list next to Optimize Rendering For, select Memory.
Click OK, close Premiere Pro, and reopen the project for the new preference to take effect.
Showing CUDA Render System Display
In this short video tutorial, SpliceNPost shares a great quick tip to toggle on a hidden feature that reveals a whole load of information on your playback quality. Even though the tutorial is using CS6, the same applies in CC.
To toggle on the CUDA Render System information display (on a Mac) hit CMD+SHIFT+F11. It will then appear the next time you press play. Use the same key command to turn it off again.

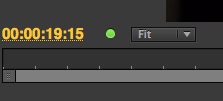
For a simple display of whether you are dropping frames while playing back your footage click on the spanner icon on in the bottom right of the program monitor and select ‘show dropped frame indicator’.
A little dot will appear on the left hand-side of the program monitor. Green is good, yellow indicates dropped frames.
Using Two Monitors with Premiere Pro CC

Larry Jordan has a great explanation of how to set up Premiere Pro CC to make use of two monitors and how to configure your user interface to make the most of all that new space. Larry also demonstrates how to fix any audio sync issues and save your newly created two-monitor workspaces. A great read, check it out here!
Enabling Mercury GPU Acceleration
This short tutorial from Video2Brain, again for CS6 but the same applies in CC, walks you through how to make the most of Mercury Engine GPU hardware acceleration within Premiere. For a full list of supported GPU’s check out this recent blog post from Adobe.
Changing Premiere Pro CC Color Labels

One of the most confusing things in Premiere Pro is the color label settings. What color is Caribbean or Cerulean anyway? It is in fact very easy to change the names and colors of these labels in a couple of clicks.
Just head to Preferences > Label Colors to type in new names for the colors and, by clicking on the colored boxes, to change the colors themselves.
What you might want to do is to change the names of the colors to the type of assets they will be color coding. For example the default color for a bin is ‘Mango’. If you re-label the mango color to Bin, then when you come to select a color label for a new bin, you will know that all bins should be mango.
This becomes more useful in shared edit systems where say all final masters should be red, or all temp graphics green. When any editor clicks on the label colors to change something, they will get a reminder of what color everything should be. This helps everyone to work consistently and collaboratively.
To find out the default color of assets click on Preferences > Label Defaults.


