FCP X Audio Tutorial Part 4: Enhancing Audio Using Final Cut Pro Equalization and Analysis Tools

In this tutorial we’ll explore some of the improvements to audio enhancement in Final Cut Pro X including a graphic equalizer and analyzation tools.
Although lacking in some professional features, Final Cut Pro X improves on previous versions of the application when it comes to audio tools. Apple recently did away with it’s Soundtrack Production application (a Pro App that was included with earlier versions of Final Cut Studio). Final Cut Pro X benefits, as some functions previously included in Soundtrack have now been cannibalized into FCPX…such as the audio enhancement tools.
Audio Enhancement: Equalization
The equalization filters in previous FCP versions were clunky and tedious to modify. Equalization in FCPX is a tremendous advancement…with each audio clip having built in EQ properties that are easily adjustable using one of the presets or adjusting manually using the graphical interface. The next time a client asks you to adjust the bass, mid-range or treble frequencies of a clip you can now do it in a snap.
- Find an audio clip in the timeline whose EQ you’d like to change. This can be music, sound effects, dialogue, etc.
- With the clip selected, use the shortcut COMMAND + 4 (or click the Inspector icon) to open the clip Inspector.
- In the Inspector choose the Audio tab (at the top).
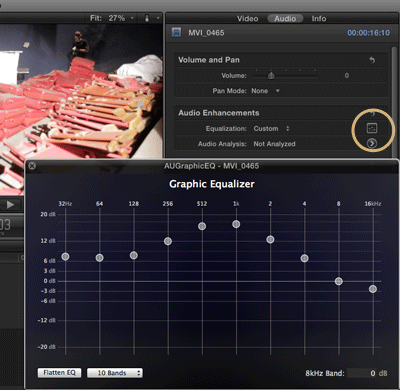
- Choose an EQ setting from the preset drop down or click the Controls icon to set your own EQ.
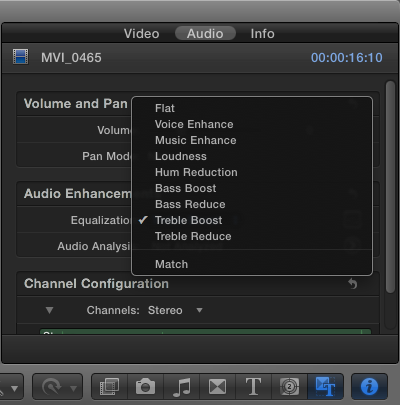
- If you click custom EQ, you have the ability to choose from 10 or 31 bands (for some REALLY intense tweaking).


Audio Enhancement: Analysis
The audio analysis tools in FCPX actually address three specific functions: loudness, background noise removal and hum removal….again, features ripped right out of Soundtrack Pro. Although you can set FCPX to analyze and correct severe audio problems on import I prefer to handle this function once I begin working with the clips in the project. Once your clips are imported into FCP, you can auto enhance these three parameters or tackle them manually (a very quick process). Loudness will make the levels in a clip more uniform, background noise removal will remove unwanted ambient noise and hum removal will take away electrical hum (common when shooting indoors).
Auto Enhancing Sound Clips in FCPX
- Select a single clip in the timeline
- Use the shortcut OPTION + COMMAND + A or click on the “Enhancements Menu” icon in the toolbar and choose “Auto Enhance Audio”
- That’s it! So simple.

Manually Enhancing Sound Clips in FCPX
You may want to have a bit more control over these enhancements. Manually select which of functions you’d like to apply to a clip and to what amount.
- Select a single clip in the timeline.
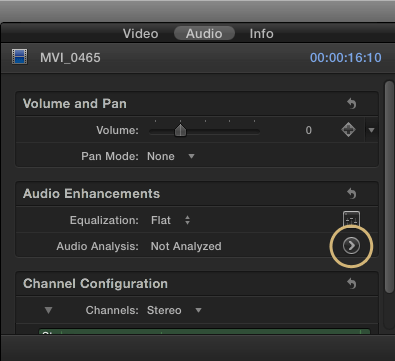
- With the clip selected, use the shortcut COMMAND + 4 (or click the Inspector icon) to open the clip Inspector.
- In the Inspector choose the Audio tab (at the top).
- In the Audio Enhancements box click the round arrow icon to analyze the clip.
- A green check mark, yellow icon or red sign will appear next to each function. Green signifies the clip is good, yellow means that there may be some problems and red denotes severe problems.
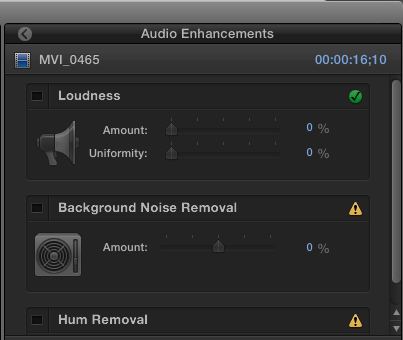
- Click the button next to an enhancement name to activate it.
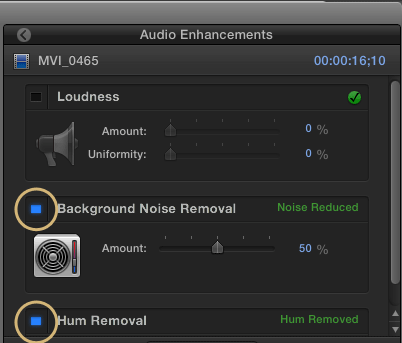
- You can now dial in the amount of the enhancement to increase or decrease it’s strength.


The audio tools in FCPX can result in a huge time-savings and much better sounding project. Their simplicity is both a positive and a negative — fast to use and typically effective but not able to be finely controlled. In a future tutorial, we’ll look at how to use the new (much upgraded) audio filters in FCP and how they can allow you additional ways to tweak and improve the sound in your video projects.
Do you like the new audio enhancement tools in FCPX? Do you have any tips for using them? Let us know in the comments!