Photoshop Quick Tip: Color Correcting an Image Sequence
Although many software platforms have the capability to edit and color RAW media natively, there are situations when Adobe Photoshop might be the best tool for the job.
On several occasions, I’ve needed to batch process an image sequence (usually Cinema DNG RAW material from a Blackmagic Cinema Camera) using Adobe Photoshop. While I’m proficient in Resolve, After Effects, and other applications that are more than capable of handling image sequences natively, there have been times when Photoshop was ultimately the best solution.
This was often the case when working on a computer system that wasn’t my own and didn’t have Resolve or any other finishing software installed. It’s not uncommon when working in the post-production world to get asked at the last minute to do a “one light color pass” when delivering your digital dailies to the editor. In a scenario where you simply don’t have access to any other software, here’s how you can use Photoshop as a band-aid solution.
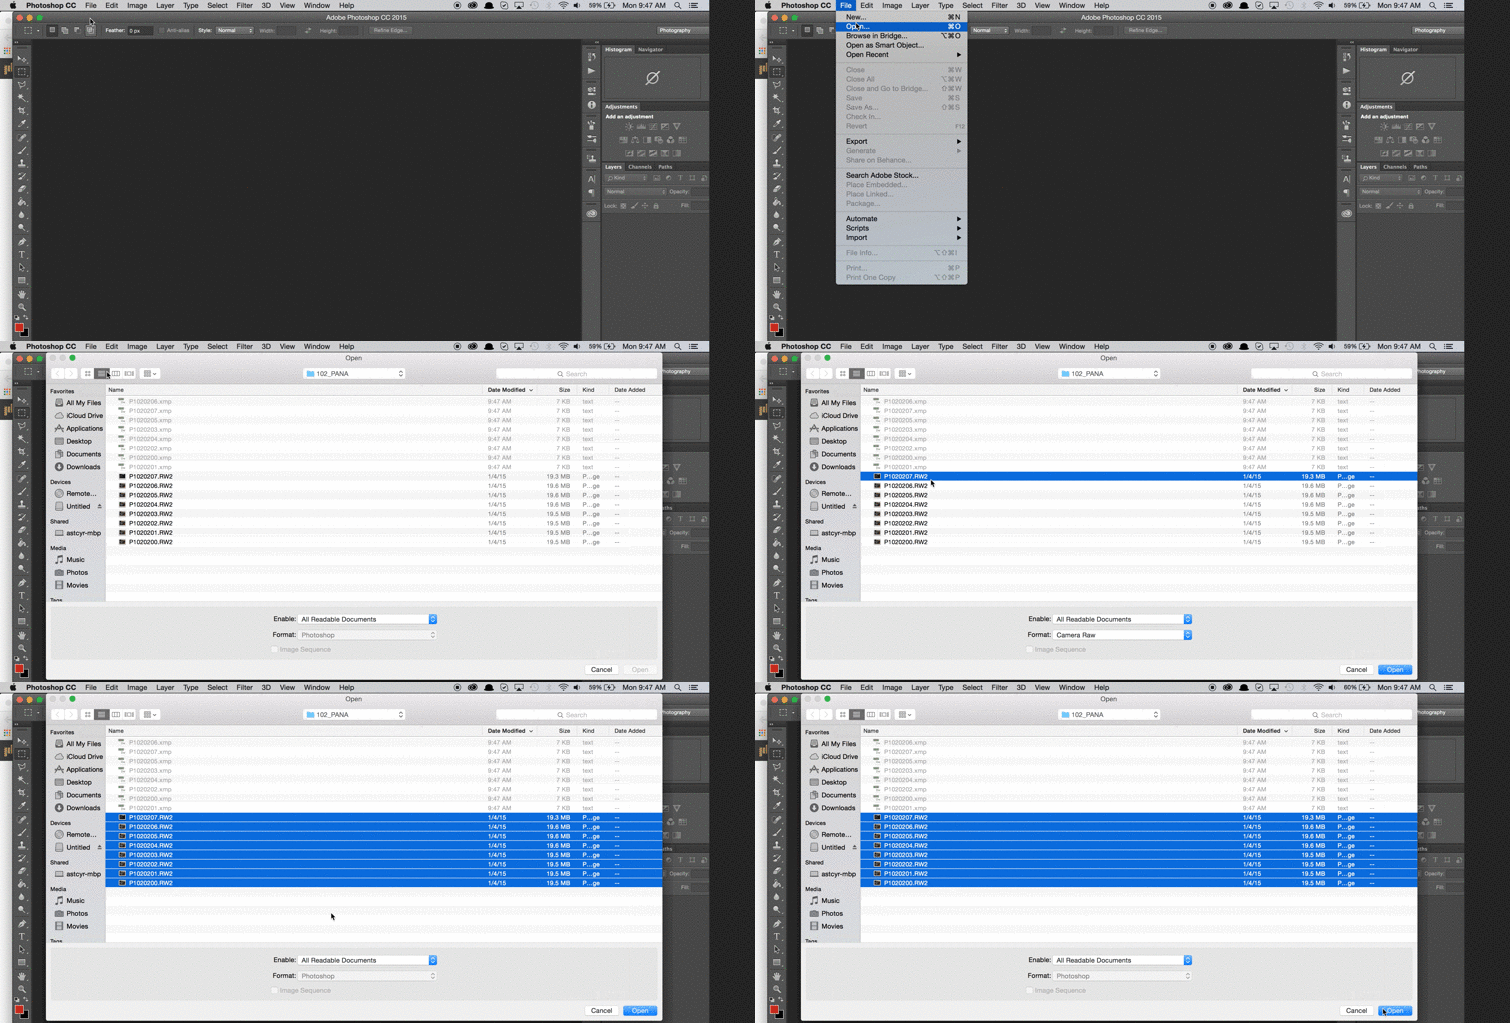
Step 1: Open the Source Media

Much like opening up a single image, simply select Open from the file menu and locate your image sequence folder. Select all of the images and click Open once again. This will load all of your individual images from the sequence into the Camera Raw window.
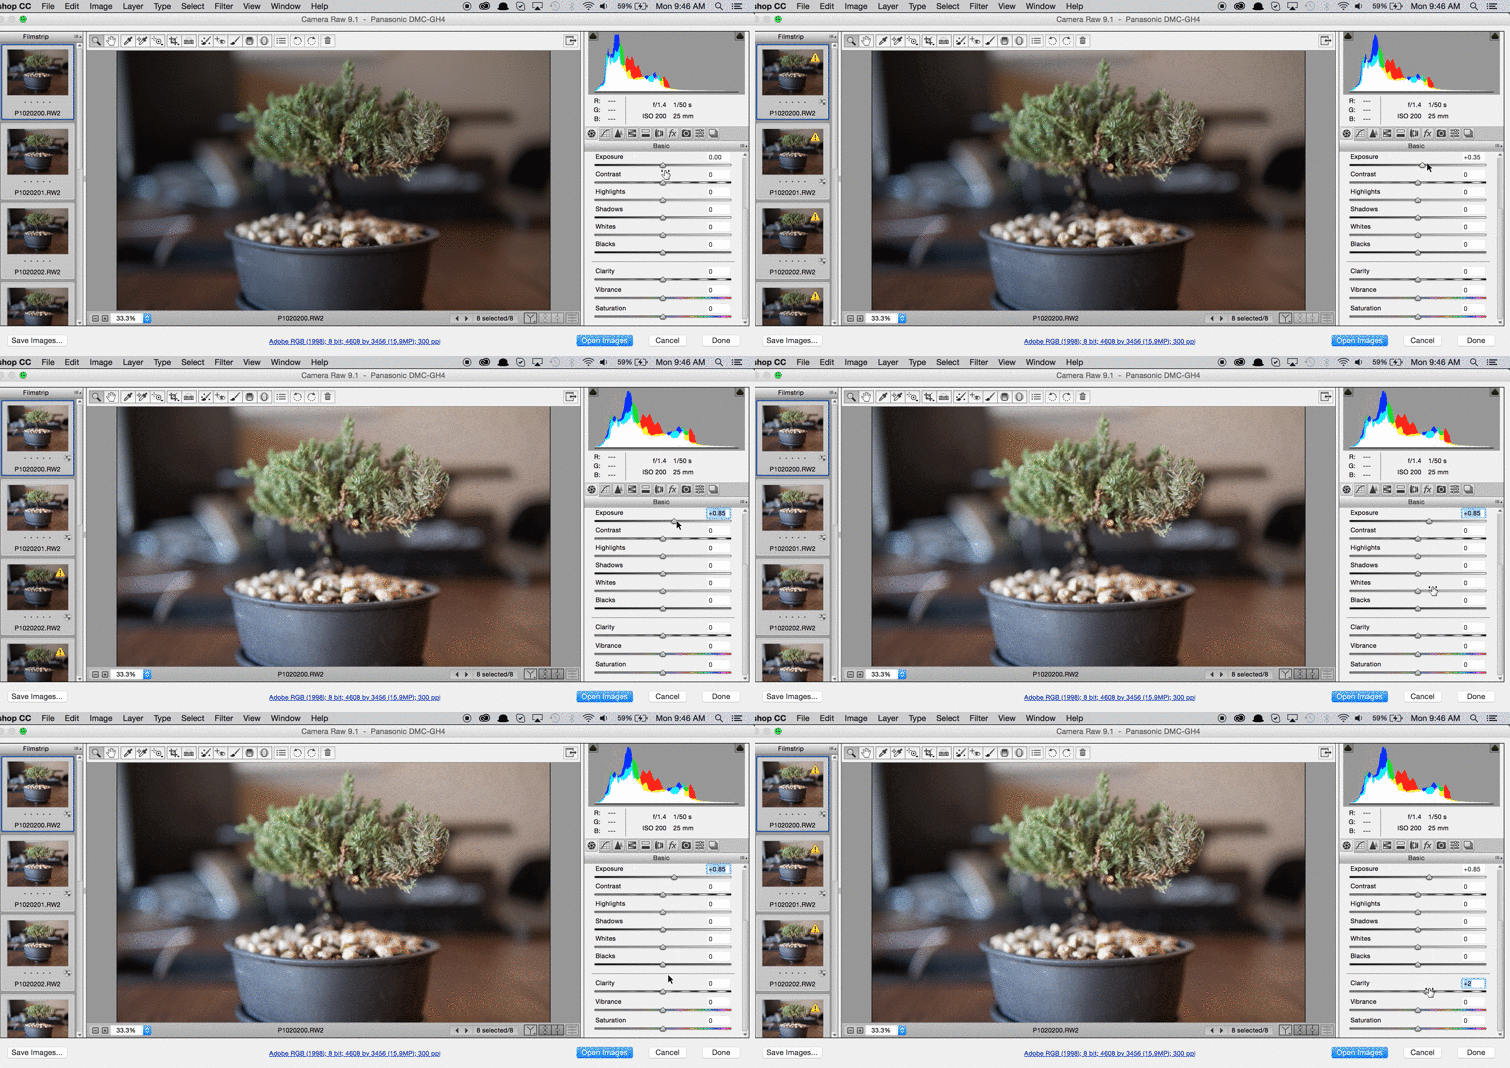
Step 2: Color Correct

With the files now imported into the Camera Raw window, hit CMD + A to select all. This way, any changes that you make to the color will be globally applied to each individual shot. Use the usual color tools on the right side panel to make any and all creative adjustments.
The familiarity and convenience of using the Photoshop tools makes for a simple and easy grading experience. You won’t be able to add power windows or create secondary grades, however that shouldn’t be an issue, as you’d typically leave more complex adjustments for the finishing stages of post.
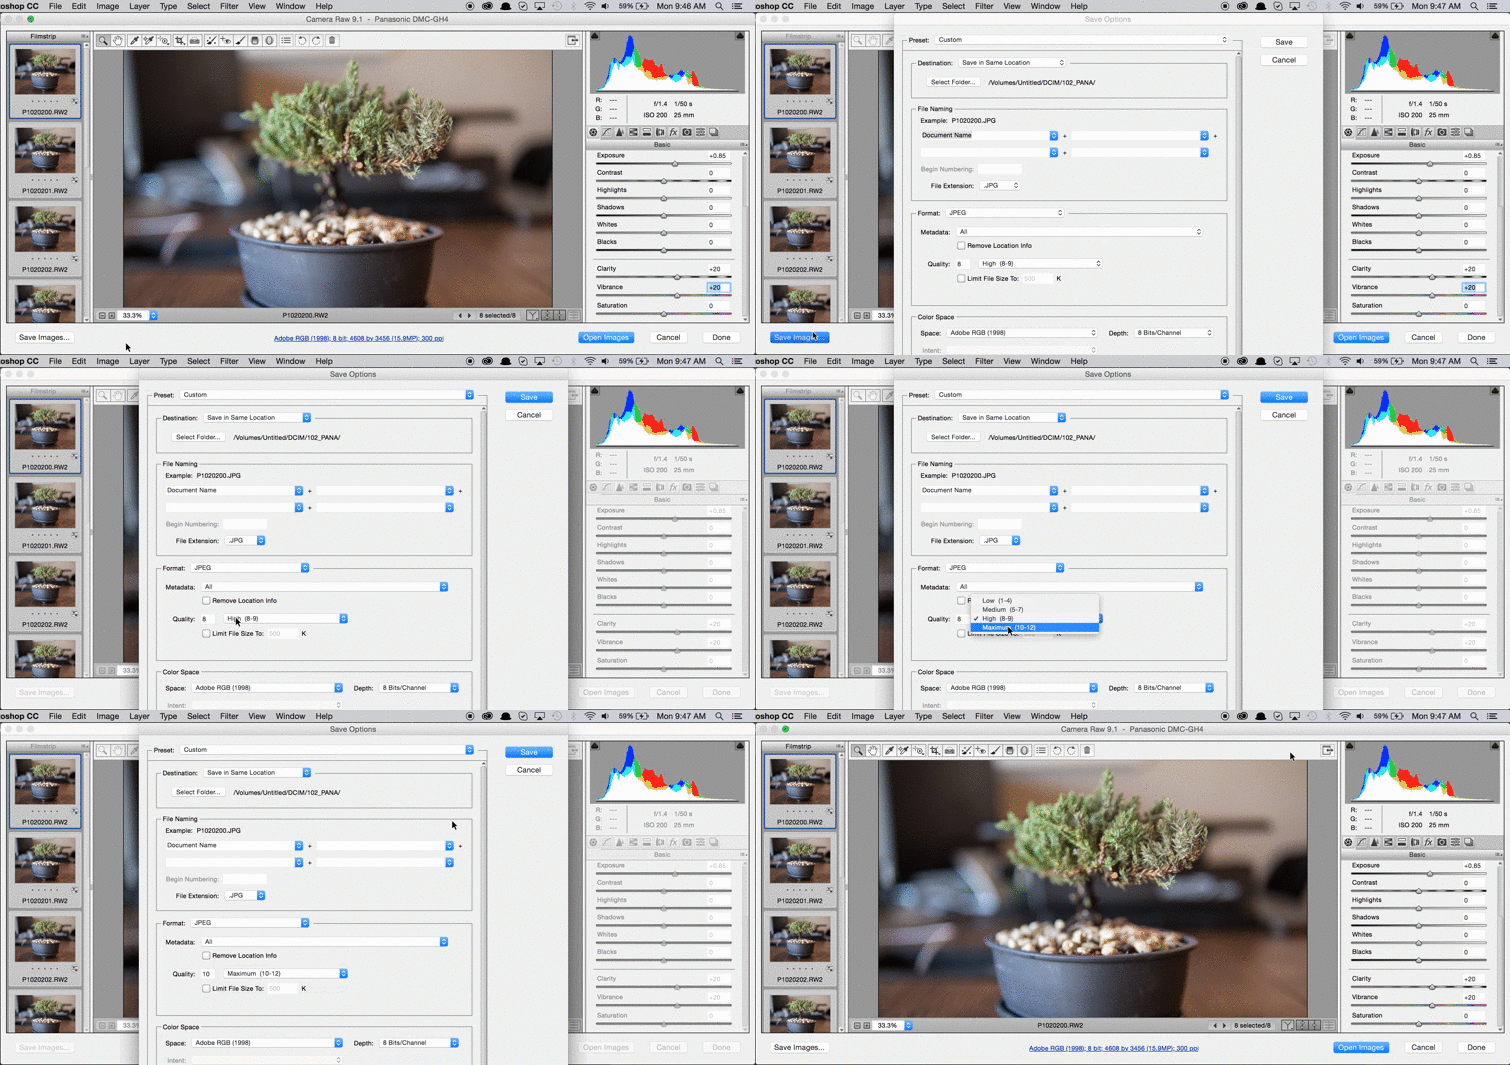
Step 3: Export

Once your color work is done, click Save Images on the bottom left of the window. Not only will this allow you to re-export all of your shots (with the color changes), but it’ll also allow you to convert the files.
If for any reason you need to work with a TIFF sequence or JPEG sequence, you’ll have the ability to convert the format at this step. This may be helpful for FCPX users who are able to use workarounds to edit JPG image sequences, but won’t be able to edit DNG sequences in the application.
Have any tips for color grading RAW footage in Photoshop? Share in the comments below.
Need stock photos for your next creative projects, check out the Shutterstock stock photo collection.


