Working with Powergrades in DaVinci Resolve

Give your video footage unique looks quickly – color grade like a pro! In this post we show you how to create and use Powergrades in DaVinci Resolve.
Powergrades in DaVinci Resolve are simply saved looks (comprised of a single or group of nodes to create that look) which you can save and then quickly apply to any shot at any time. Powergrades are often time saving preset vignettes, film stock emulations or specific ‘film legacy’ looks like cross processing, super 8 film bleach bypass, etc.
To understand how to work with Powergrades in Resolve we’ll first create a look, save it and then export it to share with others. Finally we’ll import a powergrade back into DaVinci Resolve.
How to Save a Powergrade in Resolve
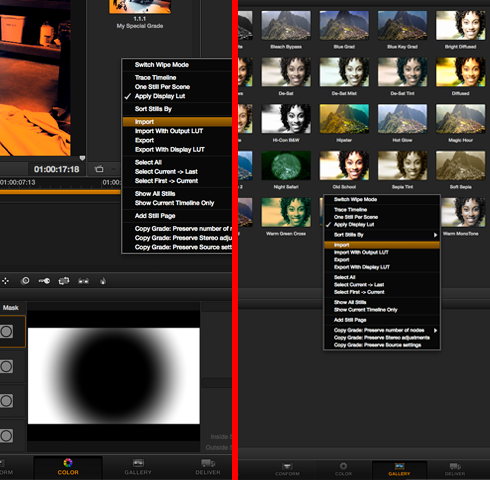
The cool thing about Powergrades is how easy they are to share, between projects and of course, across the Internet. In order to save your own Powergrades first select the grade you want to save by right clicking on the image in the Viewer in the Color page and selecting ‘Grab Still’, or press Command-Option-G.
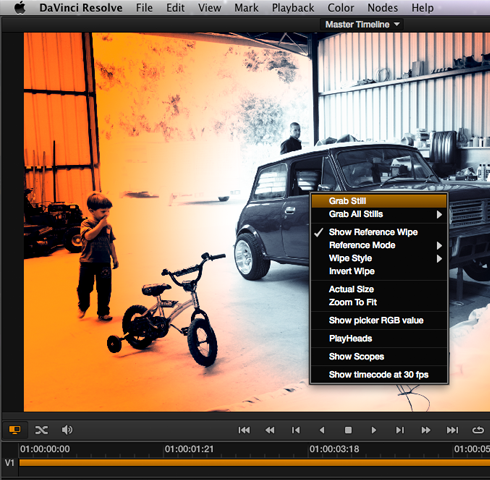
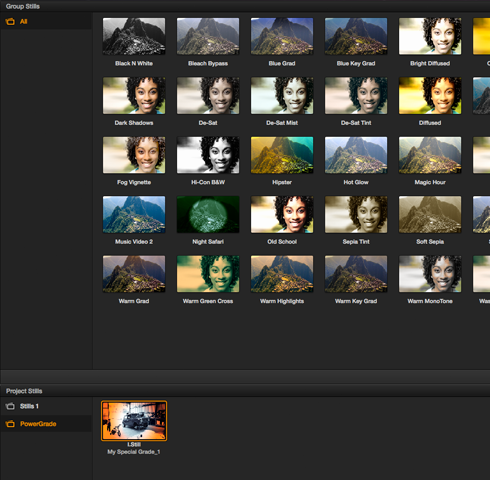
This adds the still into the Gallery. Here you can rename it as well as organize it into a specific folder if you have several saved grades. It is in the Gallery that you will also find all of the preset looks that ship with Resolve (and Resolve Lite).
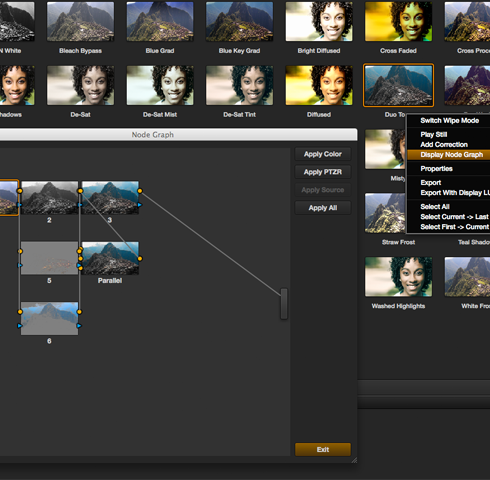
If you want to see how a specific look has been created you can right click on its image in the gallery and select ‘Display Node Graph‘. This will open up a new window which reveals how the look was created node by node.
Export a Powergrade in DaVinci Resolve
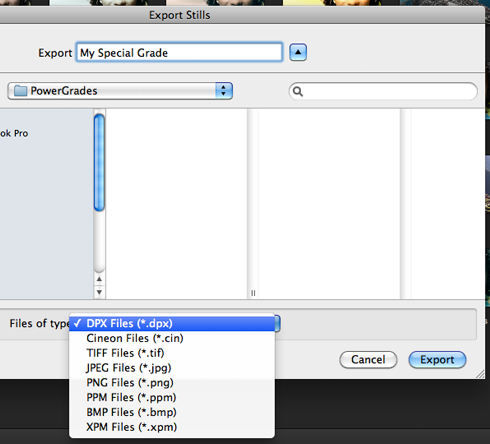
To export a Powergrade from DaVinci Resolve select the grade in the Gallery and right-click on it, then choose Export. Name it, choose the file type you prefer and press Export.
Import a Powergrade into DaVinci Resolve 9
It is very easy to install a Powergrade in DaVinci Resolve. Simply download a DRX file (which is the file Resolve creates to holds the grade metadata) to your computer. Then in Resolve’s Powergrade section of the Gallery page (or in the gallery section in the middle of the Color page) simply right click and choose ‘Import’.
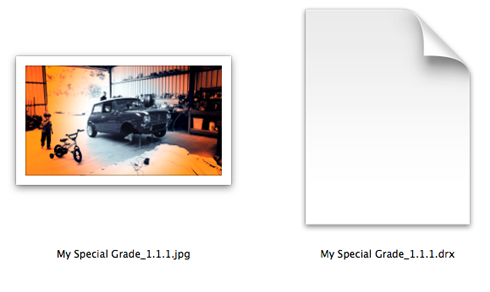
Next, navigate to your .DRX file (which might be accompanied by a still image of what the grade looks like) select it and you’re done. You have now successfully imported a powergrade into DaVinci Resolve.
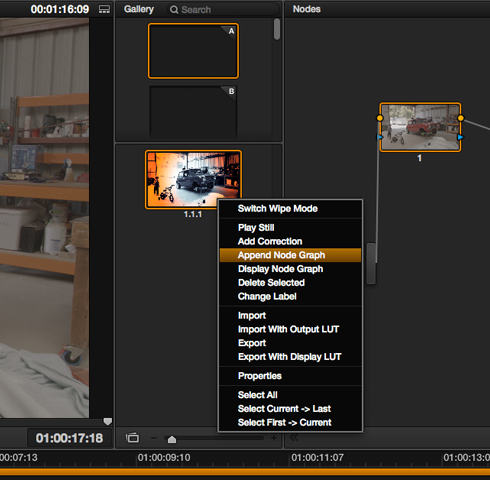
To apply the grade to your shot, simply drag it from the Gallery Store in the middle of the Color page, onto your first node and it will replace all the nodes in your grade with those from the Powergrade. If you wish to add the Powergrade to your existing grade just right-click on the Powergrade and choose ‘Append Node Graph’. This will add the Powergrade to the end of your node tree.
Where Can I Download Powergrades for DaVinci Resolve?
There are a couple of places online that you can buy Powergrades to download and use in your projects.
Denver Riddle from Color Grading Central has a $99 – 25 Luster Powergrade Pack (with 4 bonus grades) which features looks like Blockbuster, Cross Processing, Epic, Bleach Bypass and 2 and 3 stripe Technicolor grades.
Bob Sliga has a $99 pack called Pro Looks Powergrades of 135 looks and 42 tutorials these are available to download from Class on Demand.
Ben Brownlee has two volumes of ‘Film Wash Color Effects‘ for DaVinci Resolve with 65 and 45 looks respectively, as well as tutorials on how to make the most of them. Each Film Wash Volume is on sale for £40.
If you keep a sharp eye on the Looks section of Lift Gamma Gain you might also find a few free experimental looks uploaded by colorists from around the world.