5.1 Surround Sound Mixing in Adobe Premiere

Create a stunning 5.1 surround sound mix in Adobe Premiere. Check out the tips and tricks in the following video tutorial.
Audio is paramount to translating a the emotions of a film to its audience, but is often the most overlooked aspect of video production and filmmaking. If you edit in Adobe Premiere, save time by creating your 5.1 surround sound mix in Premiere. Follow the step-by-step example below or jump to the end for the video tutorial.
1. Create a new 5.1 Sequence
Premiere defaults to a stereo sequence, meaning your audio will only be in two channels, left and right. To change this, navigate to New Item>Sequence and a window will pop up.

2. Create Tracks
In the New Sequence window, click on the ‘Tracks” tab near the top. In the Tracks tab click on the box next to Master and select 5.1.
3 tracks will appear below. Hit the “+” button to add 3 more tracks. All of the tracks should have the “Standard” setting selected. Hit “OK” to create your sequence.

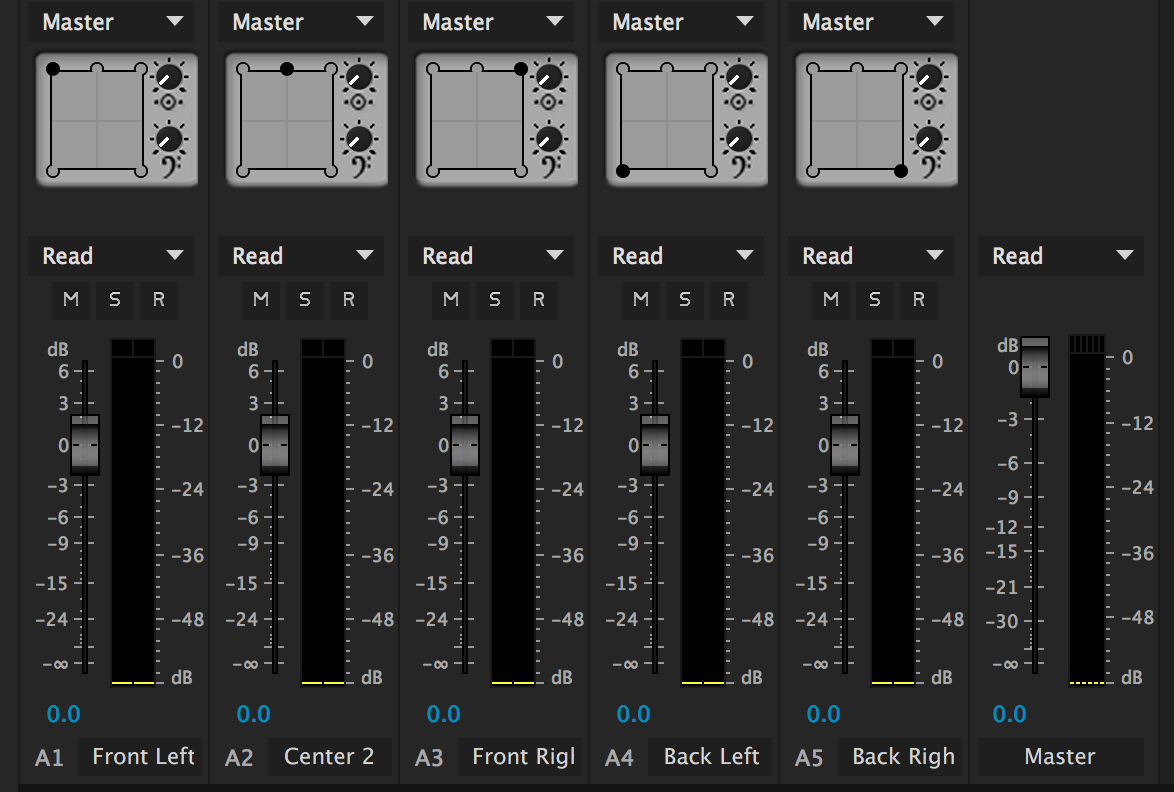
3. Pan all Channels Accordingly
Organize and name all 5.1 audio tracks in the audio track mixer tab: Left Front, Middle Front, Right Front, Left Rear, Right Rear and Sub. If you can’t see the audio track mixer in your workspace navigate to Window>Audio Track Mixer. Use the cursor to drag the black dot to the correct speaker. Pan new tracks in-between…experiment! Now you can customize the surround field according to the visuals on film. Dedicating core tracks to each speaker, in addition to multiple automations, will sonically bring life to your film.
In the following video tutorial Andrew Devis demonstrates 5.1 surround sound in Adobe Premiere:
Want to learn more about 5.1 Surround Mixing with other platforms? Check out these great resources below:
How do you mix 5.1 Surround Sound? Share in the comments below.