

Smoke ConnectFX: Matte Edge, Motif, and MUX Nodes

Our breakdown of the nodes in Autodesk Smoke’s ConnectFX continues by exploring the uses of the Matte Edge, Motif, and MUX nodes in your next composite.

Smoke’s Matte Edge Node

Smoke’s Matte Edge Node is typically used in the Modular Keying pipeline. It contains many functions for altering the edges of a matte to help you finesse a better key…and create a better composite. The Matte Edge Node’s tools include Matte Edges, Shrink, Erode, Blur, Noise and a Matte Luminance Curve function. The tools are additive effects as you effect your matte and work your way across the UI. Not only can these tools be used in traditional ways, but they can also be used in creative matte effects and transitions.
[Click on Images for Larger View]
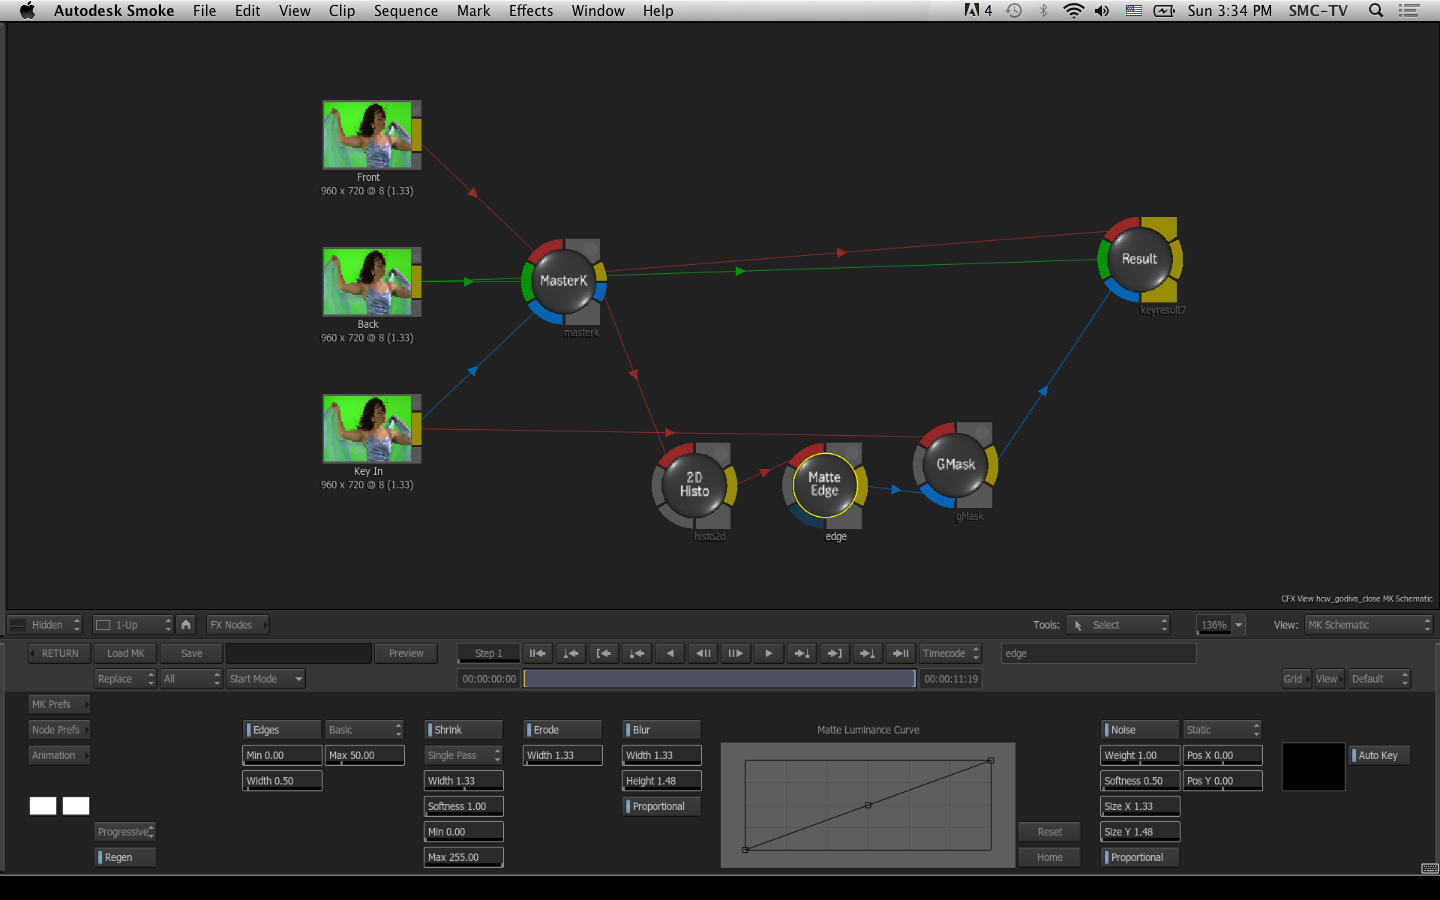
The Edge Menu can pull 3 different edges: Basic, Advanced, and Smooth. With each type you can select the minimum and maximum luminance values. Advanced Edges gives you the added ability to define the width of the edge on both the inner and outer edge of the matte. The Smooth Edge allows you to generate a soft or blurred edge matte.

The Shrink Menu is normally something you don’t want to do to your key as it is very destructive to the edges. But when you use it with text and graphics you can create an animating edge transition by setting keyframes for the shrink value. You can add a bit of softness to the shrink as well.
The Erode Menu will blend the light and dark edges of the matte.
The Blur Menu will blur the interior of the matte.
You can control the opacity of the black, white, and gray values in the matte with the Luminance Curves. The left side controls the black values and the right controls the white. You can add points and move them along the curve.
The Noise Menu will add noise to the transparent areas of the matte. You can control the weight of the noise as well as the size and softness. You can allow the noise to be static and set the position with the X&Y sliders, or set the noise to impulse which will cause the noise to animate on every frame.

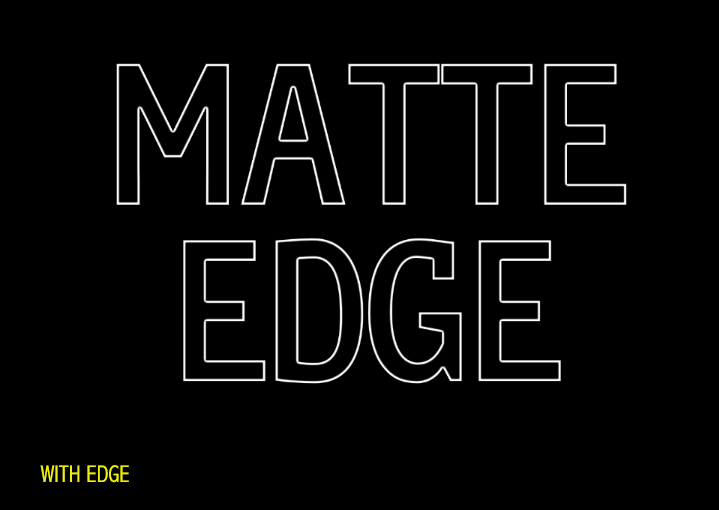
When you combine graphic textures to the matte from the text node, you can create some organic holes and erosions to the matte by using the different tools in the Matte Node. This makes this node very powerful in graphic design as well as traditional keying.


Smoke’s Motif Node

The Motif Node is a great node for pattern creation and kaleidoscope effects. The node creates tiled symmetrical textures. This tool has a lot of simple features to not only create kalidiscope effects with video images, but can also be used for to create some interesting motion graphic elements.

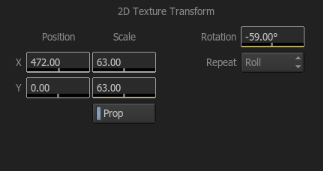
Source clips can be transformed before the Motif symmetrical effects are applied. You can transform the image through the Motif effect with animations in X/Y position, scale and rotation. Transformations are applied to both the front and matte clips simultaneously and are available on the output.
There are 2 types of symmetry patterens. Radial and Region of Interest (ROI). With the Radial mode you can set the geometric number of sides to create the kalidiscope effects. The ROI has triangle and square options. Both options allow you to adjust the scale and position of the Motif focus. The Motif node also contains a softness parameter to blur the edges or seams where the Motif images connect.

Creating the look you want is pretty easy with the on-screen widget. The widget controls the transformations of the symmetry pattern and the GPU processing allows for a fluid working of the tool.


Smoke’s MUX Node

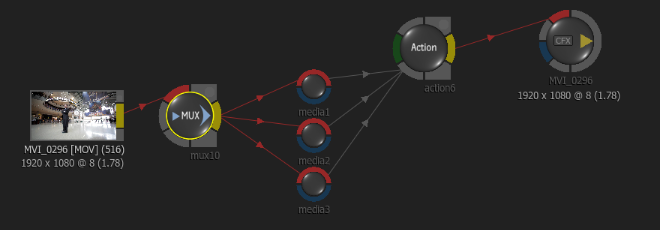
The MUX Node is located in the I/O panel of ConnectFX. I guess technically it is not an effects node, but does have features for clip timing. The MUX node is often used to help organize your schematic when you have repeating connections, and thereby making it easy to change sources.

If you have a schematic setup like the one pictured, making a change of sources can often be frustrating with the breaking and creating of connections. By adding a MUX to the mix, you only have to change one connection.

1. Select your source.
2. Press SHIFT+ALT the connections become highlighted.
3. Release ALT, but still hold down SHIFT.
4. Double Tap the MUX node.
5. The MUX node is added in-between the connections.
6. Replace the source clip by only needing to break and connect one link.
NOTE: Smoke 2013 also allows you to hover a clip over another clip to drag and drop replace it as well.
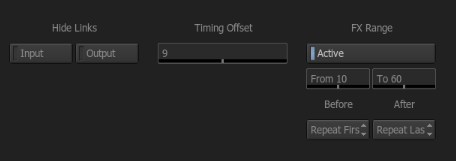
The MUX node also allows you to alter the frames that travel through the node. This allows you to slip the timing of the frames to sync video or effects up with other elements in your schematic. You can also limit the frames of the clip. By activating the FX Range, you can set the input frame and output frame. Setting the frames to the same value will give you a freeze frame of the input connection which is often quite useful. You also have the option to set how the frames before and after the in and out frames are processed. Your options are: Repeat, No Media, Black, White, Live, Loop, Ping Pong, and Ping Pong+.
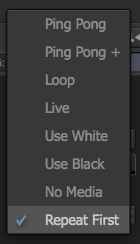
The Ping Pong mode is inclusive – the last frame of the sequence is always repeated. For example, a five frame sequence would be: 1-2-3-4-5-5-4-3-2-1-1-2-3-4-5. The Ping Pong+ mode is exclusive, so the last frame of the sequence is never repeated creating a sequence that is always 1 frame shorter, but does not create stuttering with a frame repeat.
Are you using Autodesk Smoke for video editing and compositing?
Got questions about Smoke nodes?
Let us know in the comments below!


