

Smoke ConnectFX: Motion Blur & Motion Vectors

Find out how to to add motion blur via a post process in Autodesk Smoke 2013, giving you more control when working with renders from 3D applications.

Motion vectors are a magical render pass that you can create in 3D applications like Maya, Cinema4D, and 3DS MAX. When working with CGI rendered elements in post production, it is often advantages to render out Motion Vector Passes so that you can add motion blur to the 3D elements in post. This saves you tons of time in rendering in the 3D application. It also gives you complete flexibility in matching the blur with other elements throughout the composite. OpenEXR is the most commonly used format for these CGI renders due to it’s high bit depth and High Dynamic Range (HDR) abilities.
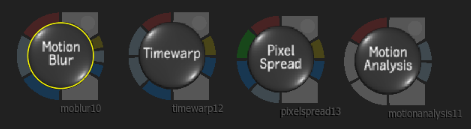
Autodesk Smoke 2013 has several nodes in ConnectFX that can process the motion vector information. Motion Blur Node, Timewarp Node, and Pixel Spread. Smoke also has the Motion Analysis Node that will create motion vectors from movement in a clip.
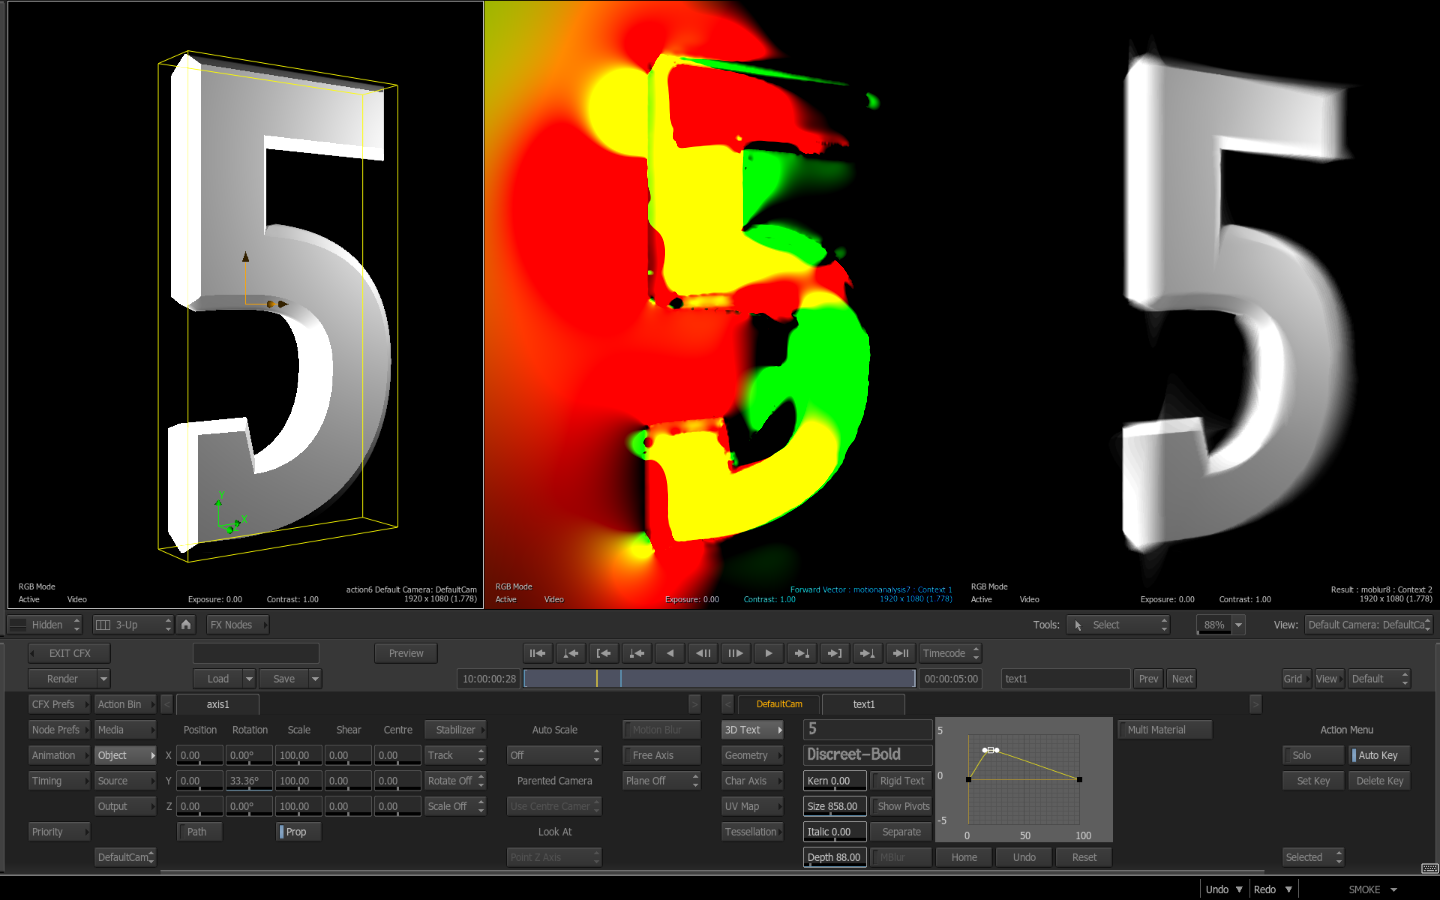
After importing the OpenEXR, the 3D image is represented in Red, Yellow and Green colors to the viewer as a clip. The actual motion data is in the RGB color channels. Red and Green Channels represent the X and Y movement of a pixel and the Blue channel can be use to set the magnitude of the motion. Black in the image shows that there is no motion in those pixels.
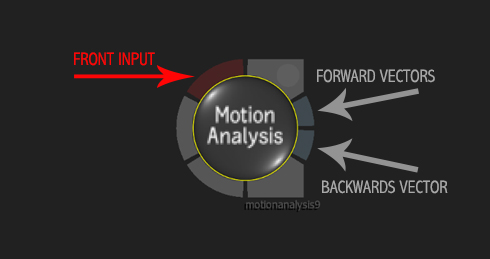
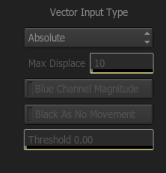
There are 2 directions for Motion Vectors… Forward Vectors (Next Frame) and Backwards Vectors (Previous Frame). Forward Vectors are the more common and if you don’t have any information on the vectors, you can assume that it’s forward. There are also 2 formats that vector information can be stored. Absolute Vectors and Normalized Vectors. Absolute Motion Vectors is the format that all tools that support motion vectors inside of Smoke are expecting and generating. The Motion Analysis Node will generate Absolute Vectors. Normalized Vectors can be used and converted in the Motion Blur Node.
How do you know what format you are dealing with? If the bit depth of the clip is 8,10 or 12-bit, it is Normalized. If it’s float or half-float (16 or 32-bit), then a color histogram is your best friend. If the file only contains colour information between 0 and 1 then it’s Normalized, if there any negative values present it’s Absolute.
Smoke’s Motion Analysis Node:
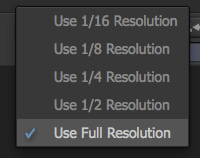
This node is very simple. The UI contains one pop up button selection for the quality of the analysis. Full resolution will give you the best results and also take the most time rendering.
Simply connect a clip to the front input and the node will produce both front and backwards vectors. It may be a good idea to cache and render this branch of the schematic as a CFX clip. This will speed up renderings down the line.
[Click Image for Larger View]

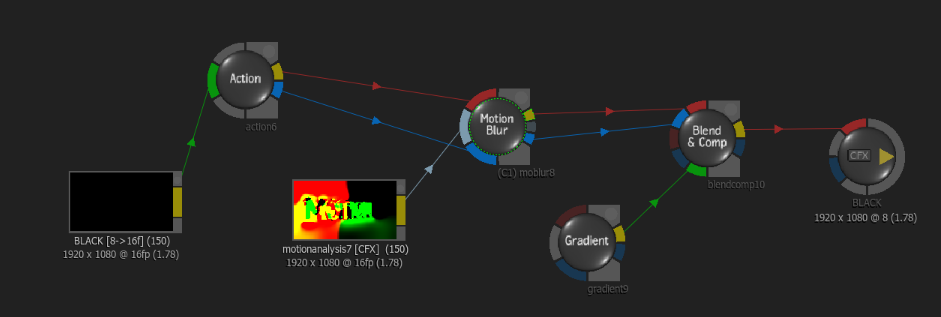
Smoke’s Motion Blur Node:
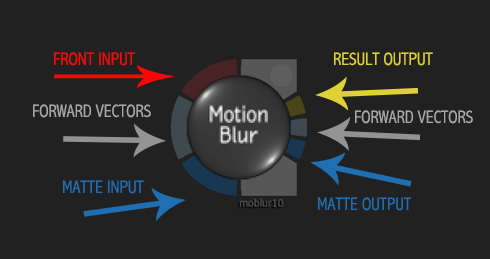
The Motion Blur Node accepts only a forward vector. The Vector Input Type Menu is where you select Normalized or Absolute Vectors. If the Blue Channel has magnitude data you can enable the button to take advantage of that in the blur. You can also activate the Black as No Movement button and threshold value to take the near-black pixels into account for the motion blur.
Activate the Show Icons button to see the movement of the Motion Vectors as colored arrows. You can adjust the size and amount of the display with the grid and scale values. This is only to help you visualize how the motion vectors are being evaluated. It has no effect on the result.
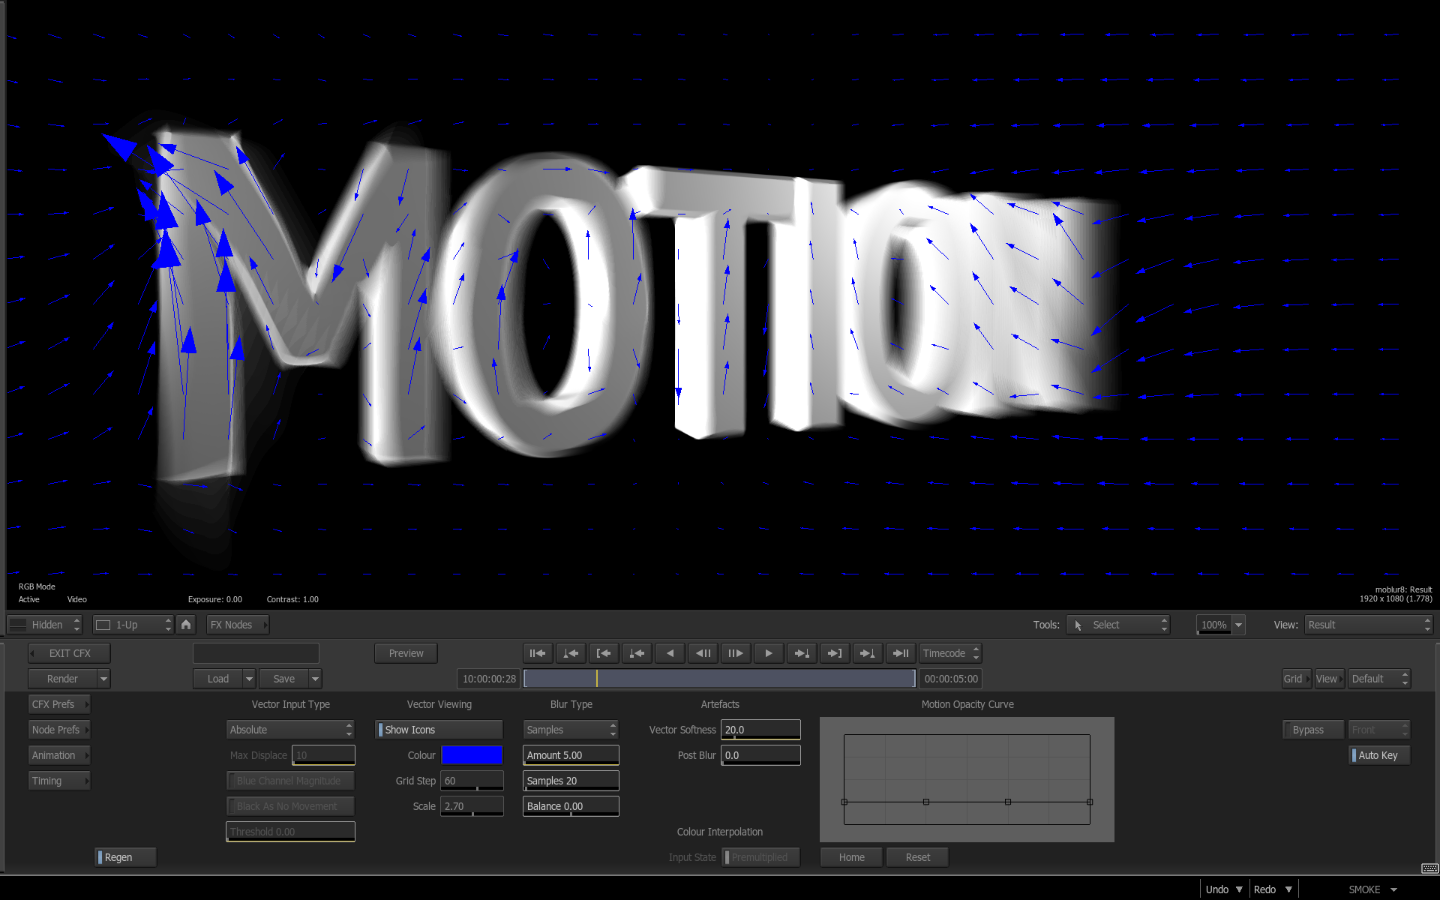
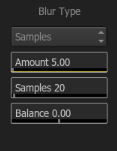
You can choose Trails or Samples for the blur type. You can adjust the look of the blur with the Amount, Softness and Balance values.
The Artifacts menu can help clean up any abnormal pixels in the result. Motion Vectors sometimes aren’t perfect. You can soften the vectors before processing as well as apply a post blur to the final result.
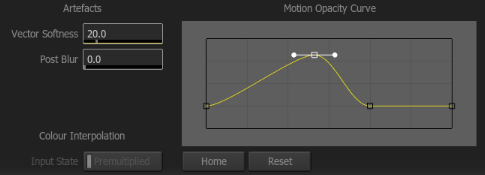
If you have a matte input for the node you can set whether the image is Premultiplied or not. This will have an effect on how the image is processed.
Autodesk’s Daryl Obert has a nice video demonstrating how to get motion vectors out of Maya 2013.
And Grant Kay show you how to incorporate motion vectors from Maya 2012 in to Smoke 2012. The workflow for Smoke 2013 would simply use the node in ConnectFX instead of the older Desktop Module.


