

ConnectFX Nodes in Smoke: Auto Matte, Average & Auto Stabilizer

In our ongoing series on the ConnectFX Nodes in Autodesk Smoke we dive into Auto Matte, Average and Auto Stabilizer.
Going alphabetically through the ConnectFX Nodes in Smoke, “Action” would be the next on the list (see our earlier post on the first few nodes). However, Action is the most powerful node in ConnectFX, and is so deep that it needs a blog series of it’s own. It is the 3D compositing hub. This series will explore all of the other nodes in ConnectFX, as they are tools that complement and support Action inside Autodesk Smoke 2013.
Smoke’s Auto Matte Node

Smoke’s Auto Matte is a very basic node. It functions a lot like 2D Histogram, but in a very stripped down way, with little UI feedback. When a front clip is fed in to Auto Matte a high contrast image is made based on the luminance levels of the clip.
(Click image for larger view)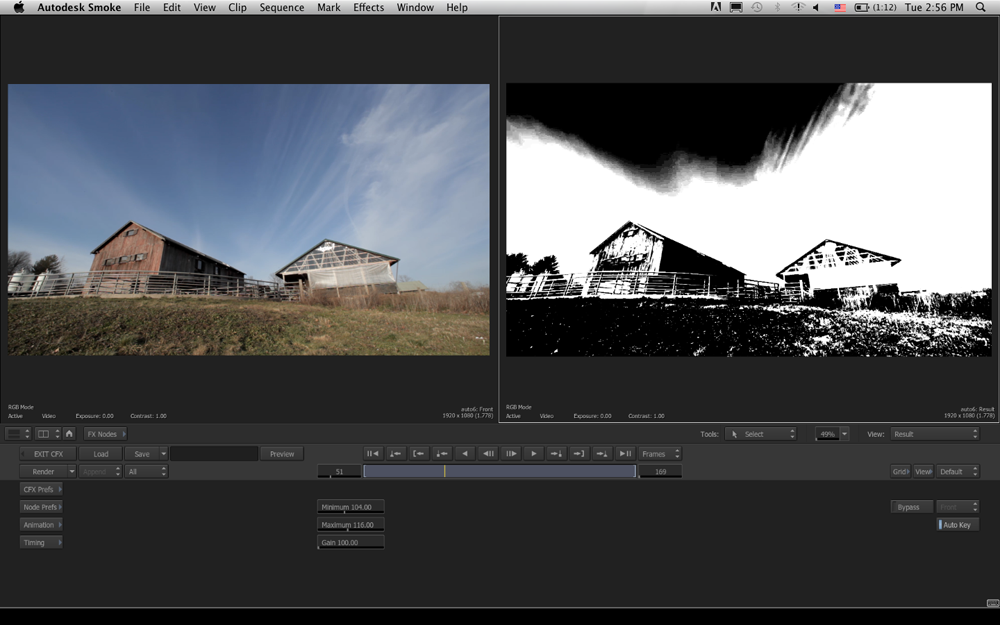
You can adjust the minimum and maximum values for the blacks and whites, which when the output is used as a matte input on another node, will give you more transparency and opaqueness to your keyed result. There is also a Gain Adjustment which is processed after the min/max values are set.
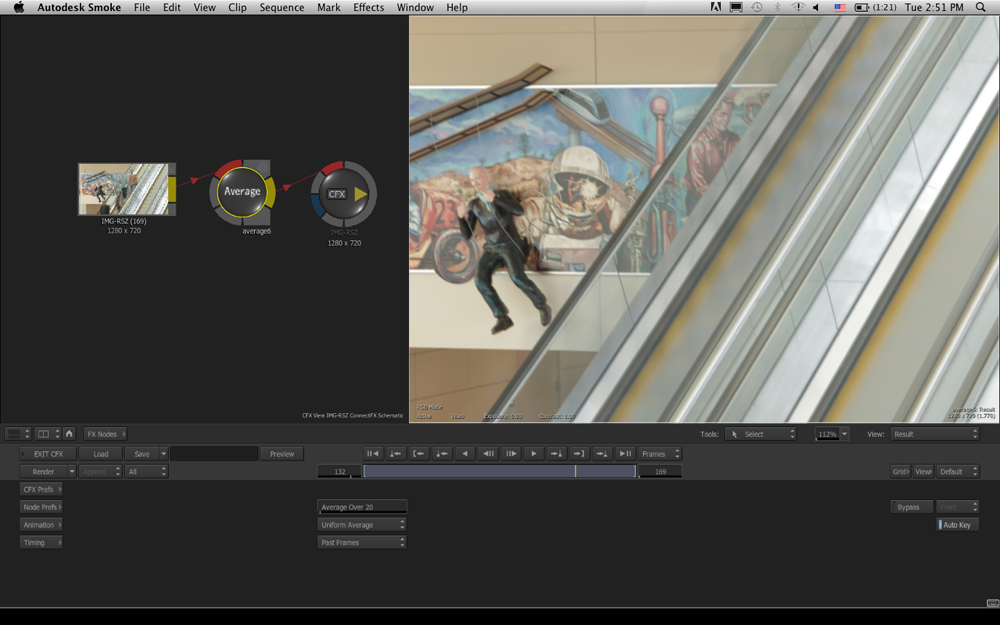
Smoke’s Average Node
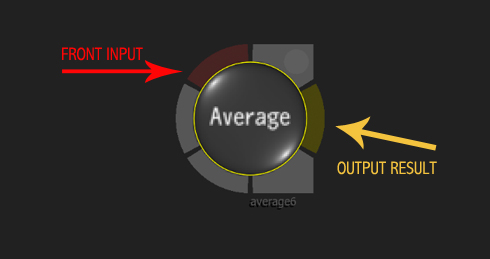

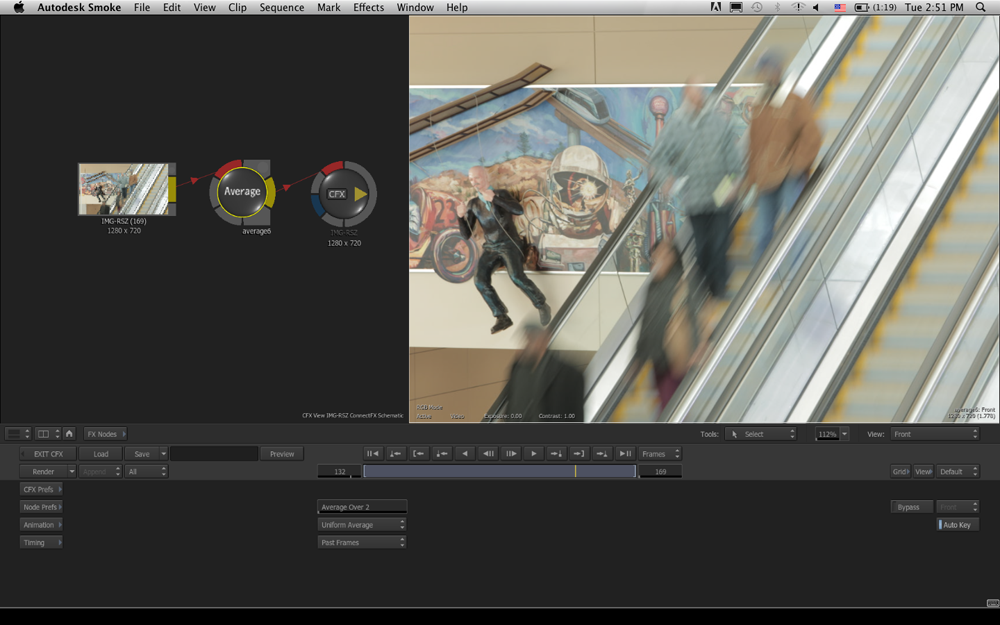
Smoke’s Average Node is a great node for many uses, both practical and artistic. Average will simulate the motion blur of a moving object in a clip. It bases the amount of blur on the number of frames set in the “Average Over” slider. The higher the number the more frames will be blended together to make the simulated blur.
You also have the option of a uniformed or weighted average. This controls the amount of the fade of the blur. You can have each averaged frame fade uniformly or you can weight the frames that are closest to the target frame and they will be less transparent than later frames. This will give you a more realistic trail blur, as the frames near the object in motion will be less transparent than the frames further away. The final option is to base the blur on just past frames or on both past and previous frames.
A practical application for Average would be in using it to blend frames together to create a clean plate for a background. With a lock-down shot, you can average the frames together which will blur out and fade the moving images and leave the background image untouched. However, a bit of softening may occur. Average is a great way to add motion blur to an image that didn’t have it before, like sports images shot with a high shutter.
(Click on images for larger view of the before/after)
On the artistic side you can use Smoke’s Average node to create a stylized look to video. Again a lock-down camera shot works great to make the moving images in the frame blur, add a bit of strobe to that and you have a very filmic 15 fps blurred fast motion result. It can also be used to animate still graphics into a flowing motion background. Or take almost any quick moving handheld shot, average multiple frames, add a little blur and color and you can make a smooth flowing animating background.
Smoke’s Auto Stabilize Node

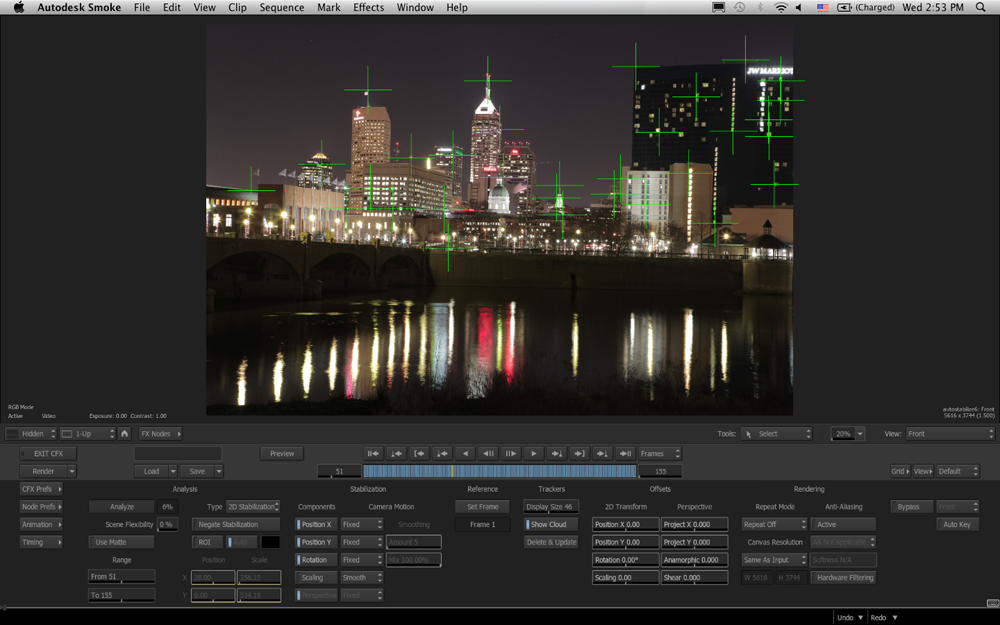
When you come back from a shoot and find that your handheld shots are a little shaky or bumpy on your driving footage because of a rough road, then Smoke’s Auto Stabilize is the node for you. You can think of the Auto Stabilize node like the Warp Stabilizer in Adobe Premiere and After Effects – and like the stabilizer in FCPX. I put the Auto Stabilizer to the test on a shot that I edited for WTHR-TV in Indianapolis, during Superbowl XLVI. The shot was a time-lapse city shot where the photographer moved his tripod 6 inches every 30 secs and shot 5616 x 3744 still images using the Canon 5D. As you can see, this shot needed a lot of stabilization.
The Auto Stabilize menu has a lot of options, but you can break it down in to 5 sections: Analysis, Stabilization, Reference & Trackers, Offset, and Rendering.
(Click image for larger view)

Analysis: Aside from the obvious Analyze button to perform the track, you can adjust the ‘Scene Flexibility’. Set the flexibility percentages based on your specific video needs.
| 0%-20% | Stabilize a pan, tilt, zoom, or the motion of a single rigid object that is visible during the entire analysis. |
| 30%-70% | Stabilize objects that change their shape or depth, and exclude objects that are smaller or moving rapidly. |
| 80%-100% | Stabilize all visible movements. |
You can set the clip range and even feed a matte to limit the area that will be tracked and stabilized. You can choose to track in 2D or with perspective. You can also negate the tracking data. This is useful when you copy the node and reuse it later on to return the clips natural motion after you have done some other clean up or paint work on the clip.
Instead of a matte you can use a square Region of Interest (ROI) to isolate the area to be tracked. Once you tweak the settings you can analyse the clip. Smoke tracks multiple points to get the most tracking data possible to generate the best stabilization and therefore the best image result. It will pick up new points as they come into view and drop others that are no longer of value to the analysis.

Stabilization: Now that you have the tracking data, you can finesse the result. The analysis happens on the front view for the image, so hit F4 to see the result. You have the option to turn off any stabilization to the X,Y, and Rotation components. This will allow you to keep any Y (vertical) camera motion and just stabilize the X (horizontal) for example.
You can also change the camera motion for these components from fixed to smooth. When you do that you will see the Smoothing options active.
Now, here is where it gets fun. You can change the amount of smoothing to the stabilization data. This will then add back some of the natural camera motion but just make it smoother, rather than stabilize it and lock it down completely. It’s a great fix for handheld shots that were just too hand held, but still keep some of the natural motions. This will also keep the edges of the image from tracking too much and getting too much cropping that you will have to deal with.

Reference & Trackers: If the first frame of your clip is not the best representation of the stableness of your clip you can set the most optimal frame as the reference frame. You will see the tracking marks on your clip throughout Smoke’s tracking analysis.
(Click image for larger view)
If the node tracks elements that are not helpful to the stabilization, like a person moving through the shot, you can highlight those trackers and delete them. This will update the stabilization curves and give a better result.

Offset: After the result of the track, you can add offsets in the X, Y, Scale, and Rotation to bring the image full.

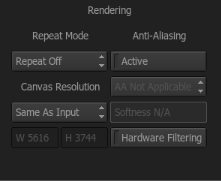
Render: You can change the canvas size for the end result and activate and set any hardware or software antialiasing. There is also a repeat function for the edges, with mirror, tile or repeat last pixel.
Here is the same Indianapolis skyline clip with before and after stabilization. Every shot is different so experiment with these Smoke Auto Stabilize settings to achieve your best result!


