

Using Photoshop 3D Layers with Autodesk Smoke

Check out how you can use Photoshop 3D to create custom 3D extrusions and simple beveled models for import into Autodesk Smoke.

 Photoshop has been able to create 3D extrusions from 2D layers and even use layers as textures on imported 3D objects. Now the original intention for this feature would be to create 3D depth to 2D logos and Text for use in your compositions. Also, you can use Photoshop as a texture painter since you can paint on the layer as it is being used on a 3D model import. So, how does this all relate to Autodesk Smoke? Let’s explore that.
There was a post on the Creative Cow Smoke 2013 forums where a user was asking if he could extrude a 2D logo and make it 3D. Now Smoke has a full 3D compositing environment within Action. You can create and extrude 3D Text and import 3D models, but you can’t extrude a 2D image layer, like an imported logo. Now back to Photoshop….
Creating your extrusion in Photoshop:
In Photoshop take your logo. If it doesn’t have a matte or alpha then create one for it. Once you have your logo set, click on the 3D tab in the layers menu.

Selected Layers should be the default selection. Choose 3D Extrusion. This will create a mesh based on the shape of your logo with its alpha.

The other useful options for creating meshes for Smoke would be Mesh from Preset, which gives you basic 3D primitives. Most of these are also available in Smoke and can be loaded via the Import Node in Action. But Photoshop does have a Hat, Soda Can, and Wine Bottle that might be useful and can be used as models in Smoke.

You can also create some custom shapes with a grayscale depth map. The shape is based on black and white values. Black being away from the camera and white being towards the camera. Gray would be center. You can create some complex 3D objects if you choose Sphere, Cylinder, or Plane.
Going back to Extrusion. Create the extrusion and you will switch to the 3D mode. The Camera is selected in this view, and if you rotate the camera by dragging in the image viewer you will see the 3D Extrusion of your logo.

If you select your layer in the list, the Properties menu will switch and give you options to customize the mesh. The Extrusion Depth is the most obvious and will control the size and depth of your object.

The other useful option here is the Shape Preset. Here you can select some bevel options for the mesh.

At the top of the Properties menu you have further options to twist and taper the extrusion under the Deform options. With the Cap Options, you can create your own custom bevel.

Once you are happy with your Extrusions shape, click the 3D menu option in the main Photoshop menu. Select Export 3D Layer.

Name the file and choose to save it as a Wavefront .OBJ model. This is the only Model format that Smoke can work with from the choices available.

You will get an option to save the textures in various formats. If you choose Original Format, you will get .psd files which you can use in Smoke. Now, in the location you chose to save the file, you will find a few .psd textures, an .mtl materials file, an the .obj file that you can import into Smoke.

Note: Smoke 2013 will crash if you try to load the .obj you just created. If you try an open them in Maya, Maya will just give you nothing. There is something about how these meshes are created that Autodesk in general doesn’t like. However, they import fine into Cinema4D. Go figure. So is what is the workaround? Convert the .obj to .fbx.
Convert the OBJ to FBX for Smoke
Autodesk has a great free utility for converting many different 3D formats to FBX. It’s available for Windows and Mac.


Once you have downloaded and installed this stand alone utility, run the app and load the OBJ model you created and convert it to FBX. It’s simple.
Just load and convert. I would suggest unchecking the Add Root Node in the OBJ options. This will eliminate and extra AXIS node being added to the Geom hierarchy in the Action schematic.

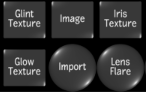
Now you have an FBX model which is now cleaned up and Autodesk friendly, that you can import it into Smoke. In CFX, add an Action Node and double click the Import Node.
Navigate to where you saved your converted FBX model. Switch the selection at the bottom to FBX. Select the model, choose Fit to Scene in the options and load.

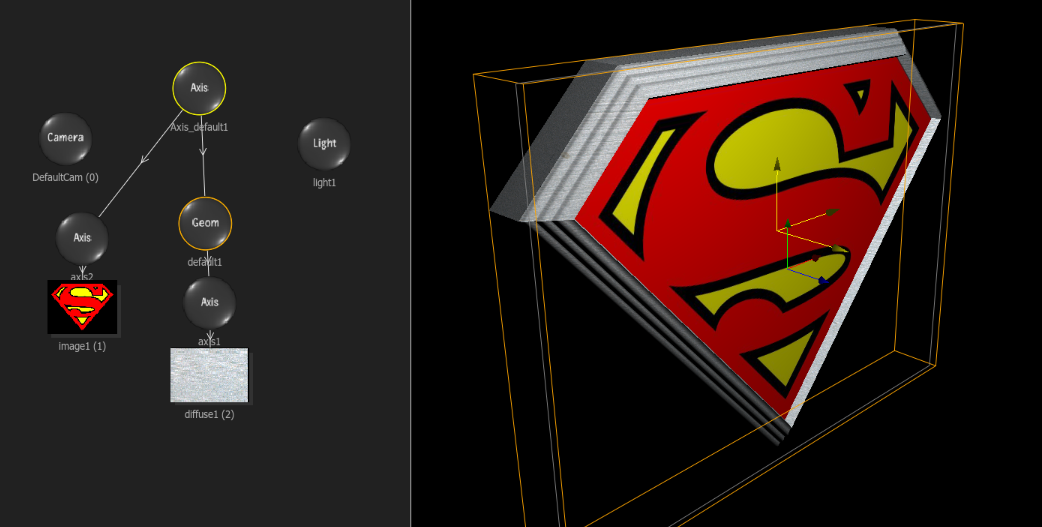
In the Action Schematic you will see an Axis – Geom – Material node connection. Now, for some reason the material node comes in oddly. The Diffuse and Specular colors are off and the Transparency values may be at 100% which will make your object invisible in your scene.
Just delete the Material node, because at this time it will cause more issues for you. Also, the centre of rotation or the anchor point is bottom left of the Geom block. So you will need to adjust the centre point of the axis so you can rotate your model around the center if desired.

Add a light to your scene to see some shading on your model. There are no textures embedded with this FBX as the convertor doesn’t read the .mtl file. Also, Photoshop doesn’t export an unwrapped UV map even though the model does have UV coordinates.
What we have here is a simple geometry that you can texture with one Diffuse Map and a Reflection Map is you so choose.

Texturing your Geometry in Smoke
Import your original logo that you had in Photoshop into your Smoke Media Library and then into CFX. Pipe this image into an Action Media Layer.

Here’s the catch. Since we have created a simple and dumb 3D model in Photoshop and bypassed using a true 3D software like 3DS Max, Maya or Cinema 4D, we have limited texturing abilities. There are no Object groups or even separate Geoms created for the front, back and bevel of the Photoshop mesh. So you have to fake the texturing on the Geom. Feel free to texture the Geom with anything you see fit. In this illustration I have used a chrome texture as the base.

Load the logo for the geometry as an image layer and use the Geom axis and link it to the Axis of the Image. Now it is just a matter of manually lining up the image on top of the Geom. It helps to pull the Image forward in Z to just enough so that it clears cutting through the GEOM and lays just 1 pixel in front of the Geom.
It’s not perfect or elegant. But if you need a quick 3D extrusion of a logo or a custom shape and you are the only one around, this tip can come in handy. I personally only know enough proper 3D to get myself in to trouble. I am an editor. I am not a 3D artist, modeler, or texturer. But sometimes, I need just a bit of 3D to make my composite work. Now, Photoshop can give me an easy solution to creating some simple 3D in Autodesk Smoke.


