Using the Audio Gain Feature in Premiere Pro
Using the Audio Gain Feature in Premiere Pro is really easy. There are multiple ways to adjust the gain of a clip. You need to know how each gain setting works in order to use it properly.

To get to the gain settings of a clip, simply right click the clip and go to “Audio Gain…” You can do this either in your timeline, or in the project window. This will give you a window with multiple options.
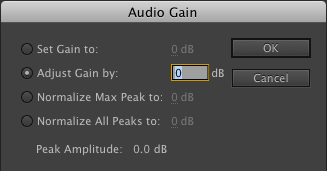
There are 4 settings in this window.
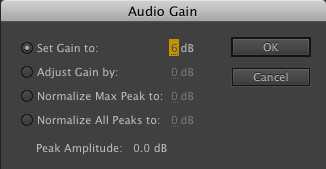
“Set Gain to:”
This will set the clip’s gain to a specified value. For example, if you specify “set gain to: 6dB,” the clip’s gain will be set at 6dB.
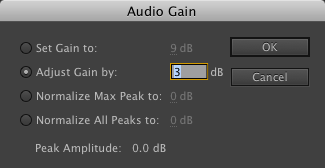
“Adjust Gain by:”
In Premiere Pro this will adjust the gain by the amount specified. For example, if the clip’s gain is already set to 6dB, and you specify “adjust gain by: +3dB,” then the clip’s gain will be set to 9dB.
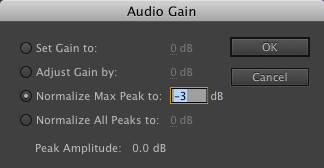
“Normalize Max Peak to:”
Normalize Max Peak will analyze the clip’s peak amplitude and adjust it to the specified value. Make sure you keep this value negative to keep your audio from peaking. For example, if you set “normalize max peak to: -3dB,” a clip with a peak amplitude of -9dB will be adjusted up by +6dB to equal -3dB.
If you have multiple clips selected, the clip with the maximum peak will be adjusted to the specified value, while the other clips will be adjusted by the same amount, preserving their relative gain differences. For example, with two clips selected, set “normalize max peak to: -3dB.” Assume clip one has a peak of -9dB, and clip two has a peak of -6dB. Since clip two has the greater peak value, it will be adjusted by +3dB, boosting is to -3dB, while clip one also will be adjusted by +3dB, boosting it to -6dB, and preserving the gain offset between the two clips in the selection.
“Normalize All Peaks to:”
This is similar to the previous setting, except that each clip’s peak amplitude is adjusted separately. For example, with multiple clips selected, set “normalize all peaks to: -3dB.” Assume clip one has a peak of -9dB, and clip two has a peak of -6dB. Clip one will be adjusted by +6dB, boosting it to -3dB, and clip two will be adjusted by +3dB, boosting it to -3dB.
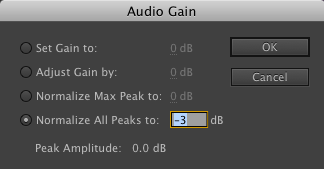
When I normalize audio peaks in Premiere Pro, I usually normalize them to -3dB. This allows for some headroom.
If you select your clip in the project window, the entire clip is affected. If you select the clip in the timeline, that instance of the clip is affected by the gain adjustments.
NOTE: Adjusting the gain in this window does not affect the value of the volume level in the “effect controls” window and will not adjust your audio keyframes.
Normalize the Master Track
You can also normalize the master track volume of a sequence in Premiere Pro. This will take the loudest peak of the entire sequence and adjust the fader to set it to the specified value.
Select the sequence you want normalized. Go to “Sequence>Normalize Master Track.” In the popup window, specify a value to be normalized to. Click OK.
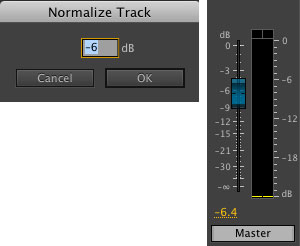
You’ll notice your Master Track fader has been adjusted. This will adjust any keyframes that are on the master track.
Learning how to use the gain feature is essential to mastering the audio tools in Premiere Pro.
Got more Premiere Pro audio tips?
Let us know in the comments below.