

Track-Based Tricks for Dialogue in Premiere Pro

Track-based effects in Premiere Pro are incredibly powerful and can make taking care of some audio issues super easy!
![]()
Track-based mixing and effects have become my go-to way of dealing with audio in Premiere Pro. After encountering audio sources that have varied widely in level, quality, characteristics, etc., I’ve compiled a few quick, easy tools for simple dialogue sweetening and fixing in Premiere using track effects.
You’ll get way more control and power out of a program like Audition, or even some of the more advanced plugins and settings in Premiere’s track effects, but these are easy ways to get something good quickly.
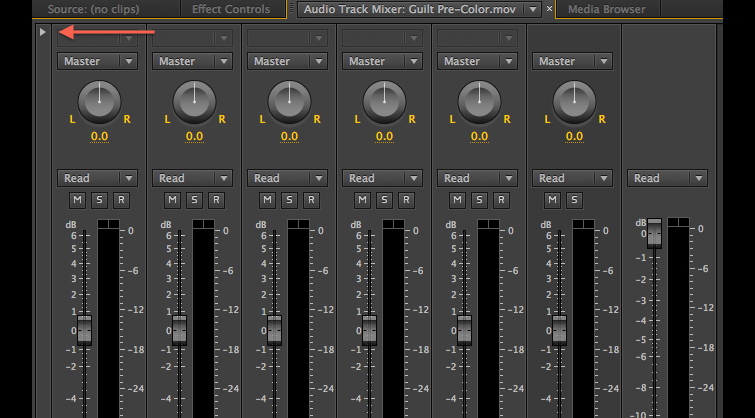
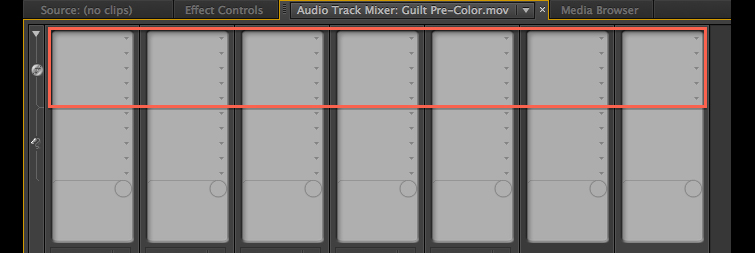
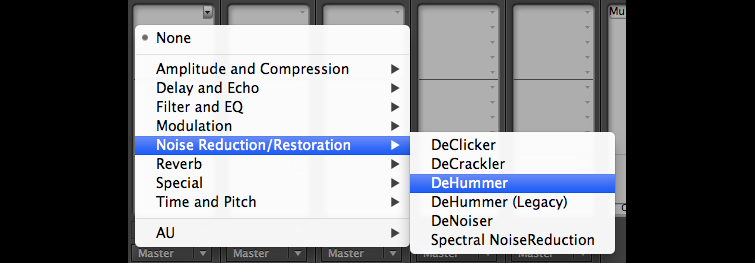
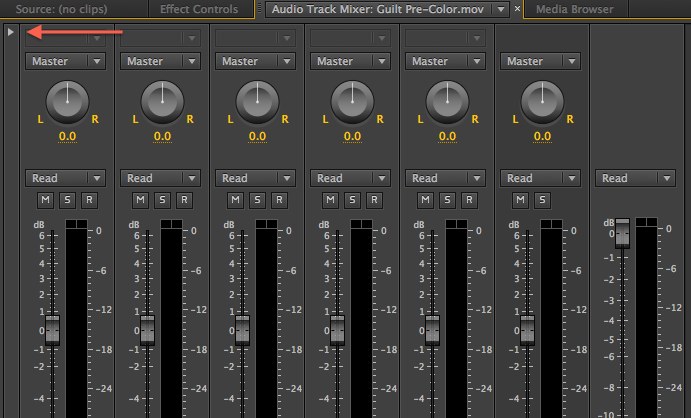
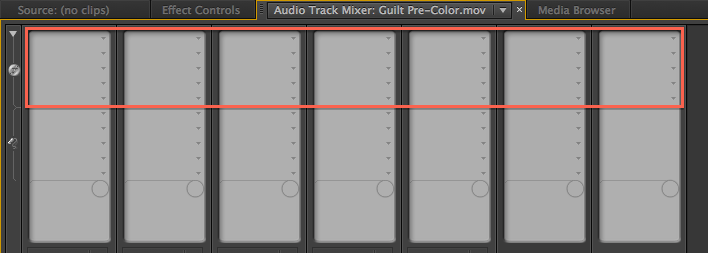
First, let’s take a look at how you get to your track effects (if you don’t already know). In the track mixer, click the disclosure triangle in the top-left corner. The top half of what appears are “slots” where you can add effects. Just click on the triangle on the right of each slot and you get a drop down of effects you can add. Once you’ve added an effect, you can open up its settings and UI (if it has one) by double-clicking it’s name.
Master Multiband Compressor in Premiere Pro
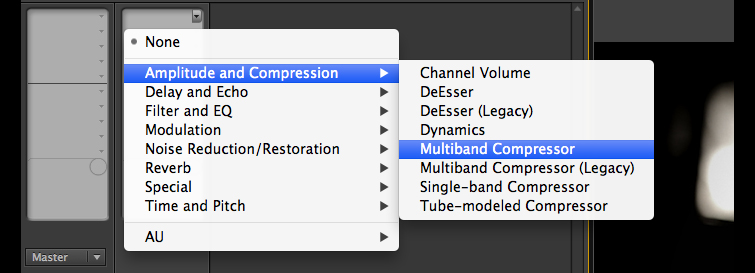
In Premiere Pro CS6, I previously used the Dynamics effect to level out minor audio levels, but the new Multiband Compressor in Premiere CC is way better and way easier. I generally add this effect to the Master Channel as an easy way to compress everything to the rough neighborhood I want my audio in – averaging (not peaking) at around –12 dB.
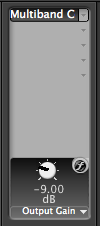
The default preset – Broadcast – does a pretty good job with one minor adjustment that you don’t have to even open the effect UI to get to: Drop the “Output Gain” to –9bB. That seems to keep things right around the range I want, as long as the incoming signal isn’t too loud or too quiet.
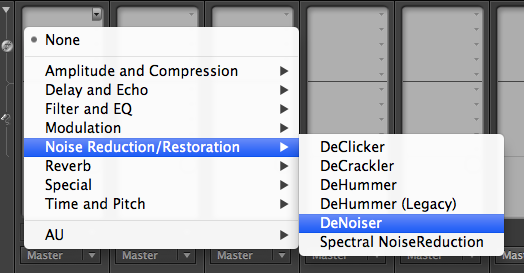
Premiere Pro DeNoiser

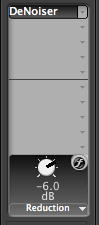
Premiere actually has a decent track-based DeNoiser built-in. For audio that was recorded too low and boosted, some air conditioner or appliance noise, etc., the DeNoiser effect can work some pretty good magic. All you have to do is apply the effect to the track and set how much to reduce the noise.
Premiere Pro analyzes the track to automatically detect the noise it needs to remove. However, because it is a real-time effect, it analyzes from the beginning of the track. This means that it works best when you have some room tone or a silent sample of the noise at the beginning of the track.
You can even have the volume of that part of the track all the way down (using the track keyframes, not the clip keyframes) and it will still pick up the noise you want removed. While it can automatically adjust to different noise samples, it takes it a second or so to adjust to the new noise, so it’s best to put audio with different noise types on different tracks.
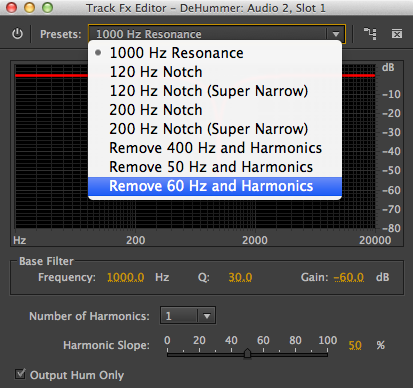
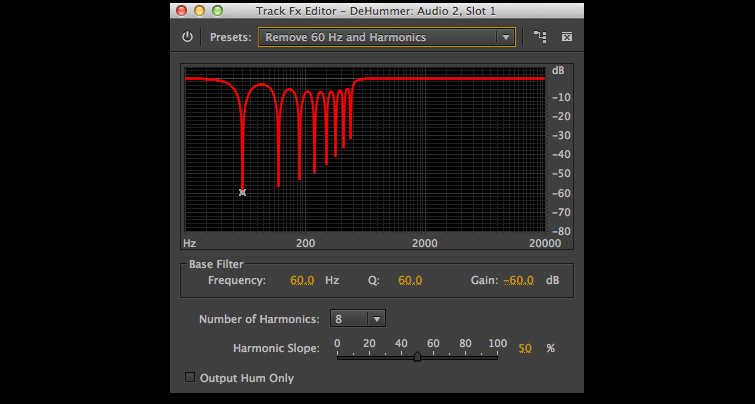
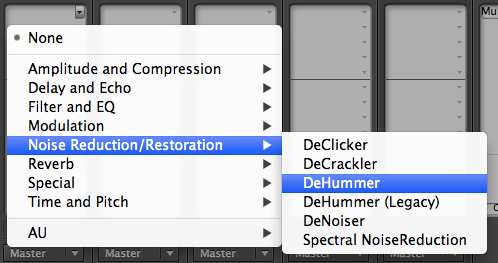
Premiere Pro DeHummer
One specific type of noise I run into every now and then is 50/60 Hz hum, which is caused by electrical interference of some sort. The DeHummer filter in Premiere has a preset just for these kinds of hums…and it works great. Just select the appropriate hum and choose how many “harmonics” you need to get the job done with the least amount of effect on your source audio.
Track-based mixing and effects have become such a part of my Premiere Pro workflow that I pretty much never touch clip-based mixing or effects if I can help it. In my experience, I’ve also found them to be much more stable in Premiere. I hope you have the same kind of success with track-based effects that I have. If any of you audio pros have tips or suggestions, please leave them in the comments!


