Essential Premiere Pro Time-Remapping Keyboard Shortcuts

Speed up your footage and workflow with these powerful and simple Premiere Pro time-remapping keyboard shortcuts.
To further build on things I learned at Adobe Video World 2016, these keyboard shortcuts weren’t even the focus of Luisa Winters’ presentation on advanced keyframing in Premiere Pro. That said, nearly the whole class asked her to stop her presentation to tell us how she quickly used time remapping on a clip in her presentation.
I felt like such a knucklehead for not knowing these Premiere Pro shortcuts in the first place, and hopefully you will find them just as helpful as I did.
Step 1. Show Clip Keyframes > Time Remapping > Speed

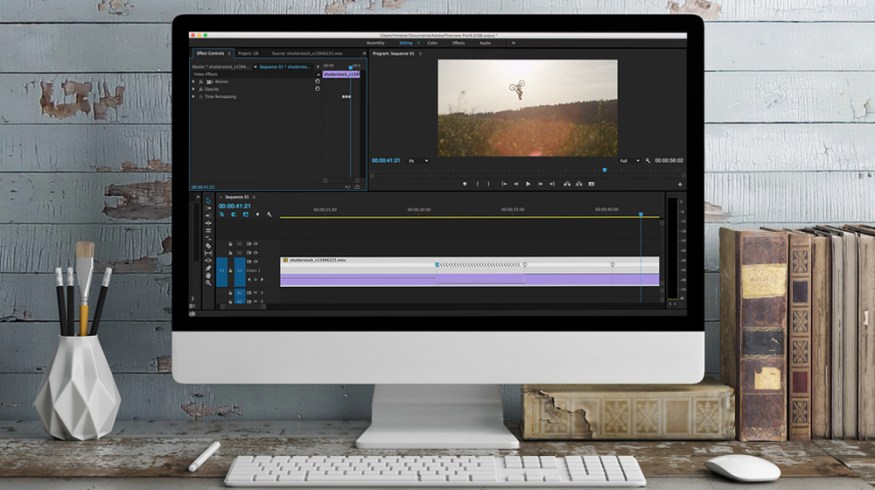
To use these keyboard shortcuts effectively, you will need to be able to see the keyframes. First, adjust the size of the V1 layer (or whichever layer you are working on).
Right-click on your clip, scroll down to Show Clip Keyframes. Go to Time Remapping and select Speed. The line you now see across the clip represents the clip’s speed. From here, you’ll be able to do a variety of adjustments like speed ramping, slow motion, reversing footage, or even making stills.
Step 2. Create a Keyframe

Find the point in the clip that you want to speed up or slow down. Drag the playhead to that position.
- Mac: Command + Click on the clip
- PC: Ctrl + Click on the clip
The keyframe you create will have an In point and Out point.
Step 3: Adjust Speed

Once you create a keyframe, you can move the In point and Out point with the mouse. Between the points, an adjustable Bezier curve will appear. These points and curve will represent the length of the ramp — essentially how long it will take to go from one speed to the other.
Drag the line before the In point or after the Out point to adjust the speed of the clip. Drag up for faster, down for slower.
Keyboard Shortcut: Freeze Frame

You can add a simple freeze frame to your clip with this Premiere Pro keyboard shortcut. With the keyframe in place, you will adjust the In point or Out point to create a still image within the clip.
- Mac: Command + Option + Drag the In point or Out point
- PC: Ctrl + Alt + Drag the In point or Out point
Keyboard Shortcut: Reverse the Clip

You can add an instant rewind to your footage with this simple-to-use keyboard shortcut. You will only be able to use this shortcut by adjusting the Out point.
- Mac: Command + Drag the outpoint
- PC: Ctrl + Drag the outpoint
Hope these quick Premiere Pro keyboard shortcuts help you save some time down the line. Keep up with the PremiumBeat.com blog to learn more video editing tips and tricks.