
Use your iPad as a Control Surface in Adobe Audition

Instead of a mouse, use your iPad to control your faders and other controls in Adobe Audition (mute, solo, automation). Using a control surface frees you from the keyboard!

The iPad is quickly turning into a powerful tool for filmmaking, with new apps appearing each month. To see some of the latest apps and post productoin tools check out HandheldHollywood.com, a site focused on iPad/iPhone filmmaking apps and gear.
I spend a bit of time in Adobe Audition working with audio, and using a mouse feels cumbersome at times. I personally prefer the tactual touch of a fader or virtual fader over using a mouse, and this is where control surfaces come in. Control surfaces are devices that control the faders and other controls (mute, solo, automation) in Audition or other Digital Audio Workstations (DAW).
Control Surfaces aren’t currently supported in Premiere Pro, but they are in Adobe Audition, FCP 7, and Logic Pro.
You can easily spend $200 on a dedicated control surface, but there is a cost effective alternative: use your iPad. AC-7 Core ($7.99) is a control surface that runs on your iPad. I previously mentioned this useful application in my 10 filmmaking apps under $10 article.
As an editor who also does audio (and wears multiple hats), I find the AC-7 good for basic post-production audio work. It enables a quicker workflow and in many ways is easier to use than a mouse.
The other big plus of using a control surface is that it frees you from your computer. You can perform basic functions like recording a voiceover from across the room!
Getting Up and Running
To start using AC-7 Core in your post production workflow you’ll need to set it up. The installation and configuration are surprisingly easy (takes 5-10 minutes) First, download the app from iTunes.
It works on both Mac & Windows iPads running (iOS 4.2 and later) in a variety of apps, including FCP 7. There are written directions and a video tutorial for both Mac & Windows installation.
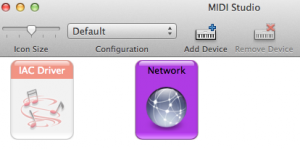
It might be necessary to manually reconnect your iPad if it was turned off after a session. Go to Utilities > Audio Midi Setup. Then double click on Network, then select the iPad and click Connect. If you will be using this workflow a lot it’s a good idea to put “Audio Midi Setup” on your dock (for Mac users).

Surprisingly the AC-7 Core dosen’t have latency issues (delay) when you move a fader and works with no hiccups wirelessly over a Wi-Fi connection.
If you prefer using an iPhone or iTouch there is also a AC-7 mini.
Basic Operation in Audition
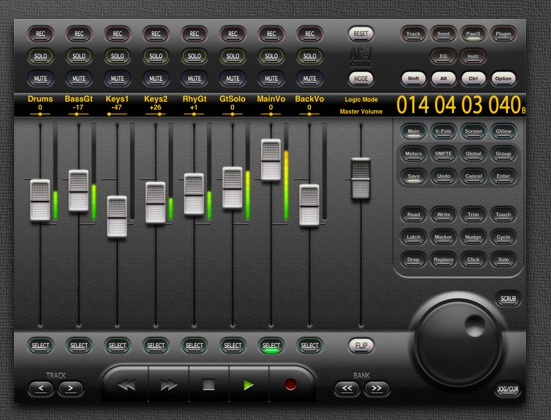
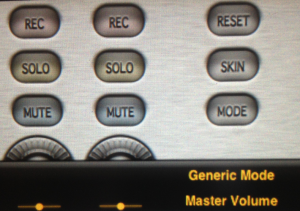
You have a choice of Modes, to emulate the settings in various DAWs. The Generic Mode works with Audition and generally any device that uses Mackie Protocol.
You can pick a skin, which gives you a light or dark interface. The faders are responsive and clicking the meters button lets you see the audio volume for each track.
You can select tracks, mute and solo them. You have transport controls to play, record, jog and shuttle. One of the most useful features for me is the ability to record audio keyframes in Adobe Audition, which we’ll dig into a little deeper now.
Audio Automation in Audition (Recording Keyframes)
Often when you have music in your video edit you want to dip it down when someone is speaking, and then bring it back up when they stop. This is called “riding the levels” or adjusting gain. Instead of doing this manually you can record keyframes when you move the fader using Automation.
The most common workflow for editors is to send your finished edit from Premiere Pro to Audition. If you need a refresher on getting from Premiere Pro to Audition I previously wrote about editing clips & sequences in Audition.
In Audition you need to be in a multitrack session to use automation.
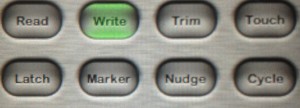
By Default each track is in Read Mode. To record keyframes change this to Write. You can do this in Audition or click the Write button on the AC-7. Click the Play button and drag the fader to record key frames, and press the Stop button when done.
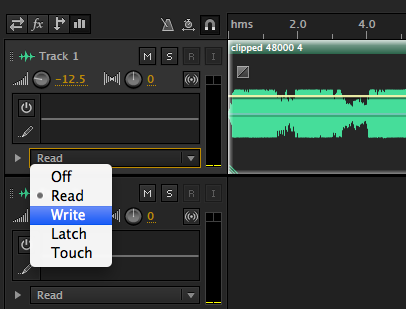
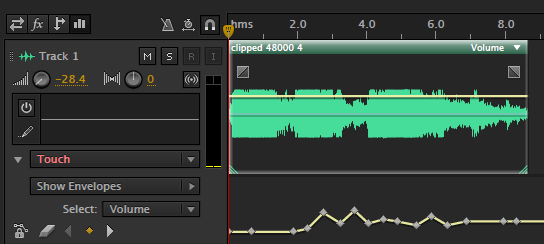
To see the keyframes you recorded, click the twirly beside the mode. After you stopped recording, the mode changed to Touch. In this mode key frames aren’t recorded till you move the fader, and when you let go, it returns to the previously recorded keyframes. Latch mode will stay where the fader was when you let go. You can click the eraser icon to clear all your recorded keyframes.
For $7.99, I think the AC-7 Core is a no brainer if you have an iPad and spend a bit of time in Audition or other DAWs. It does well what it is designed to do – speeding up and streamlining your Adobe Audition audio workflow.


